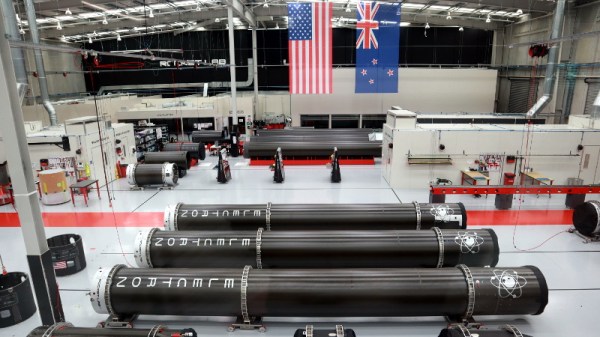
When Rocket Lab launched their first Electron booster in 2017, it was unlike anything that had ever flown before. The small commercially developed rocket was the first to use fully 3D printed main engines, and instead of pumping its propellants with traditional turbines, the vehicle used electric motors that jettisoned their depleted battery packs overboard during ascent to reduce weight. It even looked different than its peers, as rather than a metal fuselage, the Electron was built from a lightweight carbon composite which gave it a distinctive black color scheme.
Packing so many revolutionary technical advancements into a single vehicle was a risk, but Rocket Lab founder Peter Beck believed a technical shakeup was the only way to get ahead in an increasingly competitive market. While that first launch in 2017 didn’t make it to orbit, the next year, Rocket Lab could boast three successful flights. By the end of 2020, a total of fifteen Electron rockets had completed their missions, carrying payloads from both commercial customers and government agencies such as NASA, the United States Air Force, and DARPA.
Rocket Lab’s gambit paid off, and the company has greatly outpaced competitors such as Virgin Orbit, Astra, and Relativity. In fact Electron is now the second most active orbital booster in the United States, behind SpaceX’s Falcon 9. Considering their explosive growth, it’s only natural they’d want to maintain that momentum going forward. But even still, the recent announcement that the company will be developing a far larger rocket they call Neutron to fly by 2024 took many in the industry by surprise; especially since Peter Beck himself had previously said they would never build it.
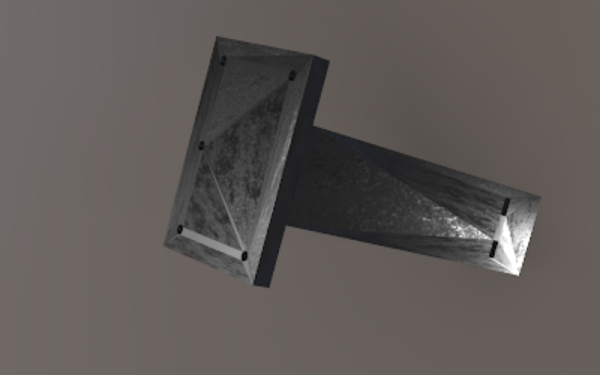
Of course, you’ll want to take your latest 3D design and print it so you’ll have a physical object. But in some cases, you’d like to have a rendering of it. If you use OpenSCAD, FreeCAD, or most other CAD programs you can get a simple rendering of your object, but what if you want something that looks real? [Teaching Tech] shows how you can use a website, Vectary, to get realistic photo renderings of your 3D models. (Video, embedded below.) The free plan has a few limits, but nothing that should bother most people.
Vectary is sort of like a super version of TinkerCad with a lot of options for realistic modeling and augmented reality. Some of the more advanced features are behind a subscription plan, but for what [Teaching Tech] is showing, you can use the free plan.
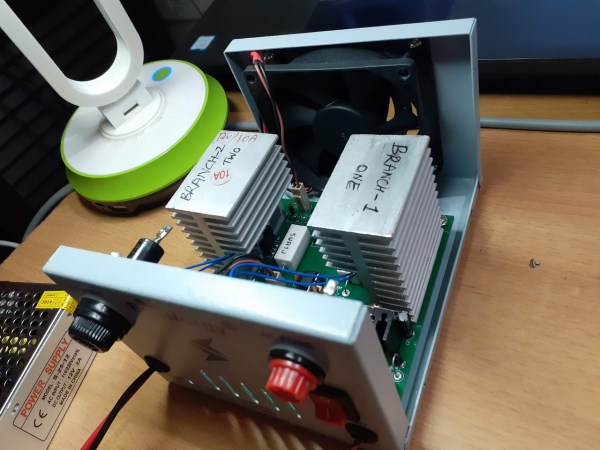
While it might seem counterintuitive on the surface, there are a number of cases where dumping a large amount of energy into a resistor simply to turn it into heat is necessary to the operation of a circuit. Most of these cases involve testing electronic equipment such as power supplies or radio transmitters and while a simple resistor bank can be used in some situations, this active dummy load is comprised of different internals has some extra features to boot.
The load bank built by [Debraj] is actually an electronic load, which opens it up for a wider set of use cases than a simple passive dummy load like a resistor bank. It’s specifically designed for DC and also includes voltage measurement, current control, and temperature measurement and speed control of the fans on the heat sinks. It also includes a Bluetooth module that allows it to communicate to a computer using python via a custom protocol and GUI.
While this one does use a case and some other parts from another product and was specifically built to use them, the PCB schematics and code are all available to build your own or expand on this design. It’s intended for DC applications, but there are other dummy loads available for things such radio antenna design, and it turns out that you can learn a lot from them too.
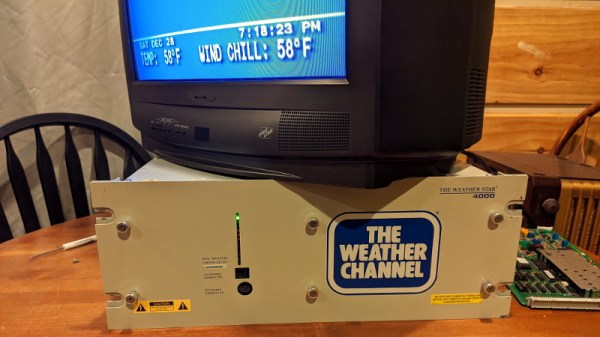
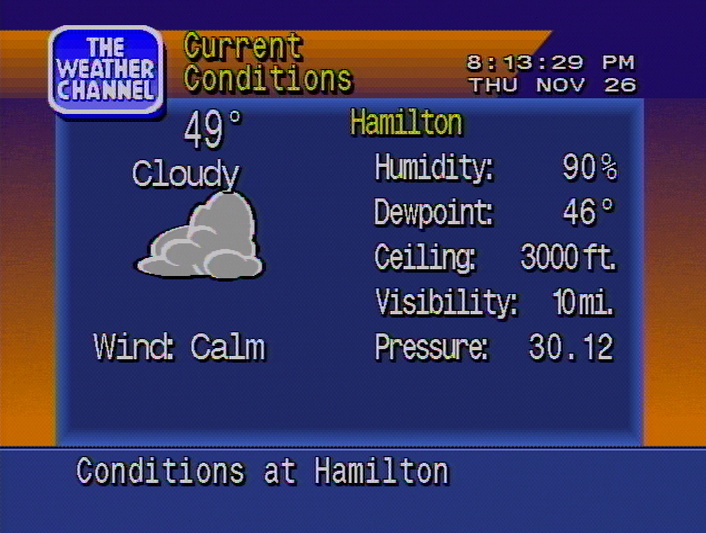
For American readers of a certain age, Local on the 8s likely holds a special spot in your heart. The program, once a staple of The Weather Channel, would provide viewers with a text and eventually graphical depiction of their local forecast set to some of the greatest smooth jazz ever heard outside of an elevator. In the days before smartphones, or even regular Internet access for that matter, these broadcasts were a critical part of planning your day in the 1980s through to the early 2000s.
Up until recently the technical details behind these iconic weather reports were largely unknown, but thanks to the Herculean efforts of [techknight], the fascinating engineering that went into the WeatherSTAR 4000 machines that pumped out current conditions and Shakin’ The Shack from CATV distribution centers all over the US for decades is now being documented and preserved. The process of reversing the hardware and software has actually been going on for the last couple of years, but all those juicy details are now finally going to be available on the project’s Hackaday.IO page.
It all started around Christmas of 2018, when an eBay alert [techknight] had configured for the WeatherSTAR 4000 finally fired off. His offer was accepted, and soon he had the physical manifestation of Local on the 8s in his own hands. He’d reasoned that getting the Motorola MC68010 machine working would be like poking around in a retrocomputer, but it didn’t take long for him to realize he’d gotten himself into a much larger project than he could ever have imagined.
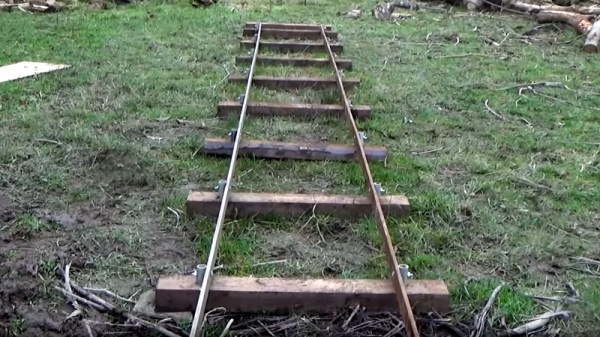
It’s likely that among our readers are more than a few who hold an affection for trains. Whether you call them railroads or railways they’re the original tech fascination, and it’s no accident that the word Hacker was coined at MIT’s Tech Model Railroad Club. So some of you like us watch locomotive YouTube videos, others maybe have an OO layout tucked away somewhere, and still more cast an eye at passing trains wishing they were aboard. Having a proper railway of one’s own remains a pipe-dream, but perhaps a hardcore rail enthusiast might like to take a look at [Way Out West Blow-in blog’s] video series on building a farm railway.
On a smallholding there is always a lot to be moved around, and frequently not the machinery with which to do it. Using a wheelbarrow or handcart on rough ground is as we can attest, back-breaking, so there’s a real gap in the market for anything to ease the task. So a railway becomes an attractive solution, assuming that its construction cost isn’t prohibitive.
The videos below the break are the first two of what will no doubt become a lengthy series, and deals with the construction of the rails themselves including the sleepers cut with a glorious home-made band saw, and then fishplates and a set of rudimentary points. The rails themselves are off-the-shelf flat steel strip laid upon its edge, and secured to the sleepers by short lengths of galvanized tube. It’s clear this isn’t a railroad in the sense that we might understand it, indeed though it uses edge rail it has more in common for its application with some early mining plateways But assuming that the flat strip rail doesn’t twist we can see that it should be perfectly adequate for hand-driven carts, removing the backbreaking aspect of their moving. It will be interesting to follow this project down the line.
Farm railways haven’t featured on Hackaday before, but your inner rail enthusiast might be sated by the world’s first preserved line.
It’ll be Pi Day when this article goes live, at least for approximately half the globe west of the prime meridian. We always enjoy Pi Day, not least for the excuse to enjoy pie and other disc-shaped foods. It’s also cool to ponder the mysteries of a transcendental number, which usually get a good treatment by the math YouTube community. This year was no disappointment in this regard, as we found two good pi-related videos, both by Matt Parker over at Standup Maths. The first one deals with raising pi to the pi to the pi to the pi and how that may or may not result in an integer that’s tens of trillions of digits long. The second and more entertaining video is a collaboration with Steve Mould which aims to estimate the value of pi by measuring the volume of a molecular monolayer of oleic acid floating on water. The process was really interesting and the results were surprisingly accurate; this might make a good exercise to do with kids to show them what pi is all about.
Remember basic physics and first being exposed to the formula for universal gravitation? We sure do, and we remember thinking that it should be possible to calculate the force between us and our classmates. It is, of course, but actually measuring the attractive force would be another thing entirely. But researchers have done just that, using objects substantially smaller than the average high school student: two 2-mm gold balls. The apparatus the Austrian researchers built used 90-milligram gold balls, one stationary and one on a suspended arm. The acceleration between the two moves the suspended ball, which pivots a mirror attached to the arm to deflect a laser beam. That they were able to tease a signal from the background noise of electrostatic, seismic, and hydrodynamic forces is quite a technical feat.
We noticed a lot of interest in the Antikythera mechanism this week, which was apparently caused by the announcement of the first-ever complete computational model of the ancient device’s inner workings. The team from University College London used all the available data gleaned from the 82 known fragments of the mechanism to produce a working model of the mechanism in software. This in turn was used to create some wonderful CGI animations of the mechanism at work — this video is well worth the half-hour it takes to watch. The UCL team says they’re now at work building a replica of the mechanism using modern techniques. One of the team says he has some doubts that ancient construction methods could have resulted in some of the finer pieces of the mechanism, like the concentric axles needed for some parts. We think our friend Clickspring might have something to say about that, as he seems to be doing pretty well building his replica using nothing but tools and methods that were available to the original maker. And by doing so, he managed to discern a previously unknown feature of the mechanism.
We got a tip recently that JOGL, or Just One Giant Lab, is offering microgrants for open-source science projects aimed at tackling the problems of COVID-19. The grants are for 4,000€ and require a minimal application and reporting process. The window for application is closing, though — March 21 is the deadline. If you’ve got an open-source COVID-19 project that could benefit from a cash infusion to bring to fruition, this might be your chance.
And finally, we stumbled across a video highlighting some of the darker aspects of amateur radio, particularly those who go through tremendous expense and effort just to be a pain in the ass. The story centers around the Mt. Diablo repeater, an amateur radio repeater located in California. Apparently someone took offense at the topics of conversation on the machine, and deployed what they called the “Annoy-o-Tron” to express their displeasure. The device consisted of a Baofeng transceiver, a cheap MP3 player loaded with obnoxious content, and a battery. Encased in epoxy resin and concrete inside a plastic ammo can, the jammer lugged the beast up a hill 20 miles (32 km) from the repeater, trained a simple Yagi antenna toward the site, and walked away. It lasted for three days and while the amateurs complained about the misuse of their repeater, they apparently didn’t do a thing about it. The jammer was retrieved six weeks after the fact and hasn’t been heard from since.
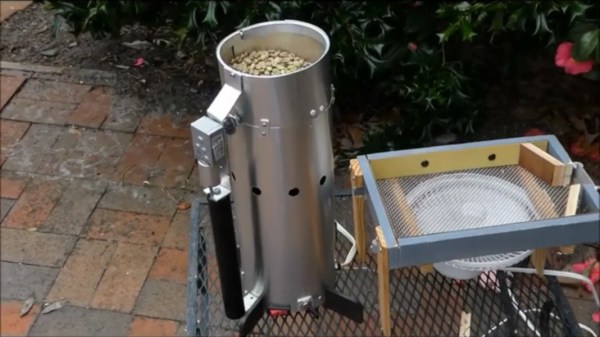
As with anything else, once your knowledge of coffee expands, the more attractive it becomes to control as much of the process as possible. Buying whole beans and grinding them at home is one thing, but you’re not a real coffee geek unless you’re buying big bags of green beans and roasting them yourself in small batches.
[Larry Cotton] has made an even more portable version of the wobble disk roaster we saw last summer. Beneath the housing made of aluminium flashing is the guts of a $15 Harbor Freight heat gun pointing upward at a metal strainer. A large metal disk mounted at a 45-degree angle to the spinning axis tosses and turns the beans as they get blasted with heat from below. [Larry] used a 12 VDC motor to run the wobble disk, and an an adapter to change the heat gun from 120 VAC to 12 VDC. This baby roasts 1½ cups of beans to city plus (medium) level in 12-15 minutes. Grab a cup of coffee and check it out after the break.