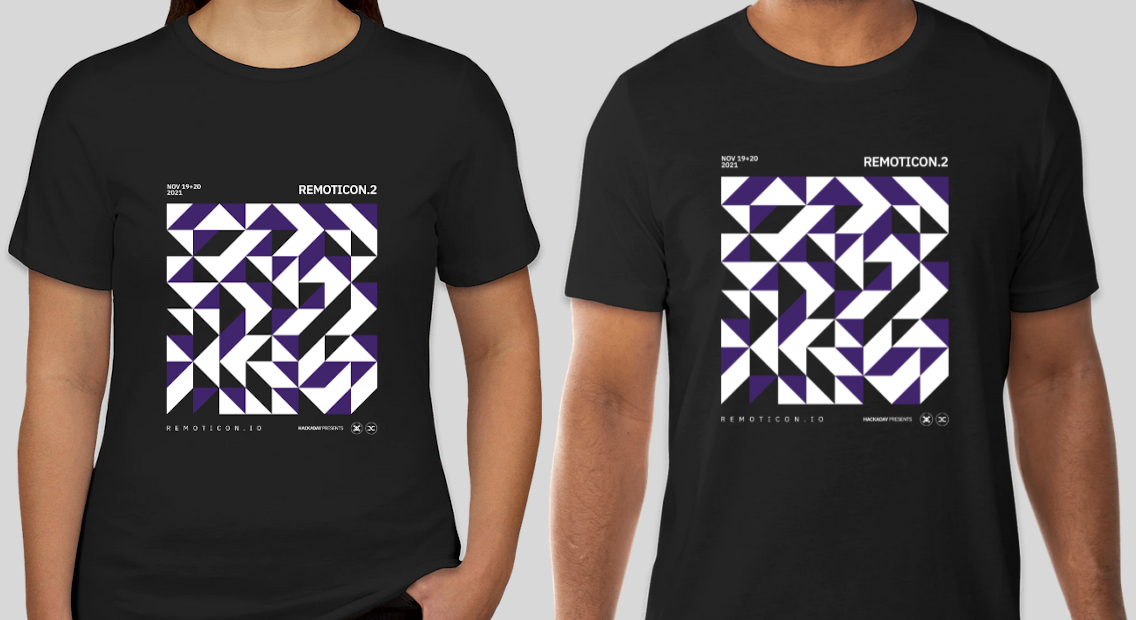
Restored Dreamcast Is A SEGA Fan’s Dream Come True

[Bren Sutton] has been a long time fan of SEGA’s Dreamcast, eagerly snapping one up right around its October 1999 European release. But after years of neglect and a somewhat questionable paint job a decade or so back, he decided it was time to spruce his old friend up. He could have just cleaned the machine and been done with it, but he took the opportunity to revamp the console’s internals with both practical and cosmetic trickery.

The first step was getting the system looking a bit fresher. Removing the silver metallic paint he applied in his youth with a rattle can wasn’t going so well, so he ended up buying a broken donor console on eBay so he’d have a new shell to work with. The donor was yellowed with age, but a coating of peroxide cream and a few hours under a cheap UV light got it whitened up nicely. Now that he had a fresh new case, [Bren] turned his attention to the internal components.

Those who might be plugged into the active Dreamcast homebrew scene may already know that several upgrade modules exist for SEGA’s last home game console. One of the most popular replaces the optical drive with an SD card filled with your favorite game ISOs. You can also get a modern high efficiency power supply, as well as a board that replaces the original soldered-on clock battery with a slot that fits a CR2032. [Bren] threw them all in, ensuring several more years of gaming bliss.

But he wasn’t done yet. He also wanted to add some visual flair to his new and improved console. After some consideration, he gingerly cut the logo out of the Dreamcast’s lid, and installed an Adafruit CLUE board underneath it. With a few carefully crafted GIFs installed onto the CircuitPython-powered board, the console now has a gorgeous fully animated logo that you can see in the video after the break.

[Bren] could have really taken his console to the next level by doubling its available RAM to an eye-watering 32 MB, but considering the limited software support for that particularly bodacious modification, we’ll let it slide. Continue reading “Restored Dreamcast Is A SEGA Fan’s Dream Come True”

A Hair-Raising Twist On Infinity Mirrors

Just when we thought we’d seen it all in the infinity mirror department, [FieldCrafting] blazed a tiny, shiny new trail with their electroplated infinity mirror hair pin. We’d sure like to stick this in our French twist. Fortunately, [FieldCrafting] provided step-by-step instructions for everything from the 3D printing to the copper electroplating to the mirror film and circuitry application.

And what tiny circuitry it is! This pin is powered by a coin cell and even has a micro slider switch to conserve it. The stick parts are a pair of knitting needles, which is a great idea — they’re pointy enough to get through hair, but not so pointy that they hurt.

[FieldCrafting] was planning to solder 1206 LEDs to copper tape and line the cavity with it, but somehow the CAD file ended up with 0603, so there wasn’t enough space for two tape traces. We think it’s probably for the better — [FieldCrafting]’s solution was to use two-conductor wire, strategically stripped, which seems a lot less fiddly than trying to keep two bare tape traces separated and passing pixies.

Don’t have enough hair for one of these? Surely you could use some handsome infinity coasters to round out that home bar setup.

1938 Radio Has Awesome Dial

[Mr. Carlson] is truly an old radio surgeon. The evidence? He recently restored an 83-year-old DeForest radio by transplanting an identical chassis from another similar radio. The restoration is fun to watch, but the 7D832 radio dial looks amazing. The dial is very colorful and the wooden knobs and preset selector are beautiful. To seal the deal, the center of the dial has a magic eye tube, giving the radio a retro high tech look.

The donor chassis needed some work before the surgery. In addition, [Carlson] makes some improvements along the way. The radio showed signs of previous service work, which is not surprising after 83 years.

Continue reading “1938 Radio Has Awesome Dial”

Tonewheels Warble In This Organ-Inspired Musical Instrument

Younger readers may not recall the days when every mall had a music store — not the kind where tapes and LPs were sold, but the kind where you could buy instruments. These places inevitably had an employee belting out mall-music to all and sundry on an electric organ. And more often than not, the organist was playing a Hammond organ, with the distinct sound of these instruments generated by something similar to this tonewheel organ robot.

Tonewheels are toothed ferromagnetic wheels that are rotated near a pickup coil. This induces a current that can be amplified; alter the tooth profile or change the speed of rotation, and you’ve got control over the sounds produced. While a Hammond organ uses this technique to produce a wide range of sounds, [The Mixed Signal]’s effort is considerably more modest but nonetheless interesting. A stepper motor and a 1:8 ratio 3D-printed gearbox power a pair of shafts which each carry three different tonewheels. The tonewheels themselves are laser-cut from mild steel and range from what look like spur gears to wheels with but a few large lobes. This is a step up from the previous version of this instrument, which used tonewheels 3D-printed from magnetic filament.

Each tonewheel has its own pickup, wound using a coil winder that [TheMixed Signal] previously built. Each coil has a soft iron core, allowing for the addition of one or more neodymium bias magnets, which dramatically alters the tone. The video below shows the build and a demo; skip ahead to 16:10 or so if you just want to hear the instrument play. It’s — interesting. But it’s clearly a work in progress, and we’re eager to see where it goes. Continue reading “Tonewheels Warble In This Organ-Inspired Musical Instrument”

3D Printed Turbocharger Boosts Pulsejet Performance

Pulsejets are a popular DIY build for the keen experimenter, much loved for their mechanical simplicity and powerful roar. However, it can be difficult to get them running smoothly and producing high amounts of thrust. In an ongoing quest to do just that, [Integza] has been iterating hard on his designs, recently adding an electric turbocharger to add some boost.

Like any combustion engine, adding more air means that more fuel can be burned for more power. The electric turbocharger is a perfect way to do this, using a powerful brushless motor to turn a radial compressor wheel to force high-pressure air into the pulse jet’s combustion chamber. [Integza] used a resin printer to produce the turbocharger compressor wheel and housing, which made producing the complex geometry a cinch.

Initial results were positive, with the pulsejet maintaining better combustion with the turbocharger activated. It does come with the drawback of requiring battery power to run, but it may be worth the tradeoff for added thrust. However, the fragile setup requires more refinement before a thrust test can be carried out. Up until now, [Integza] has made do with a set of bathroom scales; we imagine a spring force gauge or strain gauge might be in order. If you’re keen to build your own pulsejet without welding, consider the carbon fiber method used in this project. Video after the break.

Continue reading “3D Printed Turbocharger Boosts Pulsejet Performance”

Simple Slide Whistle Gets A MIDI Makeover

On today’s episode of “Will it MIDI?” we have the common slide whistle. Spoiler alert: yes, it will, and the results are just on the edge of charming and — well, a little weird.

As maker [mitxela] points out, for all its simplicity, the slide whistle is a difficult instrument to play. Or, at least a difficult one to hit a note repeatably. It’s a bit like a tiny plastic trombone, in that both lack keys or stops that limit the vibrating column of air to a specific length. Actually, the beginning of the video below shows a clever fix for that problem on the slide whistle using magnets, but that’s mainly a side project.

[mitxela]’s MIDI-fication of the slide whistle required a bit more than a few magnets. To move the slide to defined positions, a pair of high-precision servos was connected by a laser-cut plywood scissors linkage. The lung-power of the musician is replaced by a small electric blower, mounted away from the whistle and supplying air through a long hose. The fan’s speed, and therefore the speed of the airflow, can be varied; this prevents low notes from shifting up in register from over-blowing, if that’s the right term. Another servo controls a damper that shuts off the flow of air from the mouth of the whistle to control notes without having to turn off the fan completely. The main article goes into detail about the control electronics and the calibration process.

The video has a few YouTube copyright strikes demo songs, and we have to say we’re impressed with the responsiveness of the mechanism. Some will object to the excess servo noise, but we found it nice — almost like guitar string-squeak. We like the tunes where [mitxela]’s servo-plucked music box joined in, too.

The $50 Ham: Digital Modes With WSJT-X

As it is generally practiced, ham radio is a little like going to the grocery store and striking up a conversation with everyone you bump into as you ply the aisles. Except that the grocery store is the size of the planet, and everyone brings their own shopping cart, some of which are highly modified and really expensive. And pretty much every conversation is about said carts, or about the grocery store itself.

With that admittedly iffy analogy in mind, if you’re not the kind of person who would normally strike up a conversation with someone while shopping, you might think that you’d be a poor fit for amateur radio. But just because that’s the way that most people exercise their ham radio privileges doesn’t mean it’s the only way. Exploring a few of the more popular ways to leverage the high-frequency (HF) bands and see what can be done on a limited budget, in terms of both cost of equipment as well as the amount of power used, is the focus of this installment of The $50 Ham. Welcome to the world of microphone-optional ham radio: weak-signal digital modes.

Continue reading “The $50 Ham: Digital Modes With WSJT-X”