Hacking A Cheap Action Cam Into A Dashcam With A Microcontroller

Repurposing commodity electronics is one of the true forms of hacking, and it’s always the simple little hacks that lead to big ones. [Everett] wanted to use a $20 GoPro clone as a dash cam, so he wired a microcontroller into it to automate some actions and make it practical.

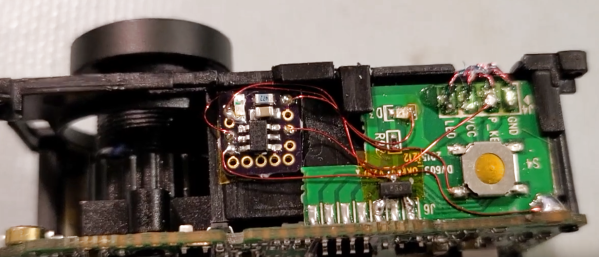
The camera turns on automatically when connected to external power like a car charger, but starting and stopping a recording and power down all had to be done manually. [Everett] wanted to automate these functions, so he opened up the camera and started probing with an oscilloscope. He found the power button, record button, 3.3 V and external 5 V traces conveniently next to each other in the top of the camera.

To automate the required functions, he wired in a PIC10 on a small breakout board, powered by the 3.3 V line. It detects if 5 V is connected to the charging port on start-up via an N-channel FET, then automatically starts a recording. When the 5 V power is switched off with the car, it waits 10 seconds before stopping the recording and switching off the camera. If no external 5 V is not detected on start-up the microcontroller does nothing, which allows the camera to be used as a normal handheld. [Everett] mounted the camera to his rearview mirror with a magnetic bracket made using a combination of a 3D printer and 3D pen.

This is a simple and practical little hack, and the firmware is available on Github. Cheap dashcams are available for similar prices, but you won’t get any hacking satisfaction that way.

The very nature of actions cameras inspire hacking. You can simply add an external battery with the help of a 3D printer, or go all out and build a gimballed helmet cam from scratch

Adding WiFi To The Acorn Electron

In the continuing quest by countless hobbyists to allow every 1980s 8-bit home computer to experience the joys of an online experience that doesn’t involve a 9600 baud modem, [Roland Leurs] has created a cartridge-based module for the Acorn Electron that adds WiFi, which he showed off at the virtual ABug conference in September 2020.

The Acorn Electron is a Synertek 6502-based computer that was released in the UK in August of 1983. It’s a budget version of the well-known BBC Micro educational/home computer, with 32 kB of RAM and featuring BBC BASIC v2 in its ROM. [Roland]’s ElkWiFi card slots into an available cartridge slot, after which the onboard ESP8266 (ESP-1 module) can be enabled and used as a WiFi modem.

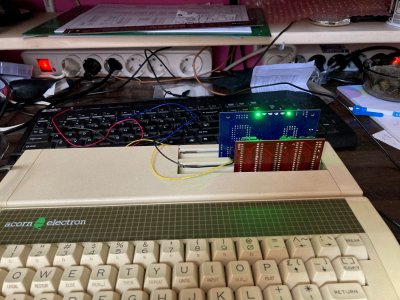
Acorn Electron with Plus 1 expansion, ElkWiFi and additional expansion card inserted.

The board features the Exar ST16C2552CJ dual UART chip, one channel of which connects to the ESP-1 module, with the other channel used as an uncommitted UART header. The control logic is implemented in VHDL and flashed to the onboard Xilinx CPLD, and a 128 kB RAM module is used as WiFi data buffer.

Although a definite niche product, reading through the forum thread makes one really appreciate the technical complexity and joy once things are beginning to work reliably. It also shows one of the few cases where an ESP-1 module is used for its original purpose: as an easy way to add WiFi functionality with full WiFi and TCP stack, without burdening the main CPU.

(Thanks, BaldPower)

DIY Grout Cleaning Machine Does A Good Job

Cleaning tiled floors can be a drag. Getting the tiles themselves clean is bad enough, but often dealing with the grouted joints in between requires more elbow grease and attention to detail. It’s a tedious chore, and thus one ripe for improvement. [Elite Worm]’s cleaning machine is an excellent solution to the problem.

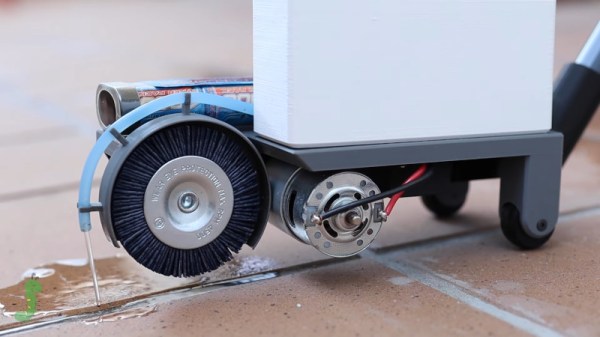
The machine is built entirely from scratch, using primarily 3D printed components. A fluid tank is fitted to the chassis, along with a custom 3D-printed pump run by a DC motor, to deliver cleaning product where its needed. A large DC motor is then used to spin a nylon brush which gets deep in the tile grooves to clean out the grime. The chassis is then fitted with rollers to allow it to glide along the floor. Finally, a handle is fitted which allows the user to push the tool along, with switches to turn on the spinning brush and dispense cleaning fluid.

It’s a great tool, and one which eliminates hours of scrubbing on hands and knees. We’re sure the time investment in the build will pay off before long. We’ve seen other tricky cleaning hacks before, too. Video after the break.

Continue reading “DIY Grout Cleaning Machine Does A Good Job”

Robotic Worm Uses NinjaFlex Filament

If you think about building a moving machine, you probably will consider wheels or tracks or maybe even a prop to take you airborne. When [nwlauer] found an earthworm in the garden, it inspired a 3D-printed robot that employs peristaltic motion. You can see a video of it moving, below.

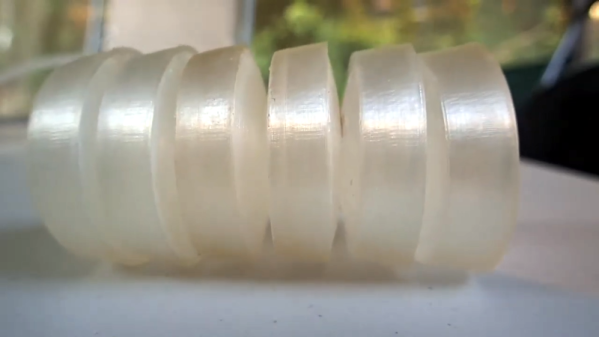
The robot uses pneumatics and soft plastic, and is apparently waterproof. Your printer’s feed path has to be pretty rigid to support flexible filament without jamming. There’s also some PVA filament and silicone tubing involved.

Continue reading “Robotic Worm Uses NinjaFlex Filament”

Plaster Annealing 3D Prints For Strength

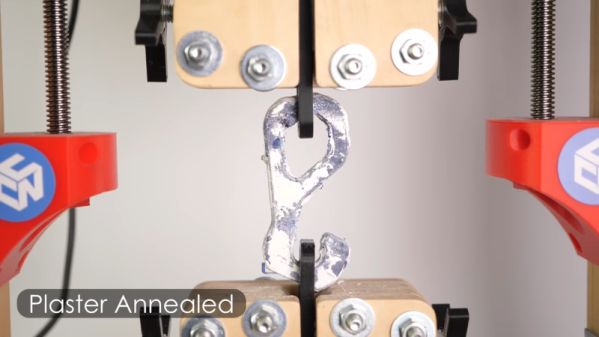
[Stefan] is always trying to make stronger 3D prints. Annealing can strengthen prints, but often at the expense of the part’s exact dimensions. His latest approach is to embed the prints in plaster and then anneal in an attempt to fuse the plastic together without changing its shape or size. Did it work? See for yourself in the video below.

He’s done a lot of work we’ve taken note of before where he measures the strength of parts after different post-processing steps. His test plastic parts used both PLA and PETG.

Continue reading “Plaster Annealing 3D Prints For Strength”

3D-Printed Adapter Keeps Your Guitar In Tune And In Style

If you like building or upgrading guitars, you may have already learned the valuable lesson that the devil absolutely is in the detail when it comes to to replacement parts. Maybe you became aware that there are two types of Telecaster bridges right after you drilled the holes through the body and noticed things just didn’t quite fit. Or maybe you liked the looks of those vintage locking tuners and the vibe you associate with them, only to realize later that the “vintage” part also refers to the headstock, and the holes in your modern one are too big.

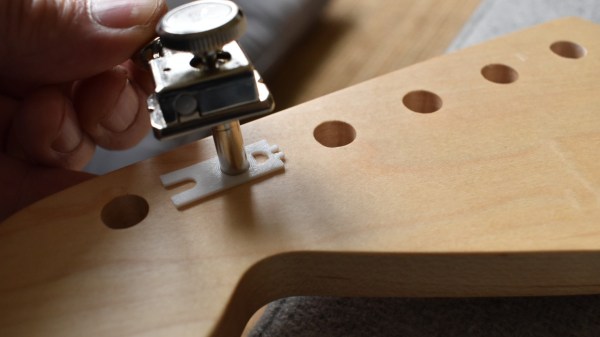
The latter case recently happened to [Michael Könings], so he did what everyone with a 3D printer would: make an adapter. Sure, you can also buy them, but where’s the fun in that? Plus, the solution is as simple as it sounds. [Michael] modelled an adaptor to bridge the gap between the headstock holes and the tuner shaft, but unlike the commercial counterpart that are mounted only on one side, his fills up the entire hole and fits the entire construct tightly together. For even more overall stability, he added an interlocking mechanism on the back side that keeps all the adaptors in line, and also allows for some possible distance differences.

[Michael] initially considered using wood filament for cosmetic reasons, but due to lack of the material went with simple white PLA instead. In the end, it doesn’t matter too much, as most of it hides under the new tuners’ metal covers anyway — and the small parts that are visible will serve as a great reminder of this lesson in guitar variety. Speaking of 3D printing and guitar variety, now that we reached the headstock, and have seen bodies for a while already (including bass), only 3D-printed guitar necks are missing. Well, we’ve had them on violins though, even with 6 strings, but they also don’t have to deal with frets and have a bit less tension going on.

Textmeter Tells Its Tale

One time-proven method to make a lesson memorable is to make it a story, but that is not easy if your core material is the repair log of a rotted out analog ammeter. Most folks don’t need a 300A meter on their drill press, so [Build Comics] converted it to a text display and describes the procedure like they are writing a comic book. He is using HDLO-3416 LED cluster arrays for that dated-but-legible industrial feel, and everything looks right at home in a box made from oak and steel. Even the USB cord even gets a facelift by running it inside a fabric shoelace. In our own lives, covering charging cables is a hack on its own because we don’t want to fumble with the wrong charger when it is time to sleep or drive. Glow-in-the-dark cord upgrades, anyone?

We don’t have a pre-operation picture of the subject, but the innards suggest that it comes from the bottom of an industrial scrap pile. There is a cross-hatch pattern on the front plate, which hinted at 3D printing, but if you look closely at the early images, you can see that it is original. There is a nodeMCU board to fetch the date information and control the four alphanumeric displays. Except for the red lights, all the new hardware hides behind wood or steel, so this old workhorse’s aesthetic lives on and has a story to share that is a delight to read.

If you enjoy reading [Build Comics] and their adventurous recollections, we forecast you’ll enjoy this weather display, or maybe it is time to check out their clock, but we want to plant the seed of literary build logs.