Imagine that you’re serving on a jury, and you’re given an image taken from a surveillance camera. It looks pretty much like the suspect, but the image has been “enhanced” by an AI from the original. Do you convict? How does this weigh out on the scales of reasonable doubt? Should you demand to see the original?
AI-enhanced, upscaled, or otherwise modified images are tremendously realistic. But what they’re showing you isn’t reality. When we wrote about this last week, [Denis Shiryaev], one of the authors of one of the methods we highlighted, weighed in the comments to point out that these modifications aren’t “restorations” of the original. While they might add incredibly fine detail, for instance, they don’t recreate or restore reality. The neural net creates its own reality, out of millions and millions of faces that it’s learned.
 And for the purposes of identification, that’s exactly the problem: the facial features of millions of other people have been used to increase the resolution. Can you identify the person in the pixelized image? Can you identify that same person in the resulting up-sampling? If the question put before the jury was “is the defendant a former president of the USA?” you’d answer the question differently depending on which image you were presented. And you’d have a misleading level of confidence in your ability to judge the AI-retouched photo. Clearly, informed skepticism on the part of the jury is required.
Unfortunately, we’ve all seen countless examples of “zoom, enhance” in movies and TV shows being successfully used to nab the perps and nail their convictions. We haven’t seen nearly as much detailed analysis of how adversarial neural networks create faces out of a scant handful of pixels. This, combined with the almost magical resolution of the end product, would certainly sway a jury of normal folks. On the other hand, the popularity of intentionally misleading “deep fakes” might help educate the public to the dangers of believing what they see when AI is involved.
This is just one example, but keeping the public interested in and educated on the deep workings and limitations of the technology that’s running our world is more important than ever before, but some of the material is truly hard. How do we separate the science from the magic?
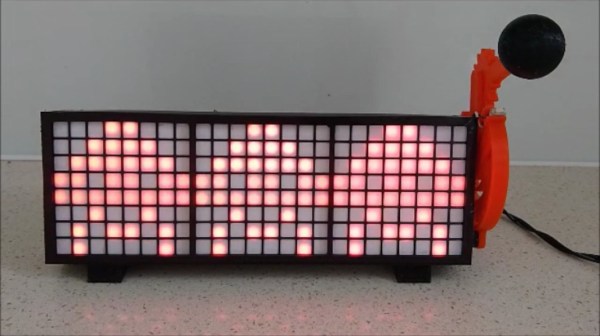
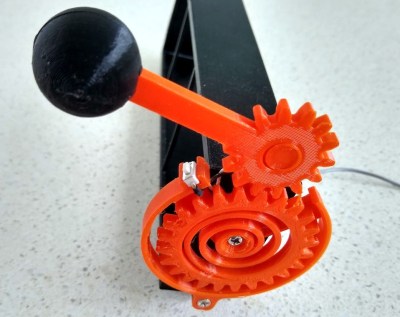 In this case, you’ll be losing all of your nickels to an Arduino Pro Mini. The handle is an upgrade to an earlier slot machine project that uses three 8×8 matrices and a custom driver board. When the spring-loaded handle is pulled, it strikes a micro switch to spins the reels and then snaps back into place. Between each pull, the current score is displayed across the matrix. There’s even a piezo buzzer for victory squawks. We only wish the button under the handle were of the clickier variety, just for the feels. Check out the short demo video after the break.