Hackaday editors Mike Szczys and Elliot Williams are deep in the hacks this week. What if making your own display matrix meant a microcontroller board for every pixel? That’s the gist of this incredible neon display. There’s a lot of dark art poured into the slivers of microSD cards and this week saw multiple hacks digging into the hidden test pads of these devices. You’ve heard of Folding@Home, but what about Minecraft@Home, the effort to find world seeds from screenshots. And when USB chargers have exposed and rewritable firmware, what could possibly go wrong?
Take a look at the links below if you want to follow along, and as always, tell us what you think about this episode in the comments!
Take a look at the links below if you want to follow along, and as always, tell us what you think about this episode in the comments!
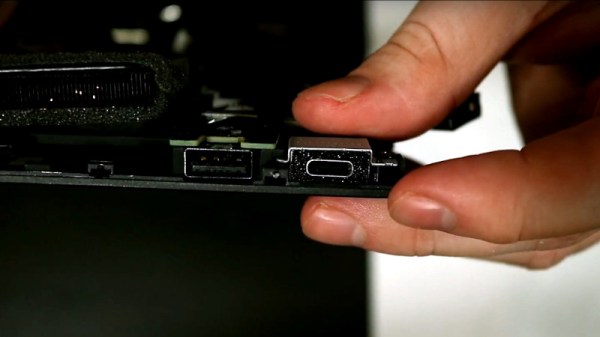
The USB-C revolution is well under way, as first your new phone, then your single-board computer, and now your laptop are likely so sport the familiar reversible round-cornered connector. We’re still in the crossover period of requiring to keep micro USB, proprietary laptop, and USB-C power supplies at hand, but the promise of a USB-C-only world is tantalisingly close. For [Purkkaviritys] that’s a little bit closer now, as he’s modified his Thinkpad T440s to take a USB charger instead of its proprietary Lenovo square-plug part. (Video, embedded below.)
At its heart is a USB-PD emulator module that does all the hard work of negotiation with the power supply, giving the laptop the DC voltage it needs. It’s not quite that simple though, because a resistor is required to reassure the laptop that it’s got a genuine power supply. The module is encased in a carefully-designed surround that neatly takes the space vacated by the original connector, and since this laptop has its internal power connector on a short cable it is made very straightforward to fit into the case. If you didn’t know it was a home-made upgrade, you could be forgiven for thinking that this laptop left the factory with a USB-C power socket.
Even top-tier security professionals make catastrophic mistakes, and this time it was the operators at Iran’s ITG18. We’re once again talking about the strange shadowy world of state sponsored hacking. This story comes from the IBM X-Force Incident Response Intelligence Services (IRIS). I suspect a Deadpool fan must work at IBM, but that’s beside the point.
A server suspected to be used by ITG18 was incorrectly configured, and when data and training videos were stored there, that data was publicly accessible. Among the captured data was records of compromised accounts belonging to US and Greek military personnel.
The training videos also contained a few interesting tidbits. If a targeted account used two factor authentication, the attacker was to make a note and give up on gaining access to that account. If a Google account was breached, the practice was to start with Google Takeout, the service from Google that allows downloading all the data Google has collected related to that account. Yoiks. Continue reading “This Week In Security: Iran’s ITG18, ProcMon For Linux, And Garbage Collection Fail”→
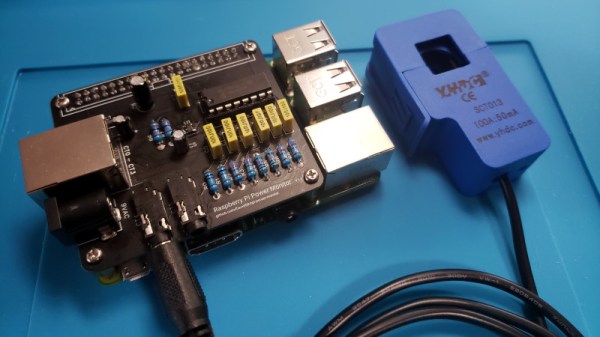
As the world has become more environmentally conscious, we’ve seen an uptick in projects that monitor or control home energy use. At a minimum one of these setups involves a microcontroller and some kind of clamp-on current sensor, but if you’re looking for resources to take things a bit farther, this Raspberry Pi energy monitoring system created by [David00] would be a great place to start.
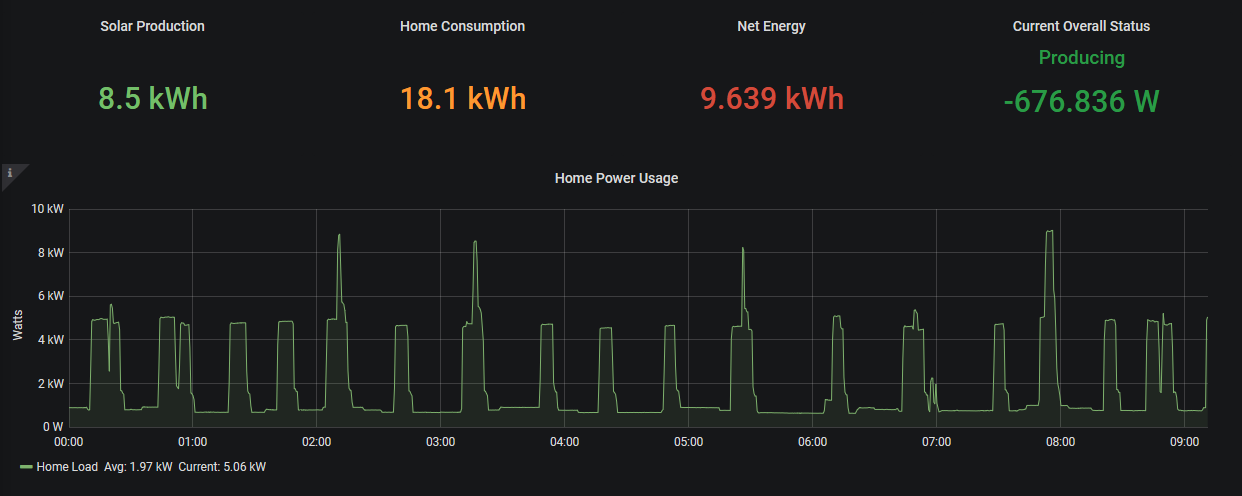
This project includes provides software and hardware to be used in conjunction with the Raspberry Pi to keep tabs on not just home energy consumption, but also production if your home has a solar array or other method of generating its own power. Data is pulled every 0.5 seconds from a MCP3008 ADC connected to up to five six current sensors to provide real-time utilization statistics, and visualized with Grafana so you can see all of the information at a glance.
While [David00] has already done the community a great service by releasing the hardware and software under an open source license, he’s also produced some absolutely phenomenal documentation for the project that’s really a valuable resource for anyone who wants to roll their own monitoring system. He’s even offering hardware kits for anyone who’s more interested in experimenting with the software side of things than building the PCB.
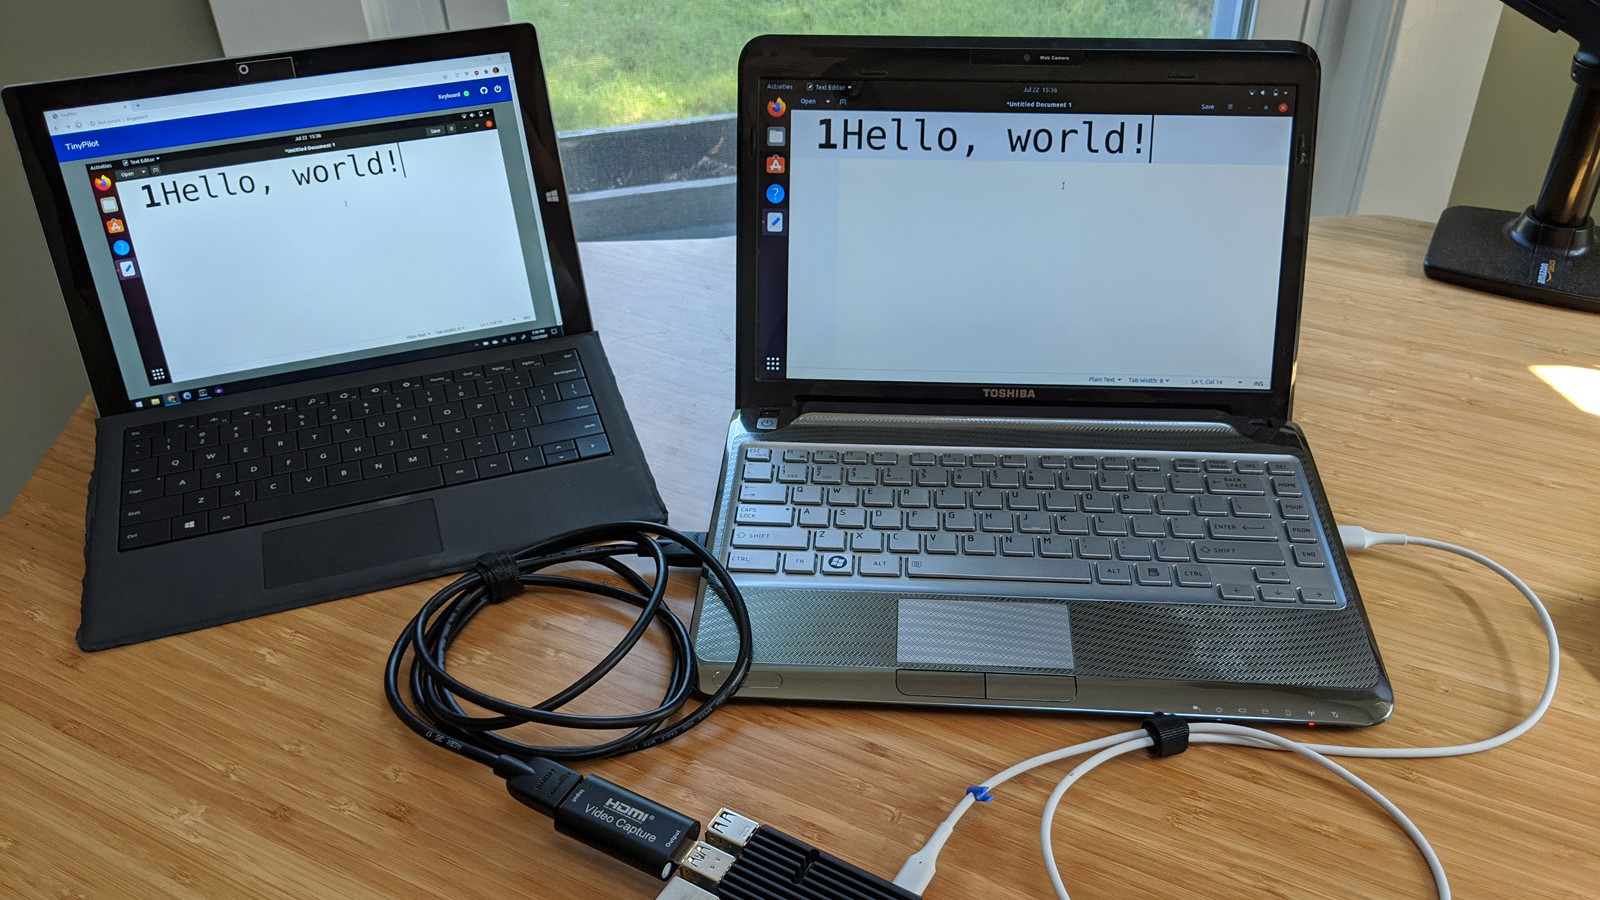
Remote access is great, but if the machine stops booting, ceases to connect to the network, or needs low-level interaction like BIOS settings or boot management, remote access is worthless because it’s only available once the host computer is up and running. The usual solution is to drag a keyboard and monitor to the machine in question for physical access.
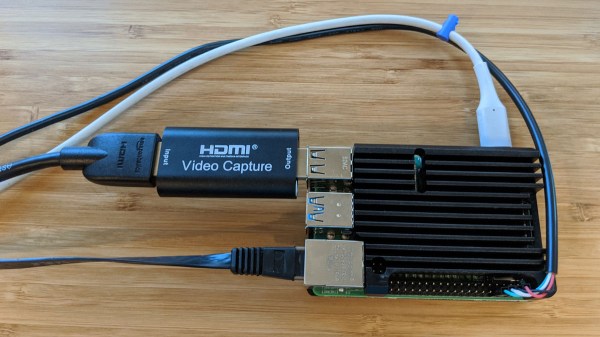
Ubuntu laptop (right) being accessed over IP, via web browser on the left.
For most people, swapping cables in this way is an infrequent task at best. But for those who work more closely with managing hardware or developing software, the need to plug and unplug a keyboard and monitor into machines that otherwise run headless can get tiresome. The modern solution is KVM (keyboard, video, mouse) over IP, but commercial options are expensive. [Michael Lynch]’s TinyPilot on the other hand clocks in at roughly $100 of parts, including a Raspberry Pi and USB HDMI capture device. It does have to drop the ‘M’ from KVM (meaning it does not support a mouse yet) but the rest of it hits all the bases, and does it all from a web browser.
What exactly does TinyPilot do? It provides remote access via web browser, but the device is an independent piece of hardware that — from the host computer’s point of view — is no different from a physical keyboard and monitor. That means keyboard and video access works before the host machine even boots, so even changing something like BIOS settings is no problem.
[Michael] demonstrates his design in the video embedded below, but we encourage you to check out the project page for a fascinating exploration of all the challenges that were part of TinyPilot’s development.
If you want to run an old CP/M program — maybe you want to run WordStar or play StarTrek — you have several options. One is to acquire some classic hardware. You can also build a new computer using a Z80 or some other processor that will emulate a Z80. Finally, you can emulate old hardware on your current computer. The iz-cpm project from [ivanizag] takes this last approach. Unlike some emulators, iz-cpm doesn’t try to emulate everything in one simulated environment. Instead, it directly accesses your file system so it allows CP/M executables to run more as though they were a native program.
You can think of it as Wine for CP/M. The code is portable to Linux, Windows, or MacOS. The author mentions, though, that it won’t run on CP/M itself! The program can run an executable standalone which means you could set .COM files up to execute automatically if you wanted to.
Coffee roasting is an art or a science, depending on who you talk to. Both camps will however agree that attention to detail is key. Many diehard beanheads, as they’re known, will go so far as to create their own roasting hardware to get the job done just right. [Larry Cotton] is one such builder, who has created an elegant roaster to get his brew just right.
The build is based around a wobble disk design. This consists of a round plate fixed at a 45-degree angle to a rotating shaft. As the shaft spins, the disk gently sweeps and agitates the roast, allowing the batch to heat up evenly without burning the beans. It’s a two-part design, with heat gun parts in the base to generate the hot air for the roasting process. The bean basket sits on top, held in place by magnets that also act as a conduit for the wobble disk motor’s power supply.