DIY Tube Lights Look Amazing For Just $50 A Piece

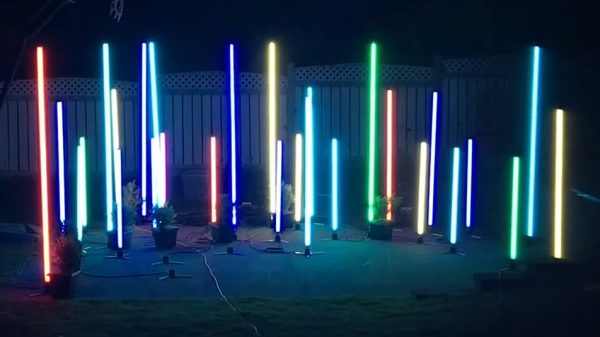
It’s the future. We should have weird glowy lights everywhere, all over our homes, cars, and businesses. In the automotive world, luxury automakers are doing their part with LED ambient lighting systems, but the rest of us have to step up. [Super Valid Designs] has developed an excellent modular DMX lighting rig that’s fit for this purpose; the rest of us just have to get to work and build our own!  (Video, embedded below.)

The design relies on hot-swapping powered bases that let a variety of different lights to be swapped in as needed. They use a custom four-pin socket designed by [Super Valid Designs] using PVC and ABS plumbing and conduit parts and tent pole springs from Home Depot. There’s a 3D-printable version, too, which is useful for those around the world that can’t get access to American standard gear easily. Anyone from the Nerf scene will understand this frustration well.

The real cool part of the modular rig, though, are the tube fixtures. There’s a ball design too, but they don’t look quite as future-cool as the tubes. They use fluorescent tube protectors as a cheap source of clear tubes, and use plumbing and conduit parts to make easy-insert connectors for pairing with the modular bases. Light is courtesy of old-school non-addressable RGB LED strips, attached to flat aluminium trim with their own adhesive combined with a wrap of clear packing tape as well. The LED strip is attached to one side of the tube, with parchment paper layered inside the tubes to act as a diffuser.

Building in quantities of 8 or more, [Super Valid Designs] reckons that the tubes can be built for $50 each or less. Of course, that adds up to a few hundred dollars in total, but the results speak for themselves.

If you’re thinking of tackling this project, but DMX is beyond your current skillset, fear not. We’ve got just the primer to get you started! Video after the break.

Continue reading “DIY Tube Lights Look Amazing For Just $50 A Piece”

The Dark Side Of Hacking XMas Lights, Literally

When looking at the piles of cheap RGB, Bluetooth-controlled LED strips you can find for sale just about anywhere these days, integrating them into a home-automation setup is very tempting. Normally these strips are controlled via a special smartphone app, that speaks whatever dodgy protocol was thrown together for the LED strip controller in question. Reverse-engineering this Bluetooth protocol is fairly easy these days, as [Will Cooke] describes in a recent tutorial, although for him there was a bit of a tragic ending with one particular RGB set.

With previous experiences reverse-engineering the Bluetooth protocol with Wireshark under his belt and having published the BJ_LED repository for LED strips that use the MohuanLED app, reverse-engineering this new LED strip with the associated “iDeal LED” app seemed fairly routine. Initially it was indeed routine, with just a curveball in the form of some encryption that the Jadx decompiler used on the app couldn’t help with. Fortunately the key ended up floating around on the internet, and the protocol was wide open. That’s when disaster struck.

While trying to throw payloads at the LED controller to find hidden modes and settings, [Will] found that he could indeed increase the brightness beyond what the app supported, but poking at lighting modes beyond the 10 presets gave a nasty shock. Modes 1 through 10 worked fine, 11 also did something new, but when the controller was asked to switch to mode 12, it shut off. Permanently. Whether this corrupted the firmware or caused some other issue is unknown, but it’s a clear warning that reverse-engineering comes with potentially fried hardware.

We hope that [Will] can get an autopsy performed on this controller to see the cause of this seemingly permanent failure that persisted across hard resets and disconnecting from power overnight. The protocol for this controller has been published on GitHub for those who’d like to take their chances.

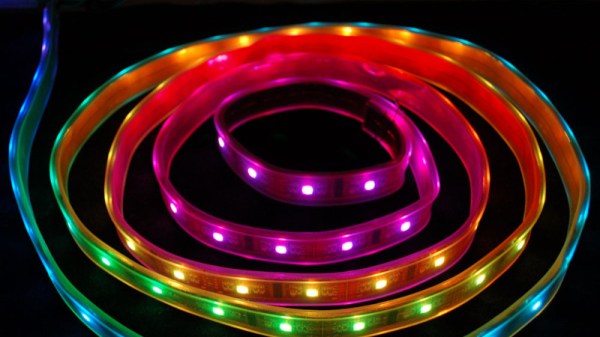
LED lights: LadyAda, CC BY-SA 4.0.

Balloon To Fly During Solar Eclipse

The Great American Eclipse was a solar eclipse that passed nearly the entire continental United States back in 2017. While it might sound like a once-in-a-lifetime event to experience a total solar eclipse, the stars have aligned to bring another total solar eclipse to North America although with a slightly different path stretching from the west coast of Mexico and ending off the cost of Newfoundland in Canada. Plenty of people near the path of totality have already made plans to view the event, but [Stephen] and a team of volunteers have done a little bit of extra preparation and plan to launch a high-altitude balloon during the event.

The unmanned balloon will primarily be carrying a solar telescope with the required systems onboard to stream its images live during its flight. The balloon will make its way to the stratosphere, hopefully above any clouds that are common in New Brunswick during the early spring, flying up to 30,000 meters before returning its payload safely to Earth. The telescope will return magnified images of the solar eclipse live to viewers on the ground and has been in development for over two years at this point. The team believes it to be the first time a non-governmental organization has imaged an eclipse by balloon.

For those who have never experienced a total solar eclipse before, it’s definitely something worth traveling for if you’re not already in its path. For this one, Canadians will need to find themselves in the Maritimes or Newfoundland or head south to the eastern half of the United States with the Americans, while anyone in Mexico needs to be in the central part of the mainland. Eclipses happen in places other than North America too, and are generally rare enough that you’ll hear about a total eclipse well in advance. There’s more to eclipses than watching the moon’s shadow pass by, though. NASA expects changes in the ionosphere and is asking ham radio operators for help for the 2024 eclipse.

Light Guns Aren’t Just For CRTs Anymore

For how much of a cultural phenomenon light gun games like Duck Hunt were, they didn’t survive the transition from CRT televisions to LCDs particularly well because of all of the technological quirks the light guns exploited in older technology that simply disappeared with modern TVs. But it’s not impossible to get a similar gameplay from modern technology as evidenced by the success of the Wii and its revolutionary Wiimote, and there are plenty of modern games that use similar devices. There are a few paths to getting older light guns working again, though.

The first system to note, called SAMCO, uses a system of LEDs and a camera to synchronize the game’s flashes to the new technology and translate the input back into the game. Gun4ir uses a similar technique, and boasts extremely high accuracy and low latency largely due to being programmed in assembly. Both systems can use either an infrared tracking sensor or a Wiimote sensor as the LEDs and while the SAMCO system can run on a Raspberry Pi Pico, Gun4ir exclusively uses ATmega32U4 boards with the optimized assembly programming.

Both SAMCO and Gun4ir offer PCBs for anyone looking to try them out without designing their own circuit boards, and once the electronics are assembled they can either be put in an original NES-era light gun, put in a custom printed enclosure, or even stuffed into a Nerf gun. For others looking for a more turnkey solution, there are also offerings from companies like Sinden which make complete system. You can always build your own system to restore the functionality of original light guns from scratch if that’s more your style.

Thanks to [LookAtDaShinyShiny] for tipping us off to the latest happenings in the light gun community!

Photo courtesy of Wikimedia Commons

Stage Lighting Hack Keeps La Bohème From Becoming A Dumpster Fire

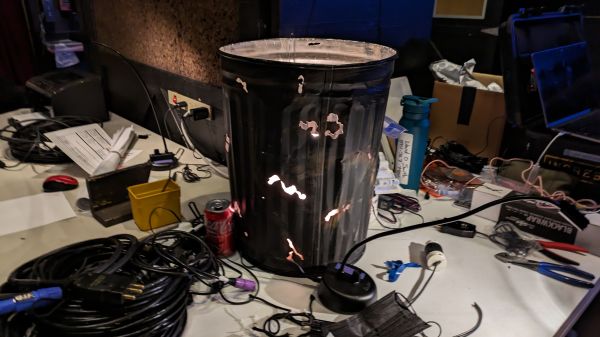
With all due respect to the Utah Opera’s production of La bohème, we just couldn’t resist poking a little fun at master electrician [David Smith]’s quick lighting hack for the opera. And who knew an opera from 1896 would need a garbage can fire? Live and learn.

In what appears to be a case of “The show must go on,” [David] was called on to improve an existing fire effect for one scene in the opera, which was reportedly a bit “artificial and distracting.” This is a pretty common problem in live productions of all types; it’s easy to throw light at a problem, but it’s often hard to make it both convincing and unobtrusive. Luckily, he had both the time to come up with something, and a kit full of goodies to make it happen. A balled-up strip of Neopixels provided the light, with an Arduino running some simple code to randomize the intensity and color of the RGBs. [David] stuck with the warm white, red, and green colors, to keep the color temperature about right for a fire, and drove the LEDs with a couple of MOSFETs that he keeps in his kit to fix busted dimmer packs.

The overall effect worked well, but the holes knocked in the side of the greatly abused garbage can let too much light out, making the effect distracting on stage. The remedy was simple: a cylinder of printer paper surrounding the LED tape. The paper not only acted as a diffuser but held the tape in place inside the can. The electrical crew ran two circuits to the can — one to keep the Arduino running throughout the show, and one to power the LED tape. The former made sure the audience didn’t see the microcontroller boot sequence, and the latter gave the electrician a way to control the effect from the dimmer console. The brief video below shows it in action during a rehearsal.

Hats off to [David] and the whole crew for the stagecraft heroics and for getting this thrown together so quickly.

Continue reading “Stage Lighting Hack Keeps La Bohème From Becoming A Dumpster Fire”

Virtual Mini Pinball Cabinet Scores Big

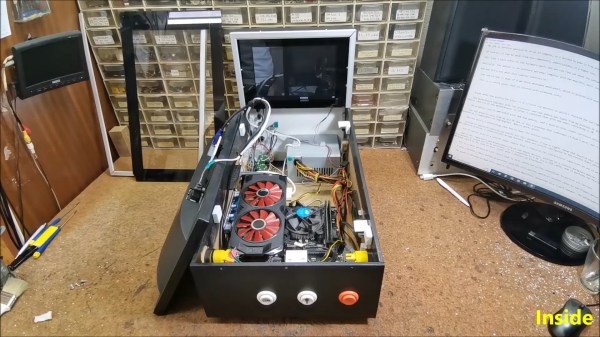
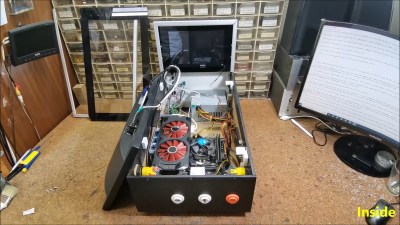
Do you love pinball, but can’t justify owning a full-size cabinet? Yeah, us either, and that’s why we’re so interested in [mircemk]’s great-looking DIY mini virtual pinball cabinet. Since [mircemk] is a IT service specialist, they are lucky enough to have access to lots used and broken equipment, and that’s what this build is made of.

Essentially two computers working together, the playfield is a old 17-inch monitor that needed its LED lighting replaced before gracing the MDF cabinet The backglass is an ancient 10-inch tablet that was perfect for this application.

Even the motherboard, RAM, and SSD came from one of [mircemk]’s previous PCs. The SSD needed some attention first as well — it didn’t work sometimes, and didn’t show up in the BIOS at all, so [mircemk] threw it in the oven for 10 minutes at 250°, and now all is well.

One thing we really like about this build is that instead of designing a control board for the buttons, [mircemk] used a cheap USB joystick and wired them up to the pads.

So how does the tablet figure into all of this? It’s connected to a PC via USB and does its job thanks to a piece of software called Wired XDisplay. There is even a tilt switch in this bad boy. Because what’s a pinball cabinet without a tilt switch? A cheater’s cabinet, that’s what. Check out the build/demo video after the break.

Don’t even have the space for a mini cabinet? We hear you. Here’s one that fits in the palm of your hand.

Continue reading “Virtual Mini Pinball Cabinet Scores Big”

What Is Killing Cursive? Ballpoints. Probably.

I get it — you hate writing by hand. But have you ever considered why that is? Is it because typing is easier, faster, and more convenient here in 2023? Maybe so. All of those notwithstanding, I honestly think there’s an older reason: it’s because of the rise of ballpoint pens. And I’m not alone.

Bear with me here. Maybe you think you hate writing because you were forced to do it in school. While that may very well be, depending on your age, you probably used a regular wood-case pencil before graduating to the ballpoint pen, never experiencing the joys of the fountain pen. Well, it’s never too late.

Continue reading “What Is Killing Cursive? Ballpoints. Probably.”