3D Printed SCARA Arm With 3D Printer Components

One of the side effects of the rise of 3D printers has been the increased availability and low cost of 3D printer components, which are use fill for range of applications. [How To Mechatronics] capitalized on this and built a SCARA robot arm using 3D-printed parts and common 3D-printer components.

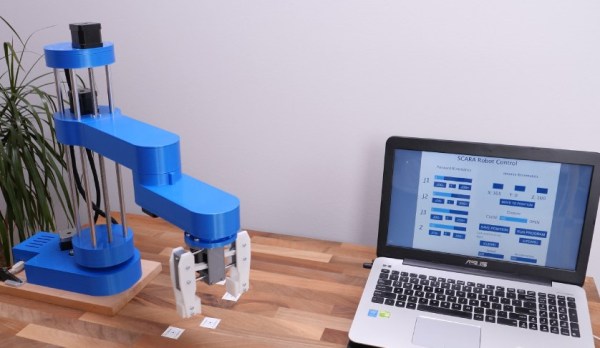
The basic SCARA mechanism is a two-link arm, similar to a human arm. The end of the second joint can move through the XY-plane by rotating at the base and elbow of the mechanism. [How To Mechatronics] added Z-motion by moving the base of the first arm on four vertical linear rods with a lead screw. A combination of thrust bearings and ball bearings allow for smooth rotation of each of the joints, which are belt-driven with NEMA17 stepper motors. Each joint has a microswitch at a certain position in its rotation to give it a home position. The jaws of the gripper slide on two parallel linear rods, and are actuated with a servo. For controlling the motors, an Arduino Uno and CNC stepper shield was used.

The arm is operated from a computer with a GUI written in Processing, which sends instructions to the Arduino over serial. The GUI allows for both direct forward kinematic control of the joints, and inverse kinematic control,  which will automatically move the gripper to a specified coordinate. The GUI can also save positions, and then string them together to do complete tasks autonomously.

The base joint is a bit wobbly due to the weight of the rest of the arm, but this could be fixed by using a frame to support it at the top as well. We really like the fact that commonly available components were used, and the link in the first paragraph has detailed instructions and source files for building your own. If the remaining backlash can be solved, it could be a decent light duty CNC platform, especially with the small footprint and large travel area. Continue reading “3D Printed SCARA Arm With 3D Printer Components”

Portrait Painter Turns G-Code Into Artworks

Portrait painting is, by and large, a human endeavour. But, like any and all skills, there are machines ready and willing to take a crack at it. [Jose Salatino] has built just such a machine, and the results are impressive.

Samples of the artwork created by [Jose’s] portrait painter.
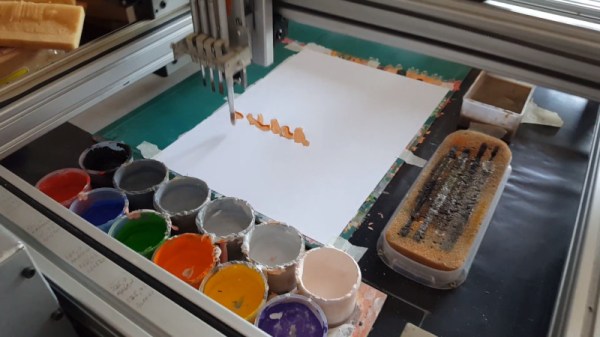
[Jose’s] portrait painter relies on a Cartesian CNC setup, with an X-Y gantry fitted with a retractable brush carrier. The carrier holds four brushes, allowing the device to paint with different sized strokes as per the artistic requirements. An algorithm is used to turn images into a series of brushstrokes, which are then turned into G-code to drive the system. Colors are mixed just like a human painter would, with the brush dipping into a series of paint pots. Using the hue-saturation-brightness (HSB) color system makes this easy.

While it’s much slower than your average printer, the goal here isn’t to create photorealistic images, but to create something with artistic appeal. The artworks painted by the ‘bot have a remarkable likeness to oil paintings by human artists, thanks to using similar techniques. We’re sure [Jose’s] experience as an oil painter helped out here, too.

We’ve seen other ‘bots produce custom artworks before, too. Video after the break.

Continue reading “Portrait Painter Turns G-Code Into Artworks”

A Masterpiece, But Our Maestro Is A CNC Machine

Sometimes we manage to miss projects when they first appear, only to have the joy of discovering them a while later. So it is with [John Opsahl]’s Project Convert To Paint, a CNC painting ‘bot that takes a bitmap image and paints it on canvas as a fine artist would, with a real brush, and paints.

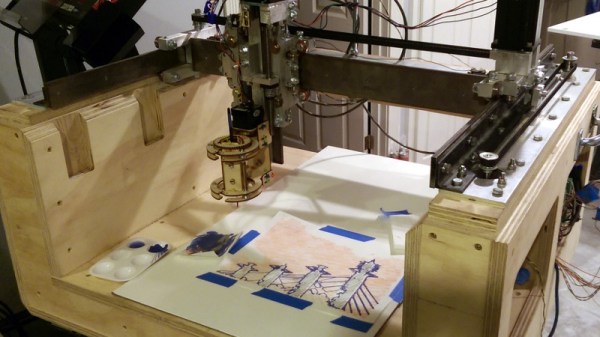
It was first created for the 2017 robotart.org competition, and takes the form of a fairly standard CNC gantry machine. It departs from the norm in its chuck however, as it has what is described as a universal artist chuck, capable of holding a variety of artistic implements. The images are converted from bitmap to vector format, and thence to gcode with the help of a bit of custom Python code.

He’s at pains to say that simply because an image can be converted to a paintable format does not mean that it will produce a good picture. But some of the results are rather impressive, delivering anything from a pointilist effect to a broader brush stroke. We can see that with a bit of experience in the processing it would be possible to create a veritable gallery of masterpieces.

We may have missed this one the first time, but we did catch another drawbot from the same competition.

Hackaday Podcast 029: Your Face In Silver Sand, Tires Of The Future, ESP32 All The CNC Things, And Sub In A Jug

Hackaday Editors Elliot Williams and Mike Szczys geek out over the latest hacks. This week we saw a couple of clever CNC builds that leverage a great ESP32 port of GRBL. The lemonade-pitcher-based submarine project is everything you thought couldn’t work in an underwater ROV. Amazon’s newest Dot has its warranty voided to show off what 22 pounds gets you these days. And there’s a great tutorial on debugging circuits that grew out of a Fail of the Week. Plus, we get the wind knocked out of us with an ambitious launch schedule for airless automotive tires, and commiserate over the confusing world of USB-C.

Take a look at the links below if you want to follow along, and as always tell us what you think about this episode in the comments!

Take a look at the links below if you want to follow along, and as always, tell us what you think about this episode in the comments!

Direct download (60 MB or so.)

Continue reading “Hackaday Podcast 029: Your Face In Silver Sand, Tires Of The Future, ESP32 All The CNC Things, And Sub In A Jug”

Lack Of Space Is No Longer An Excuse For Not Having A Pen Plotter

Pen plotters, those mechanical X-Y drawing machines that have in many cases been superseded by inkjet and other printer technologies, exert a fascination from a section of our community. Both analogue and digital machines are brought out of retirement for some impressive graphical effects, and we suspect that more than one of you wishes you had the space for one in your lives.

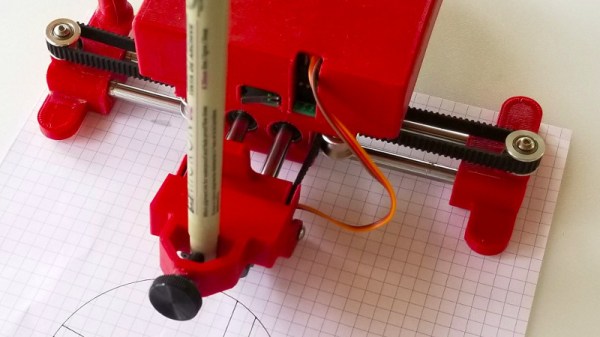
The good news is that you now no longer need room for a hefty piece of 1970s instrumentation, because the ever-inventive [Bart Dring] has produced a tiny 3D-printed plotter with an ESP32 at its heart. The ESP runs his ESP32 port of the Grbl firmware, and can handle a G-code file placed wirelessly upon the controller’s SD card.

The mechanism is particularly clever, using a single belt for both X and Y axes. The pen lift Z axis is a hinged design rather than a linear one, with a hobby servo doing the lifting. The hinge bearings are placed as close as possible to the paper surface to achieve an approximation to a vertical lift. You can see the machine in action in the video below the break, drawing its own self-portrait.

If you are a long-time reader you will recognise [Bart]’s work, he has appeared here quite a few times. His coaster-cutting machine and his CNC plotter badge are particularly memorable.

Continue reading “Lack Of Space Is No Longer An Excuse For Not Having A Pen Plotter”

What Can You Learn From An Eggbot?

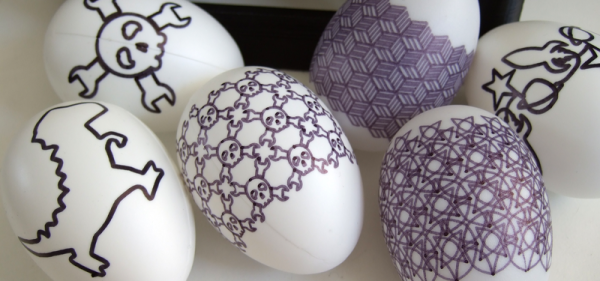
An eggbot is probably the easiest introduction to CNC machines that you could possibly hope for, at least in terms of the physical build. But at the same time, an eggbot can let you get your hands dirty with all of the concepts, firmware, and the toolchain that you’d need to take your CNC game to the next level, whatever that’s going to be. So if you’ve been wanting to make any kind of machine where stepper motors move, cut, trace, display, or simply whirl around, you can get a gentle introduction on the cheap with an eggbot.

Did we mention Easter? It’s apparently this weekend. Seasonal projects are the worst for the procrastinator. If you wait until the 31st to start working on your mega-awesome New Year’s Dropping Laser Ball-o-tron 3000, it’s not going to get done by midnight. Or so I’ve heard. And we’re certainly not helping by posting this tutorial so late in the season. Sorry about that. On the other hand, if you start now, you’ll have the world’s most fine-tuned eggbot for 2020. Procrastinate tomorrow!

I had two main goals with this project: getting it done quickly and getting it done easily. That was my best shot at getting it done at all. Secondary goals included making awesome designs, learning some new software toolchains, and doing the whole thing on the cheap. I succeeded on all counts, and that’s why I’m here encouraging you to build one for yourself.

Continue reading “What Can You Learn From An Eggbot?”

The 3D Printed Plotter You Didn’t Know You Needed

We’ve been seeing an influx of repurposed 3D printers recently. Thrifty hackers have been leveraging cheap 3D printers as a way to bootstrap their builds, on everything from laser engravers to pick and place machines. There’s nothing wrong with that, and honestly when you can get a cheap 3D printer for less than the cost of the components separately thanks to the economies of scale, you’d be foolish not to.

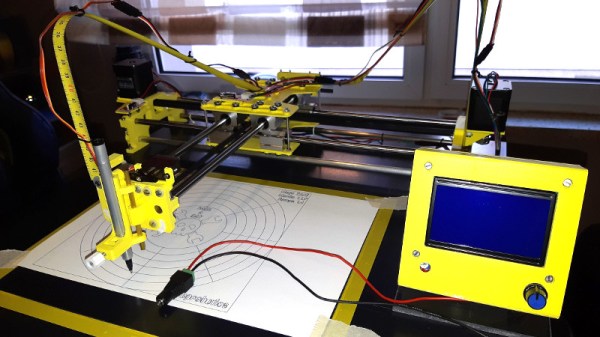
But there’s still something to be said for the classic RepRap mentality of building things using printed parts and smooth rods. Case in point, the largely 3D printed plotter that [darth vader] sent in for our viewing pleasure. This isn’t somebody sicking a pen on the extruder of their open box Monoprice special, this is a purpose built plotter and it shows. In the video after the break you can see not only how well it draws, but also how large of a work area it has compared to a modified 3D printer.

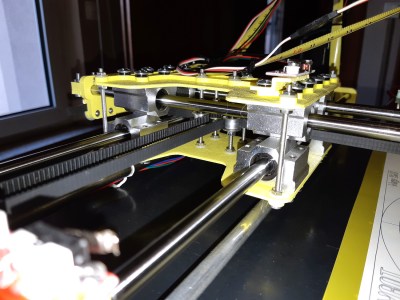
If you know your way around a 3D printer, most of it should look pretty familiar to you. Using the same GT2 belts, steppers, end stop switches, and linear bearings which are ubiquitous in 3D printers, it shouldn’t be difficult to source the parts to build your own. It even uses a Mega 2560 with RAMPS 1.4 running Marlin 1.1.9 for control.

The biggest difference is the physical layout. Since there’s no heavy hotend or extruder assembly to move around, the plotter has a cantilever design which gives it far greater reach. As it only needs to sightly lift the pen off the paper, there’s no need for a complex Z axis with leadscrews either; a simple servo mounted to the end of the arm is used to raise and lift the pen. We especially like the use of a tape measure as strain relief for his wiring, a fantastic tip that we (and many of you) fell in love with last year.

While it’s hard to beat just tossing a pen onto the business end of your desktop 3D printer in terms of convenience, we think it’s pretty clear from this build that the results don’t quite compare. If you want a real plotter, build a real plotter.

Continue reading “The 3D Printed Plotter You Didn’t Know You Needed”