How To Make Laser-cut Decals On The Cheap

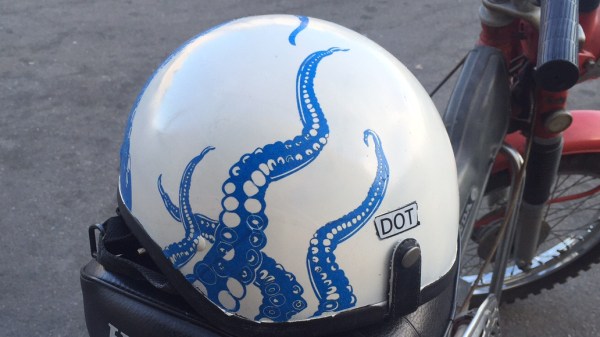
Want to make a sweet adhesive decal with a complex design and floating elements, but all you have is a laser cutter and some tape? Good news, because that’s all you need with this method of creating adhesive tape decals on a laser cutter demonstrated by the folks at [Lasers Over Los Angeles]. The overall technique is very similar to creating vinyl decals and using tape transfer to apply them, but is geared towards laser cutters and nice, cheap tape.

This method also makes applying to non-flat surfaces a breeze.

The way it works is this: paper-based tape (such as blue painter’s tape) is laid down in strips on the laser cutter’s honeycomb bed, forming a nice big rectangle big enough for the intended design. Then, the laser cutter cuts vector art into the tape, resulting in an adhesive decal ready to be stuck to some other surface. Transferring is done by using good quality clear packing tape to “pick up” the decal, then move it to where it needs to be.

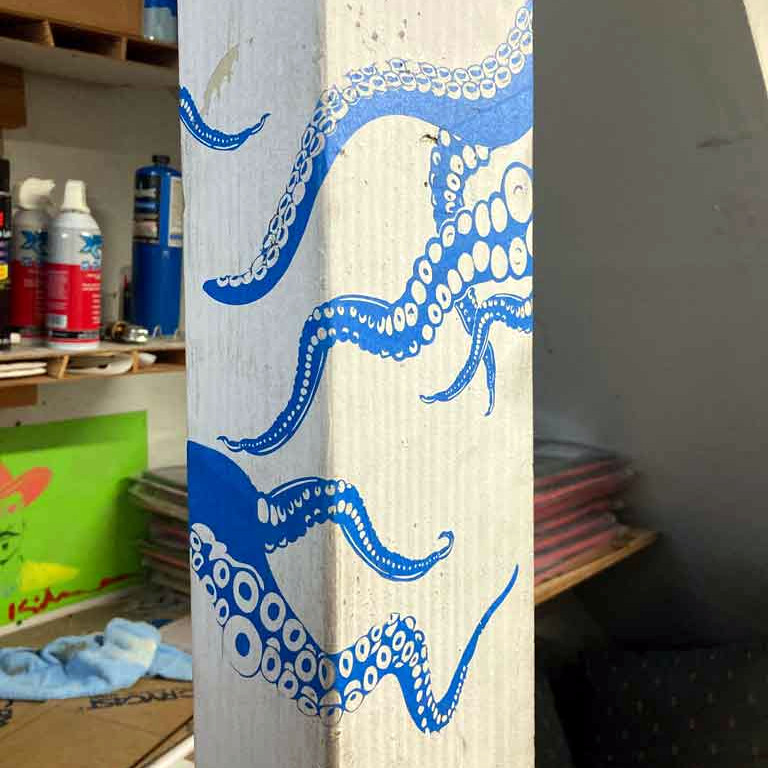
To do this, one lays strips of packing tape onto the top of the design on the laser bed, then lifts the design up and away. Move the design to its destination (the clear packing tape helps in eyeballing the final position), press the decal onto the final surface, and carefully peel away the clear packing tape. This works because the packing tape sticks only weakly to the back of the painter’s tape; it’s a strong enough bond to hold the decal, but weak enough that the decal will stick to a surface even better.

It’s true that painter’s tape isn’t as durable as vinyl and the color selection is a bit limited, but design-wise one can go as big as the laser bed allows, and the price is certainly right. Plus it’s easily cut by even the most anemic of diode lasers.

Speaking of desktop vinyl cutters, they may have small working areas compared to most laser cutters, but they have some fantastic workshop applications. They can even do home PCB fabrication, by way of knocking out three essential pieces: the etching mask, solder mask, and solder stencil.

High-Power Laser Salvaged From Headlights

[DiodeGoneWild]’s latest video lives up to the name. He takes apart a laser headlight to recover a pretty powerful blue laser. You can see the video, below.

The headlights work with blue laser diodes that excite phosphor to produce white light. Removing the outside trappings revealed a three-pin laser diode (the case is the third pin). There’s also a substantial heatsink. Removing the diode from the assembly is difficult, but it is easy enough to leave it in the heatsink and use the existing connector.

Of course, the phosphor and a filter have to go. Some destructive work with a screwdriver and pliers broke out the optics from a diode he’d destroyed trying to remove it. Then he replaced the optics on the remaining diode with the modified housing.

With a low-current test, the diode didn’t lase but did act as a regular LED. More current did the trick, though. The laser without the optics made a line rather than a spot but still had enough power to melt some plastic and light matches. To get a parallel beam, the internal lens needs to move closer to the diode, and a drill bit allowed that to happen, which reduced the beam’s divergence quite a bit, but didn’t create the best result.

With the proliferation of cheap laser modules, it is really worth scrapping a headlight? Maybe. But it is an interesting look inside of a modern headlight, either way. We’ve peeked inside these headlights before. Maybe you can turn those old headlights into an oven.

Continue reading “High-Power Laser Salvaged From Headlights”

Hackaday Podcast 138: Breakin’ Bluetooth, Doritos Rockets, Wireless Robots, And Autonomous Trolling

Hackaday editors Elliot Williams and Mike Szczys peruse the great hardware hacks of the past week. There’s a robot walker platform that wirelessly offloads motor control planning to a computer. We take a look at automating your fishing boat with a trolling motor upgrade, building the Hoover dam in your back yard, and playing Holst’s Planets on an army of Arduini. Make sure you stick around until the end as we stroll through distant memories of Gopher, and peek inside the parking garages of the sea.

Take a look at the links below if you want to follow along, and as always, tell us what you think about this episode in the comments!

Direct download (60 MB or so.)

Continue reading “Hackaday Podcast 138: Breakin’ Bluetooth, Doritos Rockets, Wireless Robots, And Autonomous Trolling”

Using A Laser To Blast Away A Bayer Array

A Bayer array, or Bayer filter, is what lets a digital camera take color photos. It’s an array of tiny color filters that sit on top of a camera’s CCD. The filter makes it so that each sub-pixel in the image sensor only sees red, green, or blue light. The Bayer filter is an elegant tool that gives us color digital photos, but what would you do if you wanted to remove one?

[Les Wright] has devised a way to remove the Bayer filter from the Raspberry Pi Camera. Along with filtering red, green, and blue light for their respective sensors, Bayer filters also greatly reduce the amount of UV and IR light that make it to the CCD sensor. [Les] uses the Raspberry Pi camera in his Pi-based Spectrometer, and he wants to remove the Bayer filter to improve and expand its sensitivity.

Of course, [Les] isn’t the first one to want to do this. Some have succeeded in physically scratching the filter off of the CCD, but because the Pi Camera has vital circuitry around the outside of the sensor, scratching the filter off would likely destroy the circuitry. Others have stripped it off using chemical means, so [Les] gave this a go and destroyed no small number of cameras in his attempt to strip the filter off with solvents like DMSO, brake fluid, and industrial paint stripper.

A look at the CCD, halfway through the process.

Inspired by techniques used in industry, [Les] eventually tried to use a several-kW nitrogen laser to burn off the filter (which seems appropriate given his experience with lasers). He built a rig that raster scans the laser across the sensor using stepper motors to drive micrometer bases. A USB microscope was included to allow progress to be monitored, and you can see a change in the sensor’s appearance as the filter is removed.

After blasting off the Bayer filter, [Les] plugged his improved camera into his home-built spectrometer and pointed it outside. The new camera gives the spectrometer much more uniform sensitivity and allows [Les] to see further into the IR and UV bands. The spectrometer can even detect the Fraunhofer lines—subtle dips in the sun’s spectrum from absorption by molecules in the atmosphere.

This is incredible for a DIY setup and instrument, and we can’t wait to see what [Les] does next to improve his measurements. If your spectrometry needs are more mass than visual, take a look at this home-built mass spectrometer. Home spectrometers aren’t just for examining light spectra—they can also be used to judge the ripeness of fruit!

Continue reading “Using A Laser To Blast Away A Bayer Array”

Cocktail Of Chemicals Makes This Blueprint Camera Unique

When you’re looking at blueprints today, chances are pretty good that what you’re seeing is anything but blue. Most building plans, diagrams of civil engineering projects, and even design documents for consumer products never even make it to paper, let alone get rendered in old-fashioned blue-and-white like large-format prints used to produced. And we think that’s a bit of a shame.

Luckily, [Brian Haidet] longs for those days as well, so much so that he built this large-format cyanotype camera to create photographs the old-fashioned way. Naturally, this is one of those projects where expectations must be properly scaled before starting; after all, there’s a reason we don’t go around taking pictures with paper soaked in a brew of toxic chemicals. Undaunted by the chemistry, [Brian] began his journey with simple contact prints, with Sharpie-marked transparency film masking the photosensitive paper, made from potassium ferricyanide, ammonium dichromate, and ammonium iron (III) oxalate, from the UV rays of the sun. The reaction creates the deep, rich pigment Prussian Blue, contrasting nicely with the white paper once the unexposed solution is washed away.

[Brian] wanted to go beyond simple contact prints, though, and the ridiculously large camera seen in the video below is the result. It’s just a more-or-less-lightproof box with a lens on one end and a sheet of sensitized paper at the other. The effective ISO of the “film” is incredibly slow, leading to problematically long exposure times. Coupled with the distortion caused by the lens, the images are — well, let’s just say unique. They’ve got a ghostly quality for sure, and there’s a lot to be said for that Prussian Blue color.

We’ve seen cyanotype chemistry used with UV lasers before, and large-format cameras using the collodion process. And we wonder if [Brian]’s long-exposure process might be better suited to solargraphy.

Continue reading “Cocktail Of Chemicals Makes This Blueprint Camera Unique”

How Laser Headlights Work

When we think about the onward march of automotive technology, headlights aren’t usually the first thing that come to mind. Engines, fuel efficiency, and the switch to electric power are all more front of mind. However, that doesn’t mean there aren’t thousands of engineers around the world working to improve the state of the art in automotive lighting day in, day out.

Sealed beam headlights gave way to more modern designs once regulations loosened up, while bulbs moved from simple halogens to xenon HIDs and, more recently, LEDs. Now, a new technology is on the scene, with lasers!

Continue reading “How Laser Headlights Work”

No Doorknobs Needed For This Nitrogen Laser Build

Sometimes the decision to tackle a project or not can boil down to sourcing parts. Not everything is as close as a Digi-Key or Mouser order, and relying on the availability of surplus parts from eBay or other such markets can be difficult. Knowing if and when a substitute will work for an exotic part can sometimes be a project all on its own.

Building lasers is a great example of this, and [Les Wright] recently looked at substitutes for hard-to-find “doorknob” capacitors for his transversely excited atmospheric lasers. We took at his homebrew TEA lasers recently, which rely on a high voltage supply and very rapid switching to get nitrogen gas to lase. His design uses surplus doorknob caps, big chunky parts rated for very high voltages but also with very low parasitic inductance, which makes them perfect for the triggering circuit.

[Les] tried to substitute cheaper and easier-to-find ceramic power caps with radial wire leads rather than threaded lugs. With a nominal 40-kV rating, one would expect these chunky blue caps to tolerate the 17-kV power supply, but as he suspected, the distance between the leads was short enough to result in flashover arcing. Turning down the pressure in the spark gap chamber helped reduce the flashover and prove that these caps won’t spoil the carefully engineered inductive properties of the trigger. Check out the video below for more details.

Thanks to [Les] for following up on this and making sure everyone can replicate his designs. That’s one of the things we love about this community — true hackers always try to find a way around problems, even when it’s just finding alternates for unobtanium parts.

Continue reading “No Doorknobs Needed For This Nitrogen Laser Build”