[Travis Goodspeed] posted a preview of what he’s working on for this Summer’s conferences. Last weekend he gave a quick demo of sniffing AES128 keys on Zigbee hardware at SOURCE Boston. The CC2420 radio module is used in many Zigbee/802.15.4 sensor networks and the keys have to be transferred over an SPI bus to the module. [Travis] used two syringe probes to monitor the clock line and the data on a TelosB mote, which uses the CC2420. Now that he has the capture, he’s planning on creating a script to automate finding the key.
ZigBee is a low-power communication system using digital radios. It’s intended to be easier to work with than Bluetooth. Adafruit recently added an adapter board for Digi’s XBee product line and has put together a great how-to to show the devices potential. Using two XBee radios and adapters you can wirelessly program an Arduino board. This would be great if your Arduino was installed in an inaccessible area or maybe it’s over 100feet away from where you’re working. The radios do serial communication just fine. What the how-to covers is getting the reset line working so the Arduino can restart automatically after you program it. Once the radio pair is configured properly, it will pass the RTS line state directly from one device to the other.
Recently [Florin] was in the market for a basic uninterruptible power supply (UPS) to provide some peace of mind for the smart home equipment he had stashed around. Unfortunately, the cheap Serioux LD600LI unit he picked up left a bit to be desired, and required a bit of retrofitting.
To be fair, the issues that [Florin] ended up dealing with were less about the UPS’ capability to deal with these power issues, and more with the USB interface on the UPS. Initially the UPS seemed to communicate happily with HomeAssistant (HA) via Network UPS Tools over a generic USB protocol, after figuring out what device profile matched this re-branded generic UPS. That’s when HA began to constantly lose the connection with the UPS, risking its integration in the smart home setup.
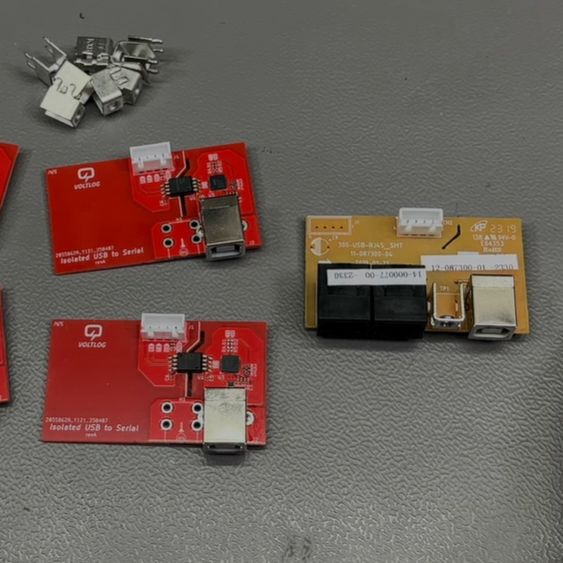
The old and new USB-serial boards side by side. (Credit: VoltLog, YouTube)
After tearing down the UPS to see what was going on, [Florin] found that it used a fairly generic USB-serial adapter featuring the common Cypress CY7C63310 family of low-speed USB controller. Apparently the firmware on this controller was simply not up to the task or poorly implemented, so a replacement was needed.
The process and implementation is covered in detail in the video. It’s quite straightforward, taking the 9600 baud serial link from the UPS’ main board and using a Silabs CP2102N USB-to-UART controller to create a virtual serial port on the USB side. These conversion boards have to be fully isolated, of course, which is where the HopeRF CMT8120 dual-channel digital isolator comes into play.
After assembly it almost fully worked, except that a Sonoff Zigbee controller in the smart home setup used the same Silabs controller, with thus the same USB PID/VID combo. Fortunately in Silabs AN721 it’s described how you can use an alternate PID (0xEA63) which fixed this issue until the next device with a CP2102N is installed
As it turns out, the cost of a $40 UPS is actually 10 hours of work and $61 in parts, although one cannot put a value on all the lessons learned here.
As the saying goes, modern problems require modern solutions. When the modern problem is that your smart light is being hijacked by the neighbors, [Wejn]’s modern solution is to reverse engineer and replace the mainboard.
The light in question is a Phillips Hue Ambiance, and [Wejn]’s excellently-documented six part series takes us through the process of creating a replacement light driver. It’s a good read, including reverse-engineering the PWM functions to get the lights to dim exactly like stock, and a dive into the Zigbee protocol so his rebuild light could still talk to the Philips Hue hub. The firmware [Wejn] wrote for the ESP32C6 he chose to use for this project is on GitHub, with the PCB in a second repo.
We want to applaud [Wejn] for his excellent documentation and open-sourcing (the firmware and PCB are under GPL v3). Not only do we get enough information to replicate this project perfectly if we so choose, but by writing out his design process, [Wejn] gives everyone reading a good head start in doing something similar with other hardware. Even if you’re scratching your head wondering why a light switch isn’t good enough anjymore, you have to appreciate what [Wejn] is offering the community.
Before you go, can we just take a moment to appreciate how bizarre the world has become that we have a DOOM-capable computer to run fancy light fixture? If you’re using what might have been a decent workstation in days of yore to perform a painfully mundane task, let us know on the tips line.
For one-off projects, adding a few integrated circuits to a PCB is not too big of a deal. The price of transistors is extremely low thanks to Moore and his laws, so we’re fairly free to throw chips around like peanuts. But for extremely space-constrained projects, huge production runs, or for engineering challenges, every bit of PCB real estate counts. [g3gg0] falls into the latter group, and this project aims to remove the dedicated USB-PD module from a lighting project and instead bit-bang the protocol with the ESP32 already on the board.
The modern USB power delivery (PD) protocol isn’t quite as simple as older USB ports that simply present a 5V source to whatever plugs itself into the port. But with the added complexity we get a lot more capability including different voltages and greater power handling capabilities. The first step with the PD protocol is to communicate with a power source, which requires a 1.2V 600kHz signal. Just generating the signal is challenging enough, but the data encoding for USB requires level changes to encode bits rather than voltage levels directly. With that handled, the program can then move on to encoding packets and sending them out over the bus.
After everything is said and done, [g3gg0] has a piece of software that lets the ESP32 request voltages from a power supply, sniff and log PD communication, and inject commands with vendor defined messages (VDM), all without needing to use something like a CH224K chip which would normally offload the USB-PD tasks. For anyone looking to save PCB space for whatever reason, this could be a valuable starting point. To see some more capabilities of the protocol, check out this USB-PD power supply that can deliver 2 kW.
A good source of hackable home automation parts has come for a while in the form of inexpensive modules offered by large retailers such as Lidl, or IKEA. They’re readily available and easy to play with, they work with open source hubs, so what’s not to like! As an example, [Circuit Valley] has an IKEA Vallhorn motion sensor for a teardown, it’s as you might expect, a passive infrared sensor (PIR) sensor coupled with a Zigbee interface.
Inside the ultrasonic welded case is a small PCB and a Fresnel lens on the inside of the top cover, and a small PCB for the electronics. We applaud the use of a Swiss Army knife can opener as a spudger. The interesting part comes in identifying the individual components: the Silicon Labs EFR32MG21 SoC is easy enough, but another mystery 8-pin chip is more elusive. The part number suggests an Analog Devices op-amp for signal conditioning the PIR output, but the pinout seems not to support it and from here we think it’s too expensive a part for a budget item like this.
There’s a handy header for talking to the SoC, which we’d love to report is open and ready to be hacked, but we’re not getting too optimistic. Even if not hackable though, we’re guessing many of you find uses for these things. Continue reading “A Look Inside IKEA’s Vallhorn Motion Sensor Teardown”→
Imagine you own a weather station. Then imagine that after some years have passed, you’ve had to replace one of the sensors multiple times. Your new problem is that the sensor is no longer available. What does a hacker like [Luca] do? Build a custom solution, of course!
[Luca]’s work concerns the La Crosse WS-9257F-IT weather station, and the repeat failures of the TX44DTH-IT external sensor. Thankfully, [Luca] found that the weather station’s communication protocol had been thoroughly reverse-engineered by [Fred], among others. He then set about creating a bridge to take humidity and temperature data from Zigbee sensors hooked up to his Home Assistant hub, and send it to the La Crosse weather station. This was achieved with the aid of a SX1276 LoRa module on a TTGO LoRa board. Details are on GitHub for the curious.
Luca didn’t just work on the Home Assistant integration, though. A standalone sensor was also developed, based on the Xiao SAMD21 microcontroller board and a BME280 temperature, pressure, and humidity sensor. It too can integrate with the Lacrosse weather station, and proved useful for one of [Luca’s] friends who was in the same boat.
Ultimately, it sucks when a manufacturer no longer supports hardware that you love and use every day. However, the hacking community has a way of working around such trifling limitations. It’s something to be proud of—as the corporate world leaves hardware behind, the hackers pick up the slack!