Surely our readers are well aware of all the downsides of owning an airplane. Certainly the cost of fuel is a big one. Birds are a problem, probably. That bill from the traveling propeller sharpener is a killer too…right? Alright fine, we admit it, nobody here at Hackaday owns an airplane. But probably neither do most of you; so don’t look so smug, pal.
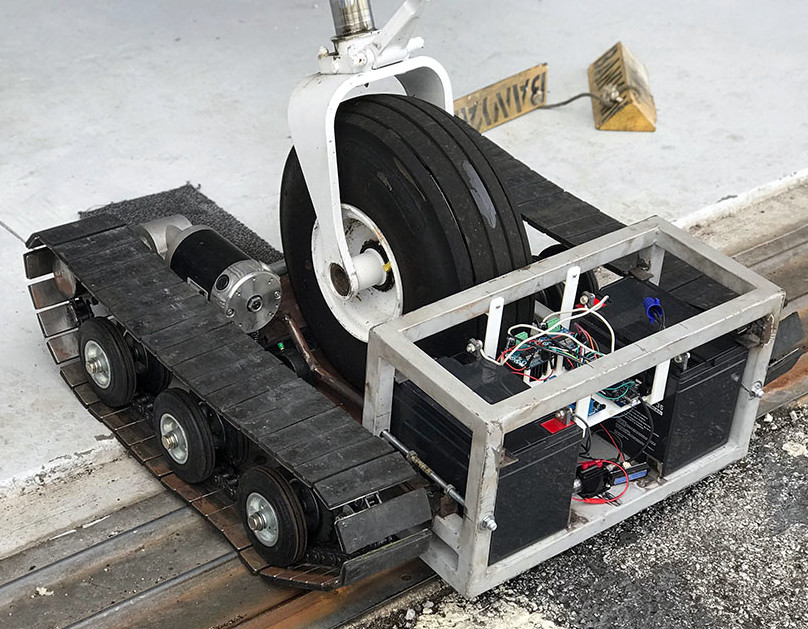
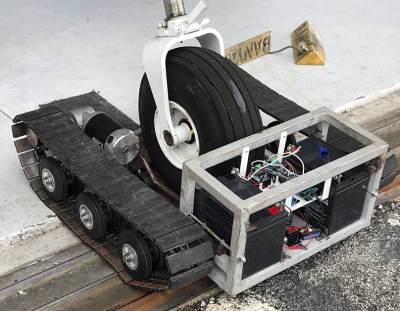 But if you did own a plane, or at least work at a small airport, you’d know that moving the things around on the ground is kind of a hassle. Smaller planes can be pulled by hand, but once they get up to a certain size you’ll want some kind of vehicle to help out. [Anthony DiPilato] wanted a way to move around a roughly 5,200 pound Cessna 310, and decided that all the commercial options were too expensive. So he built his own Arduino powered tank to muscle the airplane around the tarmac (if site is down try Google cache), and his journey from idea to finished product is absolutely fascinating to see.
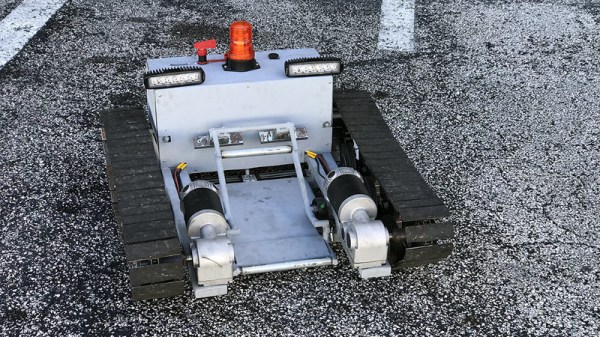
So the idea here is pretty simple. A little metal cart equipped with two beefy motors, an Arduino Mega, a pair of motor controllers, and a HC-08 Bluetooth module so you can control it from your phone. How hard could it be, right? Well, it turns out combining all those raw components into a little machine that’s strong enough to tow a full-scale aircraft takes some trial and error.
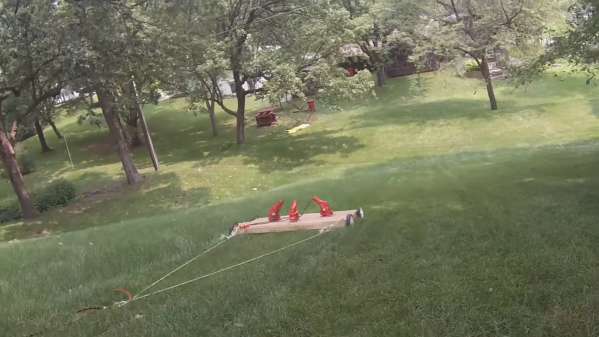
It took [Anthony] five iterations before he fine tuned the design to the point it was able to successfully drag the Cessna without crippling under the pressure. The early versions featured wheels, but eventually it was decided that a tracked vehicle would be required to get enough grip on the blacktop. Luckily for us, each failed design is shown along with a brief explanation about what went wrong. Admittedly it’s unlikely any of us will be recreating this particular project, but we always love to see when somebody goes through the trouble of explaining what went wrong. When you include that kind of information, somewhere, somehow, you’re saving another maker a bit of time and aggravation.
Hackers absolutely love machines with tank treads. From massive 3D printed designs to vaguely disturbing humanoid robots, there’s perhaps no sweeter form of locomotion in the hacker arsenal.
Continue reading “An Arduino Powered Tank Built To Pull Planes” →