Showing the ESP-Prog-Adapter board plugged into the ESP-Prog adapter, wired to a SOIC clip, that then attaches to a PCB under test

ESP-Prog-Adapter Makes Your ESP32 Tinkering Seamless

Did you ever struggle with an ESP32 board of yours, wishing you had exposed that UART, or seriously lacking the JTAG port access? If so, you should seriously check out [0xjmux]’s ESP-PROG-Adapter project, because [0xjmux] has put a lot of love and care into making your ESP32 hardware interfacing a breeze. This project shows you how to add JTAG and UART headers with extra low board footprint impact, gives you a KiCad library to do so super quickly, and shares a simple and helpful adapter PCB you can directly use with the exceptionally cheap Espressif’s ESP-Prog dongle you should have bought months ago.

The hardware is perfect for ZIF no-soldering interfacing – first of all, both UART and JTAG can be connected through a SOICBite connection, a solderless connector idea that lets you use SPI flashing clips on specially designed pads at the edge of your board. For the fancy toolkit hackers among us, there’s also a Tag Connect symbol suggested and a connector available, but it carries JTAG that you will already get with the SOICBite, so it’s maybe not worth spending extra money on.

Everything is fully open-source, as one could hope! If you’re doing ESP32 hacking, you simply have to order this board and a SOIC clip to go with it, given just how much trouble [0xjmux]’s board will save you when programming or debugging your ESP32 devices. Now, you don’t strictly need the ESP-Prog dongle – you could remix this into an adapter for the Pi Pico board instead. Oh, and if designing boards with ARM CPUs are your thing, you might benefit from being reminded about the Debug Edge standard!

Espressif’s ESP32-P4 Application Processor: Details Begin To Emerge

Every now and then there’s a part that comes along which is hotly anticipated, but which understandably its manufacturer remains tight-lipped about in order to preserve maximum impact surrounding its launch. Right now that’s Espressif’s ESP32-P4: a powerful application processor with dual-core 400 MHz and a single-core low power 40 MHz RISC-V processors. Interestingly it doesn’t appear to have the radios which have been a feature of previous ESP parts, but it makes up for those with a much more comprehensive array of peripherals.

Some details are beginning to emerge, whether from leaks or in preparation for launch, including the first signs of support in their JTAG tool, and a glimpse in a video from another Chinese company of a development board. We got our hopes up a little when we saw the P4 appearing in some Espressif documentation, but on closer examination there’s nothing there yet about the interesting new peripherals.

Looking at the dev board and the video we can see some of what the thing is capable of as it drives a large touchscreen and a camera. There are two MIPI DSI/CSI ports on  the PCB, as well as three USB ports and a sound codec. A more run-of-the-mill ESP32-C3 is present we think to provide wireless networking, and there’s a fourth USB port which we are fairly certain is in fact only for serial communications via a what our best blurry photograph reading tells us is a Silicon Labs USB-to-serial chip. Finally there’s large Raspberry Pi-style header which appears to carry all the GPIOs and other pins. We’ve placed the video below the break, if you see anything we’ve missed please tell us in the comments.

We first covered this chip back in January, and then as now we’re looking forward to seeing what our community does with it.

Continue reading “Espressif’s ESP32-P4 Application Processor: Details Begin To Emerge”

ESP-Drone: Building An ESP32-Based Quadcopter For Not Much Cash

What’s the cheapest quadcopter you can build? As [Circuit Digest] demonstrates with their variant of the ESP-Drone project by Espressif, you only need a minimum of parts: an ESP32 MCU, an inertial measurement unit (IMU) such as the MPU6050, and four MOSFETs to drive the brushless DC motors. As the PCB also forms the structural frame and landing struts for the quadcopter, not even a 3D printer is needed. All told, [Circuit Digest] figures the total BOM comes in at around 1,000 Indian Rupees, or about $12 USD.

The fully assembled ESP-Drone flying around. (Credit: Circuit Digest)

While this [Circuit Digest] project provides basic IMU functionality, the Espressif project also has a few expansion boards detailed on its hardware page, depending on the base model of the mainboard you pick. The [Circuit Digest] project follows the ESPlane-V2-S2 version with no expansion boards, but the ESP32-S2-Drone V1.2 mainboard can be extended with position-hold, pressure and compass modules, as well as custom boards.

As a derivative of the Bitcraze Crazyflie project, the ESP-Drone firmware also supports the rather nifty cfclient software for remote monitoring, logging and control. This may also be in the [Circuit Digest] firmware, but wasn’t listed among the features.

Continue reading “ESP-Drone: Building An ESP32-Based Quadcopter For Not Much Cash”

Clever E-Ink Driver Does 32 Levels Of Grey, Avoids Update Flicker, And More

There’s a lot to like about E-Ink displays, and you might be about to like them even more with [antirez]’s MicroPython driver for the Badger 2040 (or any display based on the UC8151 / IL0373) because it brings all kinds of useful features to your next project.

E-Ink displays are great. They are high contrast, daylight-readable, and require zero power to maintain a displayed image. But a few things come with the territory: displays have slow refresh rates compared to other display types, expect flickering during screen changes, and the displays are monochrome. [Antirez]’s new driver not only provides a MicroPython interface but goes in some fantastic directions that challenge those usual drawbacks.

Probably the most striking is the ability to display greyscale images without relying on dithering, which means the results avoid the charmingly gritty look of old-school dithering. Dithering has its place, but it’s not always the best choice, so options are great.

Similarly, display flicker may be a small price to pay for some, but if the obvious flicker is too boorish and crude-looking one can use an anti-flicker refresh mode that greatly limits flickering at the cost of update speed. Over time some image ghosting will accumulate which necessitates an occasional whole-screen refresh, but the effect is overall much nicer when updating something like a clock face.

How is this all done? It turns out that the controller chips for these displays are highly configurable, and it’s possible to do much more than simply drive the display in known-good and completely approved modes. It’s also entirely possible to permanently damage one’s display by doing so. Part of what makes [antirez]’s work so appealing is that he has already done the work finding workable configurations.

His driver is designed using computed LUTs (look-up tables) that make using and exploring alternative refresh modes easy and efficient, invaluable for exploring the capabilities of a patented, poorly documented technology like E-Paper displays.

We’ve seen the Badger 2040 E-Ink display in a teapot timer and a custom macropad, and [antirez]’s uc8151_micropython project is a fantastic step forward. And don’t miss another of [antirez]’s clever microcontroller hacks: playing audio without a DAC.

Commodore CHESSmate Replica Runs On The ESP32

The Commodore CHESSmate chess computer might not be terribly well known, but that doesn’t make it any less worthy of being reproduced. If anything it is more important, as it gives more people an opportunity to use one of these devices, yet beyond a purely emulated experience the real user interface is harder to experience.

Internals of the reproduction Commodore ChessMate (Credit: Michael Gardi)

This is where [Michael Gardi]’s modernized replica provides a highly accessible version, consisting of a custom PCB with an ESP32 as the brains of the system. Although decidedly overkill next to the 6502 in the original CHESSmate, it makes the project far easier for others to assemble as it contains few components that shouldn’t be readily available.

The ESP32 is mounted on a small daughterboard which plugs into the main PCB with the buttons, LEDs and indicators. The whole stack is then inserted into the 3D printed reproduction case. These 3D models along with the ESP32 port of the CHESSmate firmware can be found in the GitHub repository, along with a minimalist frame and a ‘CHESSmate Lite’ version as alternative enclosure options for those who somehow don’t appreciate the delightful 1980s aesthetics.

We covered the Commodore CHESSmate last year, including a highly faithful reproduction built by [Hans Otten], which [Michael] read the day after meeting [Peter Jennings], the author of MicroChess (which the CHESSmate uses internally) at an event at York University. Taking this as a sign, he set to work on this particular project.

We’re not sure if there’s really a cosmic force directing [Michael] towards his next project, but if there is, we’d like to take this opportunity to thank it for doing a fantastic job so far.

PCB Design Review: ESP32-S3 Round LCD Board

For our next installment, I have a lovely and daring PCB submitted by one of our readers, [Vas]. This is an ESP32-S3 board that also has an onboard round TFT display, very similar to the one we used on the Vectorscope badge. The badge is self-sufficient – it has an ESP32, it has a display, a programming connector, two different QWIIC ports you could surely use as GPIOs – what’s not to love?

This is a two-layer board, and I have to admit that I seriously enjoy such designs. Managing to put a whole lot of things into two layers is quite cool in my book, and I have great fun doing so whenever I get the opportunity. There’s nothing wrong with taking up more layers than needed – in fact, if you’re concerned about emitted/received noise or you have high-speed interfaces, four-layer is the way to go. But making complex boards with two layers is a nice challenge, and, it does tend to make these boards cheaper to manufacture as a very nice bonus.

Let’s improve upon it, and support [Vas]’s design. From what I can see looking at this board, we can help [Vas] a lot with ease of assembly, perhaps even help save a hefty amount of money if they go for third-party PCBA instead of sitting down with a stencil – which you could do with this board pretty easily, since all of the components on it, save for the display, are the ones you’d expect JLCPCB to stock.

Continue reading “PCB Design Review: ESP32-S3 Round LCD Board”

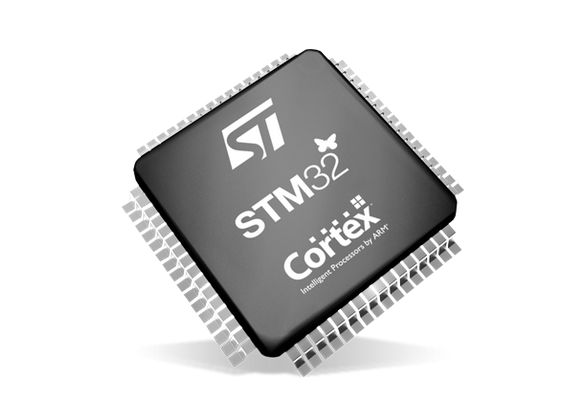
STM32 Draws On Scope

Drawing on an oscilloscope’s XY mode isn’t a new idea. However, if you’ve ever wanted to give it a go, you’d be hard-pressed to find more information than the nearly hour-and-a-half video about the topic from [Low Byte Productions]. You can check out the video below.

If you prefer to jump straight into the code, there’s a GitHub page. While the code is specific to the STM32, you can apply the ideas to anything.

Continue reading “STM32 Draws On Scope”