Passion Project Turns BeagleBone Into Standalone Super NES

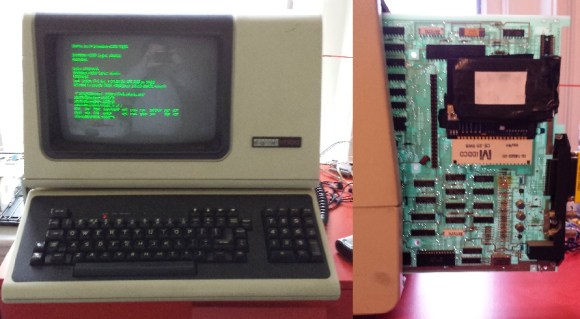
So you want to play some retro games on your BeagleBone, just load up Linux and start your favorite emulator right? Not if you’re serious about it. [Andrew Henderson] started down this path with the BeagleBoard-xM (predecessor of the BeagleBone Black) and discovered that the performance with Snes9X wasn’t quite what he had in mind. He got the itch and created a full-blown distro called BeagleSNES which includes bootloader and kernel hacks for better peformance, a custom GUI, and is in the process of developing hardware for the embedded gaming rig. Check out the documentation that goes along with the project (PDF); it’s a blueprint for how open source project guides should be presented!

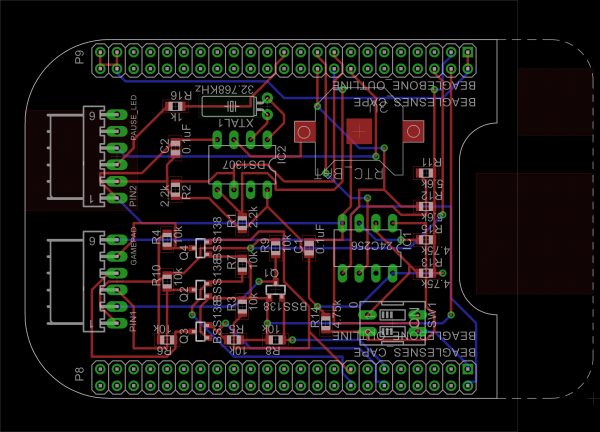
The hardware he’s currently working on is a Cape (what add-on boards for the BBB are called) that adds connectors for original Nintendo and Super Nintendo controllers. It also includes an RTC which will stand in for the real-time clock features included in some cartridges (Pokemon Yellow). Also in the works is a 3D printed enclosure which would turn it into a portable, something like this other BBB portable hack.

Check out a demo of what BeagleSNES can do in the video after the break.

Continue reading “Passion Project Turns BeagleBone Into Standalone Super NES”

VT100 Gets BeagleBoned

vt100

How do you make a great terminal even better?  The answer is simple: add a BeagleBone Black to it! [Brendan] got his hands on one of the staples of classic computing, the DEC VT100 terminal.  The VT100 was produced from 1978 to 1983. The terminal was so widely used that it became the standard for other terminals to emulate. Open any terminal program today and chances are you’ll find a setting for VT100 emulation.

[Brendan] originally hooked his terminal up to a laptop running Linux. The terminal, cables, and the laptop itself became quite a bit to manage on a small desk. To combat this he decided to add a BeagleBone Black inside the terminal case. It turns out the VT100 actually lends itself to this with its Standard Terminal Port (STP) connector. The STP was designed to add a “paddle board” in-line with the serial stream of the terminal. DEC and third party manufacturers used this port to add everything from disk drives to entire CPM computers to the VT100.

[Brendan] began by designing a board to interface between the VT100 and the BeagleBone. The board level shifts serial lines from the BeagleBone to the VT100. The STP also allows the terminal to provide power to the BeagleBone Black.  He did notice some power glitches as the supply of the VT100 came up. This was solved with a standard TI TL77xx voltage supervisor chip. The hardest part of the entire design was the card edge connector for the STP. [Brendan] nailed the dimensions on the first try.  In the end [Brendan] was rewarded with a very clean installation that didn’t require any modification to a classic piece of hardware.

We should note that most PCB houses use Electroless Nickel Immersion Gold (ENIG) as their standard coating. This will work for a card edge connector that will be plugged in and removed a few times.  Cards that will be inserted and removed often (such as classic console cartridges) will quickly scrape the ENIG coating off. Electroplated Gold over Nickel is the classically accepted material for card edge connectors, however the process most likely is not going to come cheap in hobbyist quantities.

BeagleBone SensorCape Lets You Measure Just About Anything

beaglebone-sensor-cape

Here’s another entry in the 2013 Intern Design Challenge which motivates summer Interns at Texas Instruments to build something cool for one of a handful of embedded platforms. This entry, developed by [Michael Leonard] is a cape for the BeagleBone Black which has footprints for a bunch of different sensors.

Use it to turn your BeagleBone into a weather station by populating the temperature, pressure, and humidity sensors. Or perhaps you’d prefer an IMU for your next quadcopter by populating the MPU-9150 chip on the pad labeled ‘9-Axis’. This part is an accelerometer, gyroscope, and digital compass all in one. There’s also room for a light sensor and an IR remote control receiver, with the large square pads on the right servung as breakouts for input buttons. If you want all the nitty-gritty on the sensors he designed for [Michael’s] done a great job of compiling a reference manual for the board.

[Michael] didn’t send us a link until he saw the retro-gaming cape we featured on Tuesday. Come on people! Don’t hide in the basement and build stuff unless you’re going to tell us about it.

Continue reading “BeagleBone SensorCape Lets You Measure Just About Anything”

RF Wireless Kernel Module For Raspberry Pi, BeagleBone And Others

rfm12b-kernel-module

If you’ve done any wireless work with hobby electronics you probably recognize this part. The green PCB is an RFM12B wireless board. They come in a few different operating bandwidths, the 433 MHz is probably the most common. They’re super easy to interface with a small microcontroller but what about an embedded Linux board? That is the focus of this project, which builds a kernel driver for the RF module.

You can get your own RFM12B for a few bucks. They’re quite versatile when paired, but a lot of inexpensive wireless consumer goods operate on this band so the board can be used to send commands to wireless outlets, light fixtures, etc. [Georg] has been working with the BeagleBone, BeagleBone Black, and Raspberry Pi. His software package lets you build a kernel module to add an entry for the device into the /dev directory of a Linux system. So far the three boards listed are all that’s supported, but if you have five I/O pins available it should be a snap to tailor this to other hardware.

Wondering what else you can do with the setup? This will get the receiving end of a text-messaging doorbell up and running in no time.

Continue reading “RF Wireless Kernel Module For Raspberry Pi, BeagleBone And Others”

A Gaggle Of Boards Makes For An I2C Playground

It’s not much of a stretch to assume that the majority of Hackaday readers are at least familiar with I2C. In fact, there’s an excellent chance that anyone who’s ever done more with an Arduino than blink the onboard LED has at one time or another used the serial communication protocol to talk to a sensor, display, or other external gadget. Of course, just because most of us have used it in a few projects doesn’t mean we truly understand it.

If you’re looking to brush up on your I2C knowledge, you could do worse than to follow the guide [András Tevesz] recently wrote up. With a title like Hardware Hacking 101: E01 I2C Sniffing, How to Listen to Your Arduino’s I2C Bus, you know you’re in for a good time. While the document is arguably geared more towards security researchers than electronic hobbyists, the concepts presented can be useful even if you’re just trying to debug your own projects. Continue reading “A Gaggle Of Boards Makes For An I2C Playground”

A Power Button For Raspberry Pi, Courtesy Of Device Tree Overlays

As a standard feature of the Linux kernel, device tree overlays (DTOs) allow for easy enabling and configuration of features and drivers, such as those contained within the standard firmware of a Raspberry Pi system. Using these DTOs it’s trivial to set up features like as a soft power-off button, triggering an external power supply and enable drivers for everything from an external real-time clock (RTC) to various displays, sensors and audio devices, all without modifying the operating system or using custom scripts.

It’s also possible to add your own DTOs to create a custom overlay that combines multiple DTO commands into a single one, or create a custom device tree binary (DTB) for the target hardware. Essentially this DTB is loaded by the Linux kernel on boot to let it know which devices are connected and their configuration settings, very similar to what the BIOS component with x86-based architectures handles automatically.

Ultimately, the DTB concept and the use of overlays allow for easy configuration of such optional devices and GPIO pin settings, especially when made configurable through a simple text file as on the Raspberry Pi SBC platform.

Continue reading “A Power Button For Raspberry Pi, Courtesy Of Device Tree Overlays”

Altium Has Its 2kicad Moment

Around these parts we tend to be exponents of the KiCad lifestyle; what better way to design a PCBA than with free and open source tools that run anywhere? But there are still capabilities in commercial EDA packages that haven’t found their way into KiCad yet, so it may not always be the best tool for the job. Altium Designer is a popular non-libre option, but at up to tens of thousands of USD per seat it’s not always a good fit for users and businesses without a serious need.

It’s hard to find an exciting photo of a dialog box

What do you do as a KiCad user who encounters a design in Altium you’d like to work with? Well as of April 3rd 2020, [Thomas Pointhuber] has merged the beginnings of a native Altium importer into KiCad which looks to be slated for the 6.0 release. As [Thomas] himself points out in the patch submission, this is hardly the first time a 3rd party Altium importer has been published. His new work is a translation of the Perl plugin altium2kicad by [thesourcerer8]. And back in January another user left a comment with links to four other (non-KiCad) tools to handle Altium files.

If you’d like to try out this nifty new feature for yourself, CNX has a great walkthrough starting at building KiCad from source. As for documents to test against the classic BeagleBone Black sources seen above can be found at on GitHub. Head past the break to check out the very boring, but very exciting video of the importer at work, courtesy of [Thomas] himself. We can’t wait to give this a shot!

Thanks for the tip [Chris Gammell]!

Continue reading “Altium Has Its 2kicad Moment”