Make Your Own Pot And Encoder Knobs, Without Reinventing Them

Rotary potentiometers, switches, and encoders all share a basic design: adjustment is done via a shaft onto which a knob is attached, and knobs are sold separately. That doesn’t mean one knob fits all; there are actually a few different standards. But just because knobs are inexpensive and easily obtained doesn’t mean it’s not worth making your own.

A simple and effective indicator can be easily printed in a contrasting color.

Why bother 3D printing your own knobs instead of buying them? For one thing, making them means one can rest assured that every knob matches aesthetically. The ability to add custom or nonstandard markings are another bonus. Finally, there’s no need to re-invent the wheel, because [Tommy]’s guide to making your own knobs has it all figured out, with the OpenSCAD script to match.

By default, [Tommy]’s script will generate a knob with three shims (for interfacing to a splined shaft) when pot_knob(); is called. The number of shims can be adjusted by modifying potKnobDefaultShimCount. To give the knob a flat side (to interface with D-shafts), change flatted = false to flatted = true. And for adding a screw insert suitable for a set screw? Change tightenerDiameter = 0 from zero to the diameter desired.

The script is quite comprehensive and has sensible defaults, but it does require a bit of knowledge about OpenSCAD itself to use effectively. We have covered the basics of OpenSCAD in the past, and if you’re ready for a resource that will help you truly master it, here’s where to look.

Ride-on Star Wars Land Speeder Gets A Real Jet Engine

When it comes to children’s ride-on toys, the Star Wars Land Speeder is one of the cooler examples out there. However, with weedy 12-volt motors, they certainly don’t move quickly. [Joel Creates] decided to fix all that, hopping up his land speeder with a real jet engine.

First, the original drivetrain was removed, with new wheels installed underneath. Initially, it was set up with the front wheels steering, while the rear wheels were left to caster freely. A RC jet engine was installed in the center engine slot on the back of the land speeder, and was controlled via a standard 2-channel RC transmitter.

The jet engine worked, but the wheel configuration led to the speeder simply doing donuts. With the speeder reconfigured with rear wheels locked in place, the speeder handled much more predictably. Testing space was limited to a carpark, so high-speed running was out of the question. However, based on the limited testing achieved, it looks as though the speeder would be capable of a decent clip with the throttle maxed out.

It’s not a practical build, but it sure looks like a fun one. [Joel Creates] has big dreams of adding two more jet engines and taking it out to a runway for high-speed testing, and that’s something we’d love to see.

RC jet engines are a bit of a YouTube fad right now, showing up on everything from RC cars to Teslas. Video after the break.

Continue reading “Ride-on Star Wars Land Speeder Gets A Real Jet Engine”

Probing CAN Bus For EV Battery Info

The widespread adoption of the CAN bus (and OBD-II) in automobiles was largely a way of standardizing the maintenance of increasingly complicated engines and their needs to meet modern emissions standards. While that might sound a little dry on the surface, the existence and standardization of this communications bus in essentially all passenger vehicles for three decades has led to some interesting side effects, like it’s usage in this project to display some extra information about an electric car’s battery.

There’s not a ton of information about it, but it’s a great proof-of-concept of some of the things CAN opens up in vehicles. The build is based on a Citroën C-Zero (which is essentially just a re-badged Mitsubishi i-MiEV) and uses the information on the CAN bus to display specific information about the state of charge of the battery that isn’t otherwise shown on the car’s displays. It also includes a build of a new secondary display specifically for this purpose, and the build is sleek enough that it looks like a standard part of the car.

While there are certainly other (perhaps simpler) ways of interfacing with a CAN bus, this one uses off-the-shelf electronics like Arduino-compatible microcontrollers, is permanently installed, and has a custom case that we really like. If you’re just starting to sniff around your own vehicle’s CAN bus, there are some excellent tools available to check out.

Thanks to [James] for the tip!

Continue reading “Probing CAN Bus For EV Battery Info”

Volvo C30 Custom Gauge And CAN Bus Reverse Engineering

With cars being essentially CAN buses on wheels, it’s no wonder that there’s a lot of juicy information about the car’s status zipping about on these buses. The main question is usually how to get access to this information, both in terms of wiring into the relevant CAN bus, and decoding the used (proprietary) protocol. Fortunately for [Alex], decoding the Volvo VIDA protocol used with his Volvo C30 was relatively straightforward, enabling the creation of a custom gauge that displays information like boost pressure and coolant temperature.

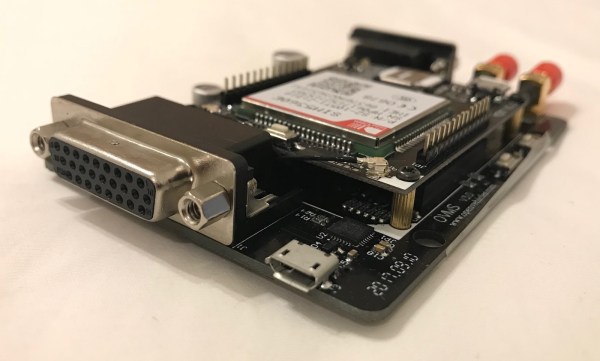
The physical interfacing is accomplished via the car’s OBD port, which conveniently provides access to the car’s two (high-speed and low-speed) CAN buses. Hardware of choice is an M2 UTH (Under the Hood) board, sporting a SAM3X Cortex-M3-based MCU, designed for permanent automotive installations. On [Alex]’s GitHub project page it is explained how the protocol works, and which bytes to look for when replicating the project.

Rounding off the project is a round LCD display from 4D Systems that cycles through the status update screens. As a bonus, the dashboard illumination level is also read out in real-time, so the brightness of the display is adjusted to fit this level. All in all a well-rounded project, with interesting prospects for a more permanent integration of the gauge into the dashboard proper.

Continue reading “Volvo C30 Custom Gauge And CAN Bus Reverse Engineering”

Building Faster Rsync From Scratch In Go

For a quick file transfer between two computers, SCP is a fine program to use. For more complex, large, or regular backups, however, the go-to tool is rsync. It’s faster, more efficient, and usable in a wider range of circumstances. For all its perks, [Michael Stapelberg] felt that it had one major weakness: it is a tool written in C. [Michael] is philosophically opposed to programs written in C, so he set out to implement rsync from scratch in Go instead.

[Michael]’s path to deciding to tackle this project is a complicated one. His ISP upgraded his internet connection to 25 Gbit/s recently, which means that his custom router was the bottleneck in his network. To solve that problem he migrated his router to a PC with several 25 Gbit/s network cards. To take full advantage of the speed now theoretically available, he began using a tool called gokrazy, which turns applications written in Go into their own appliance. That means that instead of installing a full Linux distribution to handle specific tasks (like a router, for example), the only thing loaded on the computer is essentially the Linux kernel, the Go compiler and libraries, and then the Go application itself.

With a new router with hardware capable of supporting these fast speeds and only running software written in Go, the last step was finally to build rsync to support his tasks on his network. This meant that rsync itself needed to be built from scratch in Go. Once [Michael] completed this final task, he found that his implementation of rsync is actually much faster than the version built in C, thanks to the modernization found in the Go language and the fact that his router isn’t running all of the cruft associated with a standard Linux distribution.

For a software project of this scope, we find [Michael]’s step-by-step process worth taking note of for any problem any of us attempt to tackle. Not only that, refactoring a foundational tool like rsync is an involved task on its own, let alone its creation simply to increase network speeds beyond what most of us would already consider blazingly fast. We’re leaving out a ton of details on this build so we definitely recommend checking out his talk in the video below.

Thanks to [sarinkhan] for the tip!

Continue reading “Building Faster Rsync From Scratch In Go”

A Minimal Motoring Manifesto

A couple of years ago, Hackaday published an article, “Electric Vehicles Continue the Same Wasteful Mistakes That Limit Longevity“, in which we took a look at the way the car industry, instead of taking the move to electric traction as an opportunity to simplify their products, was instead making their electric offerings far more complex. It touched a nerve and received a very large comment volume, such that now it is our 19th most commented story of all time.

It’s something brought back to the fore by seeing a The Drive piece bemoaning the evolution of the automobile as a software receptacle governed by end-user licenses rather than a machine under the control of its owner. In turn that’s posed the question: Just what do you really need for a car, and what is superfluous? Time to provide an answer to that question, so here it is: a minimal motoring manifesto. Continue reading “A Minimal Motoring Manifesto”

3D Printing A Guitar Neck

A lot of first-time guitar builders focus on making the body and skip the neck, which has lots of tricky dimensions to get right to if you want a nicely playable instrument. However, [Jón Schone] of Proper Printing wanted to start with the hard part on his guitar building journey, and set about 3D printing a guitar neck in one piece.

Designing a neck might sound difficult on the surface of it, but the Marz Guitar Designer plugin for FreeCAD helps make whipping one up a cinch. Once imported into Fusion 360, the geometry is tweaked for 3D printing, particularly to fit the truss rod inside. Printed on a Creality CF30 belt printer (which interestingly enough, has been mounted to the wall) in green PLA, the resulting neck can be spotted as a non-traditional design from a mile away. With a truss rod hammered in, frets installed, and hardware attached, it’s mounted up to a cheap kit guitar for testing.

The printed neck works, and it’s given a proper shakedown with some appropriate riffs to put it through its paces. It’s reportedly a bit on the flexible side, but remains playable and is surprisingly normal in its performance. [Jón] now plans to continue the project by 3D printing the rest of the guitar.

Meanwhile, if you’re sick of tuning your own guitar, consider building a robot tuner to help out. Video after the break.

Continue reading “3D Printing A Guitar Neck”