You can buy gears off the shelf, of course, and get accurately machined parts exactly to your chosen specification. However, there’s something rugged and individualist about producing your own rotating components. [Maciej Nowak] demonstrates just how to produce your own gears with a homemade cutting tool.
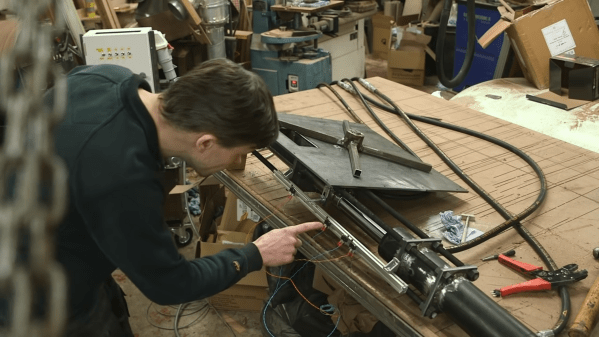
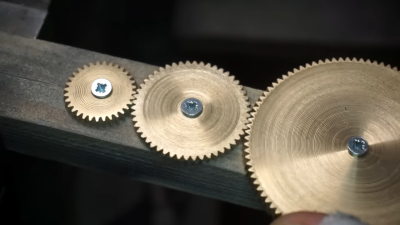 The cutting tool for the job is an M16 machine tap, chosen for the smaller flutes compared to a hand tap. This makes it more suitable for cutting gears. It’s turned by a belt driven pulley, run by a small motor. The workpiece to be cut into a gear is then fed into the cutting tool by sliding on a linear bearing, with its position controlled by a threaded rod. The rod can be slowly turned by hand to adjust the workpiece position, to allow the gear teeth to be cut to an appropriate depth.
The method of action is simple. As the tap turns it not only cuts into the workpiece, but rotates it on a bearing as well. By this method, it cuts regular teeth into the full circumference, creating a gear. Obviously, this method doesn’t create highly-complex tooth shapes for ultimate performance, but it’s more than capable of creating usable brass and steel gears for various purposes. The same tool can be used to cut many different sizes of gear to produce a whole geartrain. As a bonus, the resulting gears can be used with M16 threads serving as worm gears, thanks to the pitch of the tap.
If you find yourself needing to produce tough metal gears on the regular, you might find such a tool very useful. Alternatively, we’ve explored methods of producing your own sprockets too, both in a tidy manner, and in a more haphazard fashion. Video after the break.
Continue reading “Cut Your Own Gears With This DIY Machine” →