
Today it is easier than ever to learn how to program a computer. Everyone has one (and probably has several) and there are tons of resources available. You can even program entirely in your web browser and avoid having to install programming languages and other arcane software. But it wasn’t always like this. In the sixties and seventies, you usually learned to program on computers that didn’t exist. I was recently musing about those computers that were never real and wondering if we are better off now with a computer at every neophyte’s fingertips or if somehow these fictional computing devices were useful in the education process.
Back in the day, almost no one had a computer. Even if you were in the computer business, the chances that you had a computer that was all yours was almost unheard of. In the old days, computers cost money — a lot of money. They required special power and cooling. They needed a platoon of people to operate them. They took up a lot of space. The idea of letting students just run programs to learn was ludicrous.
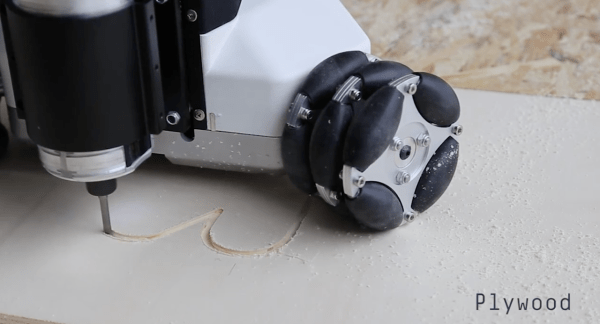
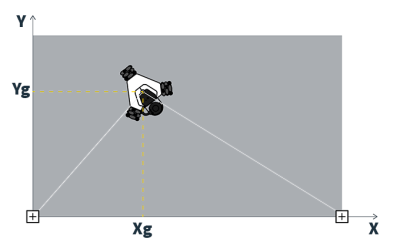 What really caught our eye is the Goliath’s unique positioning system. While most CNC machines have the luxury of end-stops or servomotors capable of precise positional control, the Goliath has two “base sensors” that are tethered to the top of the machine and mounted to the edge of the workpiece. Each sensor connects to the host computer via USB and uses vaguely termed “Radio Frequency technology” that provides a 100Hz update for the machine’s coordinate system. This setup is sure to beat out dead-reckoning for positional awareness, but details are scant on how it precisely operates. We’d love to know more if you’ve used a similar setup for local positioning as this is still a daunting task for indoor robots.