Arduino And Encoder Form Precision Jig For Cutting And Drilling

“Measure twice, cut once” is great advice in every aspect of fabrication, but perhaps nowhere is it more important than when building a CNC machine. When precision is the name of the game, you need measuring tools that will give you repeatable results and preferably won’t cost a fortune. That’s the idea behind this Arduino-based measuring jig for fabricating parts for a CNC build.

When it comes to building on the cheap, nobody holds a candle to [HomoFaciens]. We’ve seen his garbage can CNC build and encoders from e-waste and tin cans, all of which gave surprisingly good results despite incorporating such compliant materials as particle board and scraps of plumber’s strapping. Looking to build a more robust machine, he finds himself in need of parts of consistent and accurate lengths, so he built this jig. A sled of particle board and a fence of angle aluminum position the square tube stock, and a roller with a paper encoder wheel bears on the tube under spring pressure. By counting pulses from the optical sensors, he’s able to precisely position the tube in the jig for cutting and drilling operations. See it in action in the video after the break.

If you’ve been following [HomoFaciens], you’ll no doubt see where he’s been going — build a low-end tool, use that to build a better one, and so on. We’re excited to see him moving into more robust materials, but we’ll miss the cardboard and paperclip builds.

Continue reading “Arduino And Encoder Form Precision Jig For Cutting And Drilling”

A Mobile Bar In A Trailer!

Ok, there are some worthy laws in place regulating the sale and distribution of alcohol — and for good reason. For many a bootlegger, however, the dream of renovating an old trailer from 1946 into a mobile bar is a dream that must– wait, what? That already exists?

It’s no mobile workshop, but the bar was initially built to accommodate guests at their wedding. [HelloPennyBar] has shared the reconstruction process with the world. Inside, there’s everything you’d need to serve beverages, including a (double) kitchen sink. In addition to a water tank, a pair of car batteries serve as the central power with electrical work installed for interior lights, a small fan to keep the bartenders cool, exterior lights, a water pump, the trailer lights, and more exterior lights so the patrons can party the night away.

Before you say anything, [HelloPennyBar] says they would need a license to sell alcohol, but alleges that for serving alcohol at private events in their state it suffices to have an off-site responsible serving license. Furthermore, a few helpful redditors have chimed in regarding battery safety and cable-mounts, to which [HelloPennyBar] was amenable. Safety and legality noted, the mobile bar must make for a novel evening of fun.

[via /r/DIY]

Self balancing robot

Building A Self-Balancing Robot Made Easy

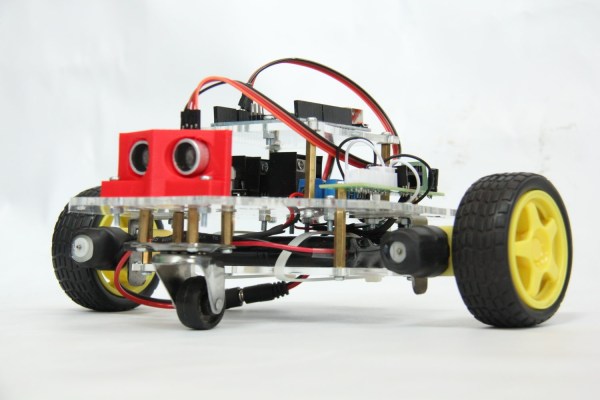
Not only has [Joop Brokking] built an easy to make balancing robot but he’s produced an excellent set of plans and software for anyone else who wants to make one too. Self-balancers are a milestone in your robot building life. They stand on two-wheels, using a PID control loop to actuate the two motors using data from some type of Inertial Measurement Unit (IMU). It sounds simple, but when starting from scratch there’s a lot of choices to be made and a lot of traps to fall into. [Joop’s] video explains the basic principles and covers the reasons he’s done things the way he has — all the advice you’d be looking for when building one of your own.

He chose steppers over cheaper DC motors because this delivers precision and avoids issues when the battery voltage drops. His software includes a program for getting a calibration value for the IMU. He also shows how to set the drive current for the stepper controllers. And he does all this clearly, and at a pace that’s neither too fast, nor too slow. His video is definitely worth checking out below.

Continue reading “Building A Self-Balancing Robot Made Easy”

Saving A Part-Way-Through Failed 3D Print

This will be an experience shared by all 3D printer owners; a long print is mostly done, and something goes wrong. Result: most of the print and a heap of plastic vermicelli, or worse still, a print with an obviously offset layer in it.

[Simon Merrett] had a large part running on his printer, and 2.5 hours in to a 3 hour print the nozzle caught the edge of what he had already done, and as a result he was extruding into thin air (He told us in his tip email that his machine build was the likely culprit). Being fortunate enough to see it happening, he was able to hit the stop button in his Repetier software and bring the calamity to a swift halt.

How he rescued the situation is an interesting tale which he’s recorded in the screen capture video we’ve placed below the break, it involved using a spreadsheet to analyse the G-Code and remove the lines for the part he had already printed before inserting a new set of Z-axis dimensions to start the remaining section of print from the bed upwards. A few further fixes, and he was able to print the rest of his part, which he could then glue to the unfinished top of the section he had already printed. He points out in his YouTube description that he emailed the Repetier folks, and they told him a quicker way to deal with the Z-axis: using the G92 command to reset it.

You might ask why if he was prepared to spend this amount of time he didn’t simply reprint the entire part. But he points out, in that event the print could well have failed again at exactly the same point.

Continue reading “Saving A Part-Way-Through Failed 3D Print”

Z80 Based Raspberry Pi Look-alike

Homebrew computers are the ‘in thing’ these days and the Zilog Z80 is the most popular choice for making one on your own. We have seen some pretty awesome builds but [Martin K]’s Z-berry is the smallest on record yet. As the name suggests, the retrocomputer conforms to the Raspberry Pi form factor which includes the GPIO header.

The Z-berry is designed with a Z80 CPU running at 10 MHz (20 MHz possible) and comes with 32 kB ROM
and 512 kB RAM. In addition to the serial interface, the computer boasts an I2C bus, an SPI bus, and a PS/2 keyboard connector to boot. [Martin K] has a video where the finished system is enclosed in a Raspberry Pi case and has an I2C OLED display attached and working.

[Martin K] has posted a lot of details on how to make your own Z-berry which includes the BOM, schematic and preliminary information. We reached out to him to find out more about the software which is stable and available on request along with PCBs and sample code. Additionally, this project promises to draw much less current than the Raspberry Pi and should prove useful for anyone looking to create a retro solution to a modern problem.

It is interesting to see projects that combine modern techniques with retro technologies. One of the best Z80 projects we have seen is the FAP80 and there are some awesome homebrew computer projects on Hackaday.io for you to take a look and get inspiration.
Continue reading “Z80 Based Raspberry Pi Look-alike”

Hackaday Prize Entry: Water Level Station

All over the world, in particular in underdeveloped countries, people die every year by the thousands because of floods. The sudden rise of water levels often come unannounced and people have no time to react before they are caught in a bad spot. Modern countries commonly have measure equipment deployed around problematic areas but they are usually expensive for third world countries to afford.

[Benne] project devises a low-cost, cloud-connected, water level measuring station to allow remote and central water level monitoring for local authorities. He hopes that by being able to monitor water levels in a more precise and timely fashion, authorities can act sooner to warn potentially affected areas and increase the chance of saving lives in case of a natural disaster.

At the moment, the project is still in an early stage as they are testing with different sensors to figure out which would work best in different scenarios. Latest version consists essentially in an Arduino UNO, an ultrasonic distance sensor, and a DHT temperature/humidity sensor to provide calibration since these characteristics affect the speed of sound. Some years ago, we covered a simple water level monitoring using a Parallax Ping sensor, but back then the IoT and the ‘cloud’ weren’t nearly as fashionable. They also tested with infrared sensors and a rotary encoder.

They made a video of the rotary encoder, which we can see below:

Continue reading “Hackaday Prize Entry: Water Level Station”

Holograms Can’t Be Too Thin

We’ve seen the 3D phone fad come and go, with devices like the Evo 3D, that used a parallax barrier to achieve autostereoscopy (that is, 3D viewing without glasses). These displays aren’t holograms, they are just showing your eyes two different images like a 3D movie or a stereopticon. However, researchers from Australia and China are hoping to change that. They’ve developed a nano-hologram (their term) that is about 1000 times thinner than a human hair. You can see a video about the invention, below.

Conventional holograms modulate the phase of light to give the illusion of three-dimensional depth. But to generate the required phase shifts, those holograms need to be as thick as the optical wavelengths involved. The researchers claim the holograms are “simple” to make, but that depends on what you compare it to. You need some exotic materials, vacuum deposition gear, and a laser that can do femtosecond-long pulses.

The research team has broken this thickness limit with a 25 nanometer hologram. Their technique relies on a topological insulator material a novel quantum material that holds a low refractive index in the surface layer but a much higher refractive index in the bulk of the material. This forms an intrinsic optical resonant cavity which can enhance the phase shifts and makes holography possible.

The next step is to develop a rigid thin film to overlay an LCD screen. The current version has pixels at least ten times too large to be practical for that application, so that’s another hurdle to overcome.

We’ve seen screens that shoot 3D images on movies like Star Wars for years. This isn’t it yet, but it is the next step. Imagine a phone, a wrist watch, or a contact lens that could generate a holographic image. Or a garbage-can-sized robot.

Continue reading “Holograms Can’t Be Too Thin”