Foldable Dymaxion Globe

Some time back, we posted about [Gavin]’s laser-cut/3D printed Dymaxion Globe — if you haven’t read about it yet, you should check it out. [noniq] loved the idea, and like a true hacker, built and shared an improved Foldable Dymaxion Globe. It can snap together to form an icosahedron globe, or it can be laid flat to form a map.

Duct tape, stoppers and magnet holders

Like the original, [noniq]’s version is laser cut and engraved, and uses some 3D printed parts. But it does away with the fasteners (that’s 60 pairs of nuts and bolts), and instead uses neodymium magnets to make all the triangle pieces snap together to form the icosahedron globe. The hinges are simply some pieces of gaffer-tape.

This design improvement creates a cleaner globe and also addresses some of the concerns posted in the comments of the earlier build. The design files are available for download on [noniq]’s blog — you need to 3D print some magnet holders and stopper plates, and laser cut the 20 triangle tiles. The stopper plates help ensure that the angle between tiles when it is put together is limited to 138 degrees, making it easier to assemble the globe.

Check out the video after the break to hear the satisfying “thunk” of neodymium magnets snapping together.

Continue reading “Foldable Dymaxion Globe”

Shmoocon 2017: On Not Reverse Engineering Through Emulation

Right now, I’m at Shmoocon, and it’s living up to all expectations. That’s a tall order — last year, the breakout talk was from [Travis Goodspeed] on his efforts to reverse engineer the firmware for a cheap Chinese radio. Four people in the room for that talk last year bought the radio on Amazon, and now there’s a legitimate open source project dedicated to building firmware and tools to support this radio.

tyteraNow that [Travis] has a few compatriots working on firmware for this radio, he has the same challenges as any other team. The project needs unit tests, and this isn’t easy to do when all the code is locked up inside a radio. Instead of setting up an entire development platform based around a cheap radio, [Travis] came up with a toolchain that’s unlike anything I’ve ever seen. Instead of reverse engineering the firmware for this radio, he’s simply emulating the ARM firmware on the desktop. Development is quick and easy, and he has the live demos to prove it.

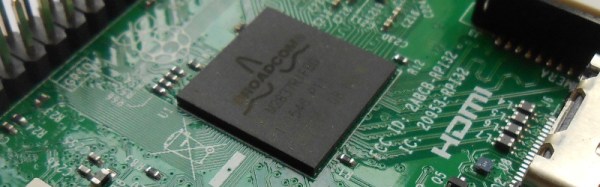
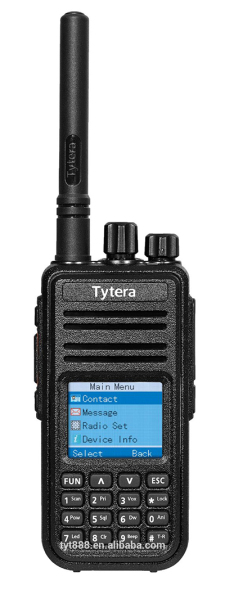
The heart of the Tytera radio in question is an STM32F405. This is a pretty common part, and thanks to [Travis]’ work last year, he has all the firmware that ships on this radio. This doesn’t mean he has access to all the radio’s capabilities, though; there’s a black box in the code somewhere that translates .wav files to radio packets and back again. Open sourcing this would usually mean reverse engineering, but [Travis] had a better idea.

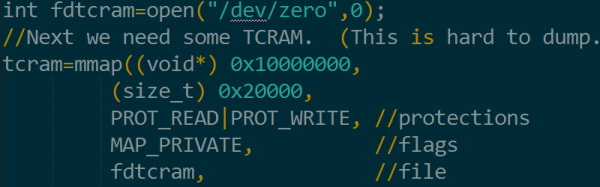
Instead of reverse engineering the entire radio, [Travis] is using QEMU to emulate an ARM microcontroller on his desktop, run the relevant code, and completely ignore any actual reverse engineering. Since this radio is already jailbroken and the community has a pretty good idea of where all the functions and subroutines are in the firmware, the most difficult part of pulling this trick off is setting up QEMU.

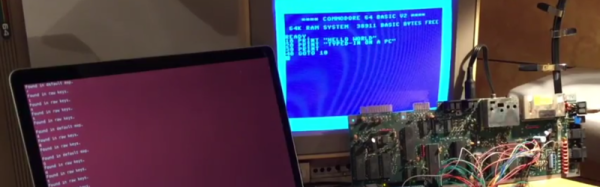
As a proof of concept, [Travis] downloaded raw AMBE packets from the radio to his laptop. These were then sent through the emulated radio, producing raw audio that was then converted into a .wav file. Effectively, a black box in this radio was emulated, which means [Travis] doesn’t need to know how the black box works.

All the code for this weird emulation / unit test, as well as everything the community has released for this radio is available on the GitHub. A lot of work has gone into the jailbreaking, reverse engineering, and emulation efforts here, making this radio somewhat ironically one of the most open radios you can buy.

C64 Keyboard Emulation Over Serial

There’s a lot of reasons you might want to emulate the keyboard on your Commodore 64. The ravages of time and dust may have put the original keyboard out of order, or perhaps you need to type in a long program and don’t fancy pecking away with the less-than-stellar feedback of the standard keys. [podstawek] has come up with the solution: a Commodore 64 keyboard emulator that works over serial.

It’s a simple concept, but one that works well. A Python script accepts incoming keypresses or pre-typed text, then converts them into a 6-bit binary code, which is sent to an Arduino over the serial connection. The Arduino uses the 6-bit code as addresses for an MT8808 crosspoint switch.

MT8808 Functional Diagram from Datasheet

The MT8808 is essentially an 8×8 matrix of controllable switches, which acts as the perfect tool to interface with the C64’s 8×8 keyboard matrix. Hardware wise, this behaves as if someone were actually pressing the keys on the real keyboard. It’s just replacing the original key switches with an electronic version controlled by the Arduino.

[podstawek] already has the setup working on Mac, and it should work on Linux and Windows too. There’s a little more to do yet – modifying the script to allow complex macros and to enable keys to be held – so check out the Github if you want to poke around in the source. Overall it’s a tidy, useful hack to replace the stock keyboard.

The C64 remains a popular platform for hacking — it’s even had a Twitter client since 2009.

Blob-less Raspberry Pi Linux Is A Step Closer

The Raspberry Pi single board computer has been an astounding success since its launch nearly five years ago, to the extent that as of last autumn it had sold ten million units with no sign of sales abating. It has delivered an extremely affordable and pretty powerful computer into the hands of hobbyists, youngsters, hackers, engineers and thousands of other groups, and its open-source Raspbian operating system has brought a useful Linux environment to places we might once have thought impossible.

The previous paragraph, we have to admit, is almost true. The Pi has sold a lot, it’s really useful and lots of people use it, but is Raspbian open-source? Not strictly. Because the Broadcom silicon that powers the Pi has a significant amount of proprietary tech that the chipmaker has been unwilling to let us peer too closely at, each and every Raspberry Pi operating system has shipped with a precompiled binary blob containing the proprietary Broadcom code, and of course that’s the bit that isn’t open source. It hasn’t been a problem for most Pi users as it’s understood to be part of the trade-off that enabled the board’s creators to bring it to us at an affordable price back in 2012, but for open-source purists it’s been something of a thorn in the side of the little board from Cambridge.

This is not to say that all is lost on the blob-free Pi front. Aided by a partial pulling back of the curtain of secrecy by Broadcom in 2014, work has quietly been progressing, and we now have the announcement from [Kristina Brooks] that a minimal Linux kernel can boot from her latest open firmware efforts. You won’t be booting a blob-free Raspbian any time soon as there are bugs to fix and USB, DMA, and video hardware has still to receive full support, but it’s a significant step. We won’t pretend to be Broadcom firmware gurus as we’re simply reporting the work, but if it’s your specialty you can find the code in its GitHub repository. Meanwhile, we look forward to future progress on this very interesting project.

We reported on the partial Broadcom release back in 2014. At the time, the Raspberry Pi people offered a prize to the first person running a native Quake III game on their hardware, sadly though they note the competition is closed they haven’t linked to the winning entry.

[Dave’s] Not Just A Member Of The Air Club For Tweezers

We are always surprised how much useful hacking gear is in the typical craft store. You just have to think outside the box. Need a hot air gun? Think embossing tool. A soldering iron? Check the stained glass section. Magnification gear? Sewing department.

We’ve figured out that people who deal with beads use lots of fine tools and have great storage boxes. But [Dave] found out they also use vacuum pickup tweezers. He had been shopping for a set and found that one with all the features he wanted (foot pedal, adjustable air flow, and standard tips) would run about $1000.

By picking up a pump used for bead makers and adding some components, he put together a good-looking system for about $200. You can see a video of the device, below, and there are several other videos detailing the construction.

Continue reading “[Dave’s] Not Just A Member Of The Air Club For Tweezers”

Custom Sensor Head Turns 3D Printer Into Capacitive Scanner

The best thing about owning a 3D printer or CNC router may not just be what you can additively or subtractively create with it. With a little imagination you can turn your machine into a 3D scanner, and using capacitive sensors to image items turns out to be an interesting project.

[Nelson]’s scanner idea came from fiddling with some capacitive sensors at work, and with a high-resolution capacitance-to-digital sensor chip in hand, he set about building a scan head for his printer. In differential mode, the FDC2212 sensor chip uses an external LC tank circuit with two plain sensor plates set close to each other. The sensor plates form an air-dielectric variable capacitor, and the presence of an object can be detected with high sensitivity. [Nelson]’s custom sensor board and controller ride on a 3D-printed bracket and scan over the target on the printer bed. Initial results were fuzzy, but after compensating for room temperature variations and doing a little filtering on the raw data, the scans were… still pretty fuzzy. But there’s an image there, and it’s something to work with.

Need a slightly more approachable project to get your feet wet with capacitive sensors? Maybe you should use your phone’s touchscreen as a 2D-capacitive scanner.

[via r/electronics]

Raspberry Pi Home Automation For The Holidays

When you want to play around with a new technology, do you jump straight to production machinery? Nope. Nothing beats a simplified model as proof of concept. And the only thing better than a good proof of concept is an amusing proof of concept. In that spirit [Eric Tsai], alias [electronichamsters], built the world’s most complicated electronic gingerbread house this Christmas, because a home-automated gingerbread house is still simpler than a home-automated home.

fya59blixaq00y3-largeYeah, there are blinky lights and it’s all controlled by his smartphone. That’s just the basics. The crux of the demo, however, is the Bluetooth-to-MQTT gateway that he built along the way. A Raspberry Pi with a BTLE radio receives local data from BTLE sensors and pushes them off to an MQTT server, where they can in principle be read from anywhere in the world. If you’ve tried to network battery-powered ESP8266 nodes, you know that battery life is the Achilles heel. Swapping over to BTLE for the radio layer makes a lot of sense.

Continue reading “Raspberry Pi Home Automation For The Holidays”