I enjoy seeing modules that can make designing other devices easier, and when I did a call for design reviews, [enp6s0] has submitted one such board to us. It’s a module called TinySparrow (GitHub), that helps you build your own vehicle ECUs and any other CAN-enabled things. With a microcontroller, plenty of GPIOs, a linear regulator and a CAN transceiver already onboard, this board has more than enough kick for anyone in hobbyist-range automotive space – and it’s surprisingly tiny!
You could build a lot of things around this module – a CAN bus analyzer or sniffer, a custom peripheral for car dashes, or even a full-blown ECU. You can even design any hardware for a robot or a piece of industrial technology that uses CAN for its backbone – we’ve all seen a few of those! It’s a great board, but it uses six layers. We’ll see if we can do something about that here.
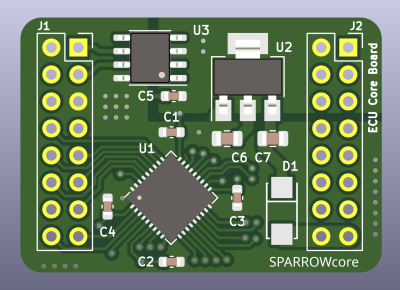
Modules like TinySparrow will make your PCBs cheaper while ordering, too! Thanks to the carefully routed microcontroller and the CAN transmitter, whatever board you design around this chip definitely wouldn’t need six layers like this one does – and, unlike designing your own board, you can use someone’s well-tested and tailored libraries and reference circuits!
With TinySparrow, you save a lot of time, effort and money whenever you want to design a car or industrial accessory. After looking at the board files, my proposal for helping today’s board is – like last time – to make its production cheaper, so that more people can get this board into their hands if the creator ever does try and manufacture it. I also have some tips to make future improvements on this design easier, and make it more friendly for its userbase.
Continue reading “PCB Design Review: Tinysparrow, A Module For CAN Hacking Needs”