Few people would deny that farming is hard work. It always has been, and it probably always will be no matter how fancy the equipment gets. In 1932, farming was especially grueling. There was widespread drought throughout the United States, which gave rise to dust bowl conditions. As if those two things weren’t bad enough, the average income of the American farmer fell to its lowest point during the Depression, thanks to the Smoot-Hawley Tariff Act.
Even so, crop farming was still a viable and somewhat popular career path in 1932. After all, knowing how to grow food is always going to get you elected into your local post-apocalyptic council pretty quickly.  As such, the John Deere Equipment Company released the 19th edition of their classic book, The Operation, Care, and Repair of Farm Machinery. This book covers all of the various equipment a crop farmer needed to get from plough to bounty. The text gives equal consideration to horse-driven and tractor-driven farming implements, and there’s an entire chapter dedicated to tractor engine maintenance.
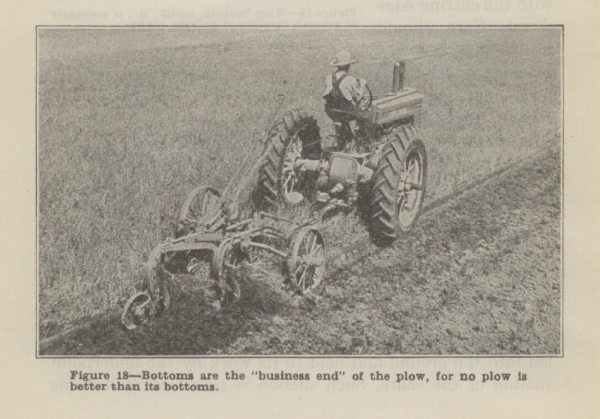
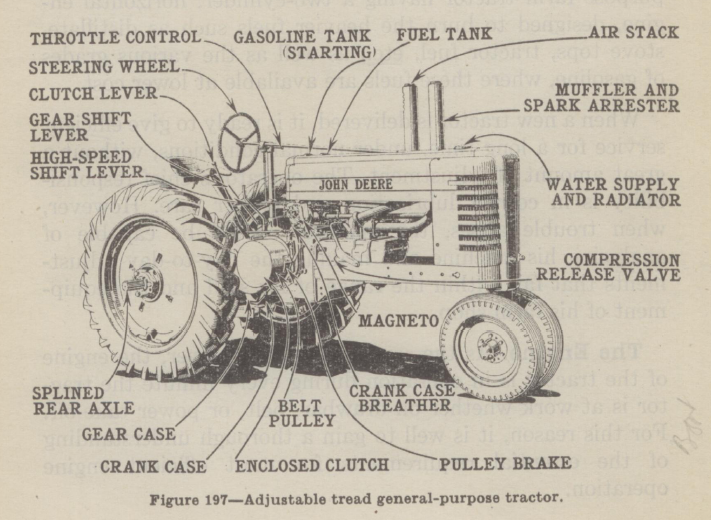
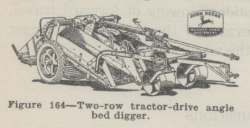
According to its preface, this book was used as an agricultural text in schools and work-study programs. It offers a full course in maintaining the all the (John Deere) equipment needed to work the soil, plant crops, cultivate, harvest, and manure in all parts of the country. The Operation, Care, and Repair of Farm Machinery was so well-received that John Deere kept the book in publication for over thirty years. The 28th edition and final edition came out in 1957. We wonder why they would have stopped putting it out after all that time. Maybe it wasn’t profitable enough, or the company decided to phase out the shade tree tractor mechanic.
 So why should you delve into a sorely outdated textbook about farm equipment? Well, it’s straightforwardly written and easy to learn from, whether you’re trying or not. You should check it out if you’re even remotely curious about the basics of farming. If for no other reason, you should go for the beautiful hand-drawn illustrations and stay for the interesting tables and charts in the back. Did you know that a gallon of milk weighs 8.6 pounds?
Continue reading “Retrotechtacular: Farming Implements In 1932” →