It’s fair to say that there’s really no phase of spaceflight that could be considered easy. But the case could be made that the most difficult part of a spacecraft’s journey is right at the very beginning, within the first few minutes of flight. At this point the vehicle’s booster rocket will be fighting with all its might against its own immense propellant-laden mass, a battle that it’s been engineered to win by the smallest of margins. Assuming the balance was struck properly and the vehicle makes its way off of the launch pad, it will still need to contend with the thick sea-level atmosphere as it accelerates, a building dynamic pressure that culminates with a point known as “Max q” — the moment where the air density imposes the maximum structural load on the rocket before quickly dropping off as the vehicle continues to ascend and the atmosphere thins.
Air-launched rockets avoid flying through dense sea level air.
While the vast majority of rocket launches have to contend with the realities of flying through the lower atmosphere, there are some exceptions. By launching a rocket from an aircraft, it can avoid having to power itself up from sea level. This allows the rocket to be smaller and lighter, as it doesn’t require as much propellant nor do its engines need to be as powerful.
The downside of this approach however is that even a relatively small rocket needs a very large aircraft to carry it. For example, Virgin Orbit’s LauncherOne rocket must be carried to launch altitude by a Boeing 747-400 airliner in order to place a 500 kg (1,100 lb) payload into orbit.
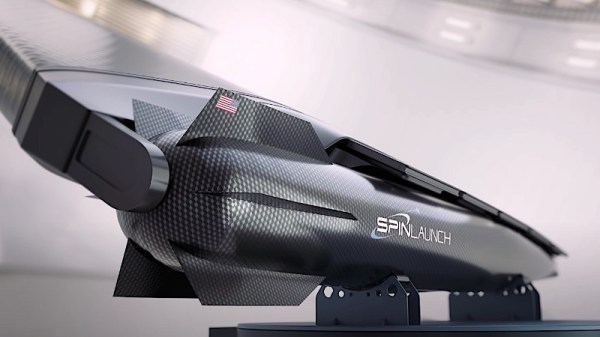
But what if there was another way? What if you could get all the benefits of starting your rocket from a higher altitude, without the cost and logistical issues involved in carrying it with a massive airplane? It might sound impossible, but the answer is actually quite simple…all you have to do it throw it hard enough.
Where today we talk broadly of climate change and it’s various effects, the conversation was once simpler. We called it “global warming” and fretted about cooking outside in the summer and the sea level rise that would claim so many of our favorite cities.
Scientists are now concerned that sea level rises could be locked in, as ice sheets and glaciers pass “tipping points” beyond which their loss cannot be stopped. Research is ongoing to determine how best we can avoid these points of no return.
South Korea’s domestically developed KSLV-2 “Nuri” rocket successfully placed six payloads into low Earth orbit Tuesday, after lifting off from from Naro Space Center at 4 PM KST. This follows an earlier attempt in October which failed to reach orbit after the booster’s third stage engine shutdown prematurely. The flight followed an initial trajectory over the East China Sea, after which the upper stage steered out towards the Philippine Sea, finally placing the payload in the desired orbital inclination of 98 degrees. This less-than-ideal path wasted energy, but ensured that the first and second stages fell into the ocean and not onto people. Success was confirmed shortly after launch as the vehicle passed over South Korea’s King Sejong Station in Antarctica.
The payload on this test flight was primarily a mass simulator of 1.3 metric tons, but a small Performance Verification Satellite (PVSAT) was included, for a grand total of 1.5 metric tons. The PVSAT itself monitors vehicle performance, but also serves as a carrier for four CubeSats. These were developed by engineering teams at various local universities and will be deployed in the coming days.
If you’re inclined to track these, the launch has been given COSPAR ID 2022-065 and the first three objects (third stage, dummy mass, and PVSAT) have been assigned the NORAD catalog numbers 52894, 52895, and 52896. It’s too early to tell which is which at this point, but as more data about their respective orbits are collected, it should be possible to tell them apart. The next four catalog numbers, 52897 – 52900, have been reserved for the CubeSats once they are released.
With this launch, South Korea has become the 10th nation to put a payload into space using its own domestic technology, and the 7th to loft a payload of more than one ton to orbit — joining the ranks of the United States, Russia, Japan, China, France, and India.
When Astra’s diminutive Rocket 3.3 lifted off from its pad at the Cape Canaveral Space Force Station on June 12th, everything seemed to be going well. In fact, the mission was progressing exactly to plan right up until the end — the booster’s second stage Aether engine appeared to be operating normally until it abruptly shut down roughly a minute ahead of schedule. Unfortunately, orbital mechanics are nothing if not exacting, and an engine burn that ends a minute early might as well never have happened at all.
According to the telemetry values shown on-screen during the live coverage of the launch, the booster’s upper stage topped out at a velocity of 6.573 kilometers per second, well short of the 7.8 km/s required to attain a stable low Earth orbit. While the video feed was cut as soon as it was clear something had gone wrong, the rigid physics of spaceflight means there’s little question about the sequence of events that followed. Without the necessary energy to stay in orbit, the upper stage of the rocket would have been left in a sub-orbital trajectory, eventually reentering the atmosphere and burning up a few thousand kilometers downrange from where it started.
An unusual white plume is seen from the engine as it shuts down abruptly.
Of course, it’s no secret that spaceflight is difficult. Doubly so for startup that only has a few successful flights under their belt. There’s no doubt that Astra will determine why their engine shutdown early and make whatever changes are necessary to ensure it doesn’t happen again, and if their history is any indication, they’re likely to be flying again in short order. Designed for a Defense Advanced Research Projects Agency (DARPA) competition that sought to spur the development of cheap and small rockets capable of launching payloads on short notice, Astra’s family of rockets have already demonstrated unusually high operational agility.
Astra, and the Rocket 3.3 design, will live to fly again. But what of the payload the booster was due to put into orbit? That’s a bit more complicated. This was the first of three flights that were planned to assemble a constellation of small CubeSats as part of NASA’s TROPICS mission. The space agency has already released a statement saying the mission can still achieve its scientific goals, albeit with reduced coverage, assuming the remaining satellites safely reach orbit. But should one of the next launches fail, both of which are currently scheduled to fly on Astra’s rockets, it seems unlikely the TROPICS program will be able to achieve its primary goal.
So what exactly is TROPICS, and why has NASA pinned its success on the ability for a small and relatively immature launch vehicle to make multiple flights with their hardware onboard? Let’s take a look.
Ding, dong; the office is dead. The real office is in your head.
This is what I tell myself when working from home gets too weird, too stale, too impossible. By now, many of you know some version what I’m talking about. Our circumstances may vary wildly, but the outcome is the same: working from home is pretty awesome, but, some small, secret part of us longs for the office. Why is that?
The answer will be different for everyone. Maybe you’re a social butterfly who misses face-time and the din of familiar voices. Maybe you just appreciate the physical separation between work and home life. If you’re lucky, the choice to go to the office is yours at this point, and if not, well, we have to wonder if you’re looking for new work. It’s 2022, we’re still in a pandemic, and of course there’s this, that, and the other multi-national Dumpster fire you haven’t heard about yet. Isn’t it time we prioritized work output over office attendance when it comes to our livelihoods?
Dovetail joints on a piece of furniture are one of those features that make it say “master carpenter” rather than “IKEA”. Traditional hand-made dovetails require accurate measurements and even more accurate sawing and chiseling, skills that may take years to develop. A slightly less artisanal method is to use a router and a dovetail template; the router makes perfectly straight cuts while the template makes sure it goes only where it needs to go.
If you haven’t got one of those templates yet, check out [Guy Perez]’s design for an adjustable dovetail template that’s easy to produce with a 3D printer. It consists of ten separate pieces mounted on a T-rail, which enables them to slide sideways and thereby generate pins and tails of varying widths. The T-rail is mounted on a wooden body with an integrated clamp to hold the target piece, as well as an endstop to provide a reference for all measurements.
As you can see in the video embedded below, the resulting jig is easy to use and should result in near-perfect dovetails each time. [Guy] made the CAD files available as well as detailed instructions on their design, so you can easily adjust them if you need pieces with a different tail angle or want to use thicker wood.
While this jig will make cutting ordinary dovetail joints a lot easier, you can still show off your manual skills by making an impossible mallet. Want to join metal bits instead? Check out this cute little dovetail cube.
I hope last week’s introduction to bulk material handling got you all thinking up amazing hacks, and we’ll soon be reporting on DIY Cap’n Crunch Robots galore. This week we’ll look at how to measure particle sizes, separate particles, and even grind them up when you need to.
Measuring Material Properties
Last week we talked about cohesive strength. Bulk material behaves somewhere between a solid and a liquid — if you’ve done your homework, it flows down the funnel just fine. But if you haven’t, it sticks together and holds up the rest of the material. Cohesive strength is the measure of how much weight the material at the bottom of the funnel can hold up.
You can get a rough measurement by packing material in a box with a square hole at the bottom. One side of the hole should have a retractable slide. Slowly withdraw the slide, making the hole rectangular. Material will bridge over, and then at some point a larger chunk will fall out. This is about the size of the minimum opening that will not arch, and a practical measure of the material’s cohesive strength.
Many materials cohere better when wet. Dry a sample in a microwave to determine the percent moisture by weighing it before and after.
Cohesive strength is closely allied to shear strength. If you want to measure shear strength, cut two 1 cm wide rings of 5 cm diameter PVC pipe, stack them, pack with material, put a disk atop the material and load it, then drag the top ring off the bottom with a spring scale. The force per unit area is the shear strength at that pressure. If it starts packing you’ll see it in the curve.
Packing factor is another useful measurement. Gently shake material to fill a rigid container and weigh it. Now empty the container and refill, packing the material as hard as you can with a length of 1” dowel. Reweigh, and the ratio of the two weights tells you how well the material packs.
Real bulk material is almost always made up of particles of varying sizes, shapes, and compositions. Dirt is particles of different kinds of mineral and organic matter varying from outright rocks to sub micron clay particles. If you’re having problems, getting a graph of material size distribution can be helpful.
For particles above about 75 μM, you can measure the sizes with sieves. If you want to be fancy, they sell nice sets of metal sieves with wire mesh in the bottom. Screen assortments are cheaper. Below 75 μM, you have to use a hydrometer. This is messy and takes a while, but does work.
The idea is to mix the material with soapy water and then use a hydrometer from the auto parts store to measure the density. The particles fall out by Stokes law, big ones first. Stokes law is just that the drag force on a sphere is proportional to the square of the radius. Mass will go up as cube of the radius, so large particles fall faster than small ones. As they fall out, the density of the fluid decreases. This page describes how to do it, and this page has a handy calculator for interpreting the results.
Grinding
You can also change the size of particles in your mix. If particles are too large, they can be crushed or ground. You can separate by size and only grind some of the sizes or discard some of the material. There’s a whole science to grinding. The finer you grind, the harder it gets to grind. Cosmetics and pharmaceutical companies are full of grinding experts.
In general, there are three ways to make something smaller – crush it, cut it, or hit it.
Crushing is straightforward. Use rollers or jaws, a rolling pin or a rock crusher. Don’t overlook the vise. A jaw crusher only crushes particles larger than the jaw space, useful to make a certain size. Rock crushers have a complex motion (video) that should nonetheless be easily imitated by a hacker project. Amateur/hobby gold prospectors have an accessible community.
Crushing action in rollers only works until the particle is small enough that the surface of the roller deforms instead of the particle. Stones have been used to crush grain into flour for most of history.
Cutting is best for soft things, like gummy worms, and tough things (video.). Make sure the cut material has an easy path out. Think of an old fashioned kitchen meat grinder. .
If you want small particles, you need an impact grinder. A coffee mill or blender works by striking the particle with a fast moving impactor. This can be a blade – useful if the material first needs to be cut up, as in a coffee mill – or blunt. Many industrial mills use two pivoting weights on a shaft, and this unit just uses chains (video).
Another impact mill is the ball mill. Rotate a drum on it’s side with steel balls and the material. The balls travel up the side, then fall back down, striking the material.
All these work by fracturing the material. What if you’re trying to powder something that doesn’t fracture, say rubber O rings? For that, there’s cryogenic grinding.
Many rubbery materials are really glasses — materials that are a gloppy liquid at a higher temperature, often brittle at a cool temperature, and soft in-between. The glass you’re probably thinking of is a brittle, breakable material at room temperature, but at high temperature is a liquid. The transition point is the ‘glass transition temperature’.
So what about our O rings? If they’re natural rubber their transition point is about -70° C. Below that temperature they’re brittle and can be ground up. Unfortunately, grinding is going to put heat back in. So consider grinding slowly – some labs grind biological materials like skin samples with a special mortar and pestle cooled beforehand with liquid nitrogen. Just be sure everything in contact with the material has been cooled, and use a thick walled container with lots of thermal mass.
Separating Wheat From Chaff
Sometimes you have a mix and need to separate it. Your roommate dumped all the gummy bears and all those weird ginger candies into a bowl or whatever. Last week we introduced particle segregation as a bad thing. But when you want to un-mix a mixture, it can be a good thing. Any of the techniques from last week can be an aid.
Sieves and screens work to separate by size. They clog unless the material keeps moving over them. One simple way to do this is to flow the material over sieves on a slanted board, finest sieve first. Another is to mechanically shake the screen. Paper filters are just fine screens, and do clog.
A trommel is a slowly turning cylinder with walls of different sized screens along it’s length. Material is fed into the fine screen end and slowly moves towards the other.
Stokes law provides another way to separate materials as we saw above. Make an upward air draft in a vertical pipe. Deliver the material into the pipe part way up. Materials with more drag than weight will go up, larger materials will go down. You can use the air speed to control the size of particle. An industrial machine called an air classifier does this with higher velocity air blowing material into the rim of a spinning set of blades.
It could be the air (or another gas) you want to remove. There are a couple ways to do it. The first is the cyclone familiar to wood shops. The second is even simpler – inject the air/material mix into the top of a tall, slender container with a tube that extends about halfway into the container. Let the air out from an outlet pipe in the roof. The air flow expands, slows down, and the material falls out.
You can just blow the material sideways – the age old system of threshing wheat works this way. Wheat comes from the plant with a husk, you beat it with a flail to loosen the husk, giving you wheat grains and chaff mixed. Put the mix on a blanket and have four peasants toss it repeatedly. The chaff blows away in the wind.
Inertial Separation
A very sensitive separation technique is inertial separation. Here’s a mix of gummy colas and jelly beans. We separated them by tilting and gently shaking the sheet. A material moves on a sheet by staying in place until the acceleration is more than some critical value. Then it rolls or slides.
If your material is dirt or such, run a magnet through it. There’s iron ore and bits of human generated iron in a lot of soil. It can get into motors and such. If you need it out run the material past magnets. An eddy current separator uses AC magnetic effects to do the same with nonferrous metals.
You can also segregate materials by dissolving them. A mixture of table salt and white sand would seem impossible, but if you stir it into water, then decant and boil off the water, the salt and sand can be recovered separately. But we think we’re veering into chemistry now, and we should stop.
Next time we’ll finish up by looking at controlling movement: building gates and contraptions that move your bulk material without clogging up.