Impressive Junkyard CNC Made From Fancy Garbage

We’ll just come out and say it, [reboots] has friends with nice garbage. Sure, some of us have friends who are desperately trying to, “gift,” us a CRT monitor, hope dropping like a rock into their stomach when they realize they can’t escape the recycling fee.  [reboots] has friends who buy other people’s poorly thought out CNC projects and then gift him with the parts.

After dismantling the contraption he found himself with nice US and Japanese made linear motion components. However, he needed a CNC controller to drive it all. So he helped another friend clean out their garage and came away with a FlashCut CNC controller.

Now that he had a controller and the motion components whirring nicely, he really needed a frame to put it all in. We like to imagine that he was at a friend’s  barbeque having a beer. In one corner of the yard was an entire Boeing 747.  A mouldering scanning electron microscope with a tattered and faded blue tarp barely covering its delicate instrumentation sat in another corner. Countless tech treasures were scattered about in various states. It was then that he spotted a rusting gamma ray spectrometer in the corner that just happened to have the perfect, rigid, gantry frame for his CNC machine.

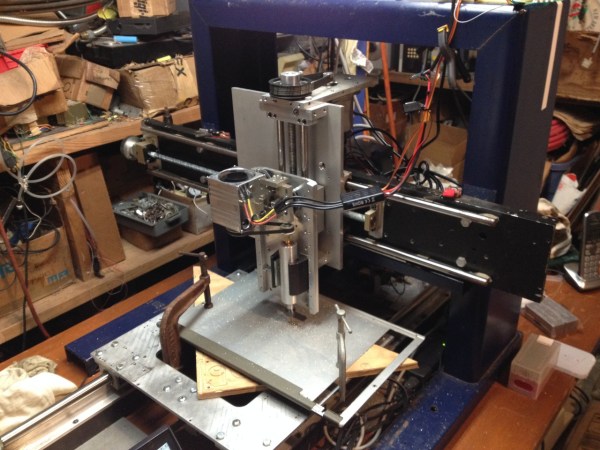
Of course, his friend obliged and gladly gave up the spectrometer. Now it was time to put all together. The gantry was set on a scavenged institutional door. The linear motion frames were bolted in place. Quite a few components had to be made, naturally, of scrap materials.
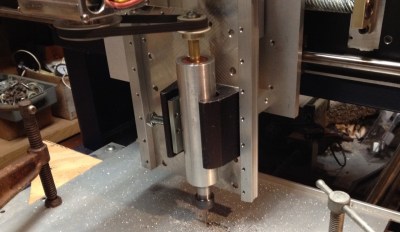
spindletest2Most people will start by using a handheld router for the spindle. The benefits are obvious: they’re inexpensive, easy to procure, and generally come with mounts. But, there are some definite downsides, one of the most glaring of which is the lack of true speed control.

Even routers that allow you to adjust the speed (a fairly common feature on new models) generally don’t actually regulate that speed. So, you end up with a handful of speed settings which aren’t even predictable under load. Furthermore, they usually rely on high RPMs to do their work. For those reasons, handheld woodworking routers aren’t the best choice for a mill that you intend to cut metal with.

[reboots] noticed this problem while building this machine and came up with an inexpensive way to build a speed-controlled spindle. His design uses a brushless DC motor, controlled through a hobby ESC (electronic speed control), which uses a belt to drive the spindle. The spindle itself is mounted using skateboard bearings, and ends in an E11 collet (suitable for light machining in aluminum).

With the ESC providing control of the brushless motor, he’s able to directly control the spindle speed via software. This means that spindle speeds can be changed with G-code, allowing for optimized feeds and speeds for different operations. The belt-drive increases torque while separating the motor from the spindle, which should keep things cool, and reduce rotating mass on the spindle itself. Now all [reboots] needs to do is add a DIY tool changer!

Fixing The Ampere: Redefining The SI Unit

We all know that it’s not the volts that kill you, it’s the amps. But exactly how many electrons per second are there in an amp? It turns out that nobody really knows. But according to a press release from the US National Institute of Standards and Technology (NIST), that’s all going to change in 2018.

The amp is a “metrological embarrassment” because it’s not defined in terms of any physical constants. Worse, it’s not even potentially measurable, being the “constant current which, if maintained in two straight parallel conductors of infinite length, of negligible circular cross-section, and placed 1 meter apart in vacuum, would produce between these conductors a force equal to 2 x 10⁻⁷ newton per meter of length.” You can’t just order a spool of infinite length and negligible cross-section wire and have it express shipped.

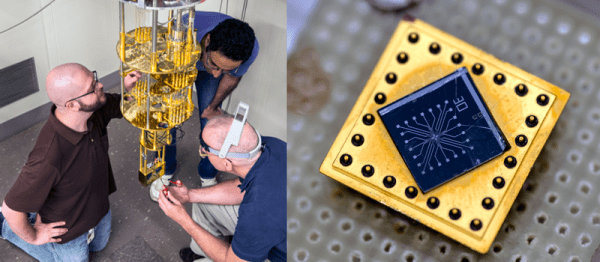
So to quantify the exact number of electrons per second in an amp, the folks at NIST need an electron counter. This device turns out to be a super-cooled, quantum mechanical gate that closes itself once an electron has passed through. Repeatedly re-opening one of these at gigahertz still provides around a picoamp. Current (tee-hee) research is focused on making practical devices that push a bit more juice. Even then, it’s likely that they’ll need to gang 100 of these gates to get even a single microamp. But when they do, they’ll know how many electrons per second have passed through to a few tens of parts per billion. Not too shabby.

We had no idea that the amp was indirectly defined, but now that we do, we’re looking forward to a better standard. Thanks, NIST!

Thanks [CBGB123B] for the tip!

Hackaday Prize Entry: 1337 Haxxor Keyboards

If you’re like us, you spend most of your time in front of a computer keyboard, wondering where your life went wrong. [AnonymouSmst] has a slightly more positive outlook on life, which led them to create a truly DIY keyboard with OLEDs, Bluetooth, NFC, Analog joysticks, an ‘Internet of Things thingy’, local storage, and ostentatious backlighting. It’s a 1337 h4x0r keyboard, and one of the coolest input devices we’ve seen since that weird GameCube controller.

[AnonymouSmst] was one of the very elite, very privileged hackers that made it out to the Hackaday Munich meetup where [sprite_tm] first demoed his firmware hack that allowed anyone to play Snake on a keyboard. Here, the idea of building the ultimate keyboard was planted, and [mst] quickly began researching which keyswitches to use. Apparently, [mst] hates his neighbors and chose the obnoxiously loud Cherry Blues.

To a standard 60% keyboard layout, [AnonymouSmst] added a lot of hardware you don’t usually see in even the most spectacular mechanical keyboard builds. A few dozen WS2812 RGB LEDs were added to the build, as was an Adafruit Bluefruit module, an NFC reader, a LORA module and a ESP8266 for WiFi capability, an OLED display just because, and two analog joysticks on either side, one acting as the arrow cluster the other acting as a mouse.

We’ve seen dozens of mechanical keyboard builds over the years, but this takes the entire concept of a DIY keyboard to the next level. It’s bright, shiney, glowey, and a vulgar display of conspicuous consumption and engineering prowess. It is the perfect keyboard, if only because it was designed and built by the person who would ultimately wield it.

Really Easy Jacob’s Ladder

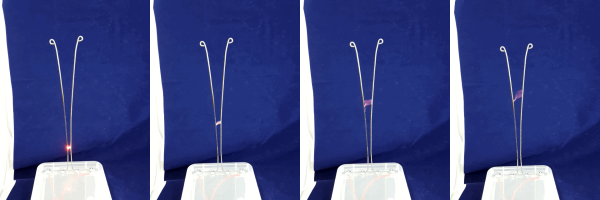
There was a time when making a high voltage project like a Jacob’s ladder took time to build or scrounge some kind of high voltage circuit. The neon sign transformer, Marx generator, or voltage multiplier was the hard part of the project. But nowadays you can get cheap high voltage modules that are quite inexpensive. [PaulGetson] picked up one for under $20 and turned it into a quick and easy Jacob’s ladder.

Honestly, once you have high voltage, making a Jacob’s ladder is pretty simple. [Paul] used a cheap plastic box, some coat hanger wire, and some stainless steel bolts.

Continue reading “Really Easy Jacob’s Ladder”

DIY Electric Pennyboard Can Hit 40Km/h!!

Home-made transportation is a thriving area for makers to flex their skills. Looking to shorten their university commute, [doublecloverleaf] modded his penny board by adding a motor that can have him zipping along at 40 Km/h!

The electric motor is mounted to the rear truck and delivers power to the wheel gear using a HTD 5 m pulley belt. Finding the deck too flexible to mount the battery pack under, [doublecloverleaf] strengthened it with a pair of carbon-fiber tubes bracketed on the underside. A few custom PCB boards connect ten 5 Ah LiPo battery cells in series to create two, five-cell packs which are kept safe by a thick housing mounted between the board’s trucks. [doublecloverleaf] calculates that they could make up to a 15 km trip on a single charge.

Continue reading “DIY Electric Pennyboard Can Hit 40Km/h!!”

Musical Proximity Detection Pet Bowls

An essential skill for a maker is the ability to improvise or re-purpose existing materials into new parts. Sometimes, one needn’t make many modifications to create something new, as is the case with [Robin Sterling] and his musical pet bowl.

Originally, it was a sealed pet bowl that opened when the proximity sensors detected an approaching pet. Having helped design the bowl, [Sterling] had a bit of an advantage when he decided to convert it into a theremin/light harp-esque instrument for the company BBQ. He routed the PWM outputs from each of the three proximity sensors (in each of the three bowls) to a small guitar amp, adjusting each sensor’s output to a different frequency. Despite the short amount of time [Sterling] had to practice, it works fairly well!

Continue reading “Musical Proximity Detection Pet Bowls”

Characterizing A Death Ray… Er, Solar Oven

Many of you will probably at some point have looked at a satellite dish antenna and idly wondered whether it would collect useful amounts of heat if you silvered it and pointed it at the sun. Perhaps you imagine a handy source of  solar-cooked hotdogs, or maybe you’re a bit of a pyromaniac.

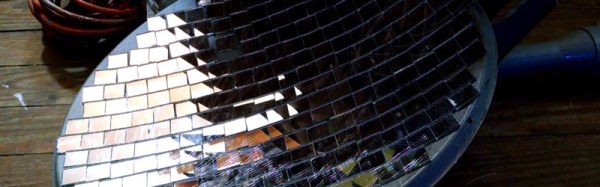
[Charlie Soeder] didn’t just think about it, he did it. Finding a discarded offset-focus DirecTV dish, he glued a grid of 230 inch-square mirror tiles to it and set to investigating  the concentrated solar energy at its focus. 

Cotton waste, newspaper, and scraps of fabric char and burn with ease. A cigarette is lit almost from end to end, and it burns a hole right through a piece of bamboo. Most of the energy is in the form of light, so transparent or reflective items need a little help to absorb it from something dark. He demonstrated this by caramelizing some sugar through adding a few bits of charcoal to it, once the charcoal becomes hot enough to caramelize the sugar around it the spreading dark colour causes the rest of the sugar to caramelize without further help.

Solar furnace calculations

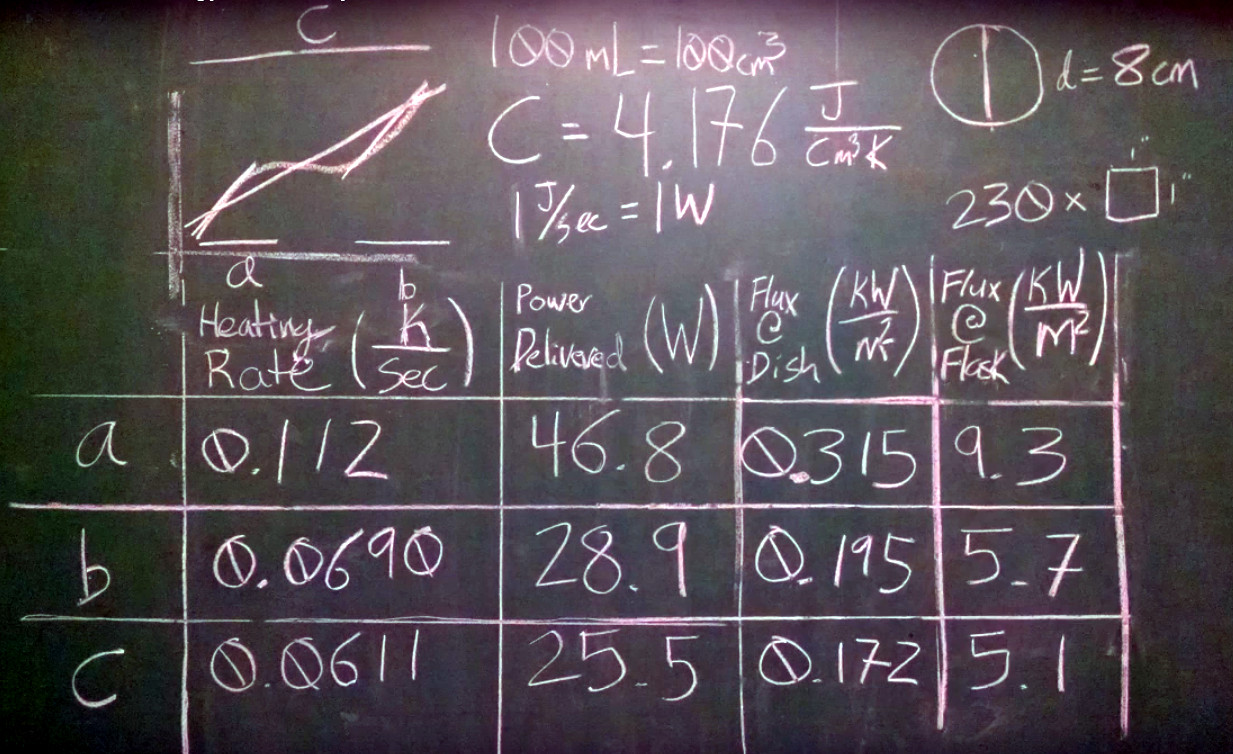
To gain some idea of the power of his solar furnace, he recorded a time series of temperature readings as it heated up some water darkened with a bit of charcoal to absorb heat. The resulting graph had a flat spot as a cloud had passed over the sun, but from it he was able to calculate instantaneous power figures from just below 30W to just below 50W depending on the sun.

He records his progress in the video you’ll find below the break. Will we be the only ones casting around for a surplus dish after watching it?

Continue reading “Characterizing A Death Ray… Er, Solar Oven”