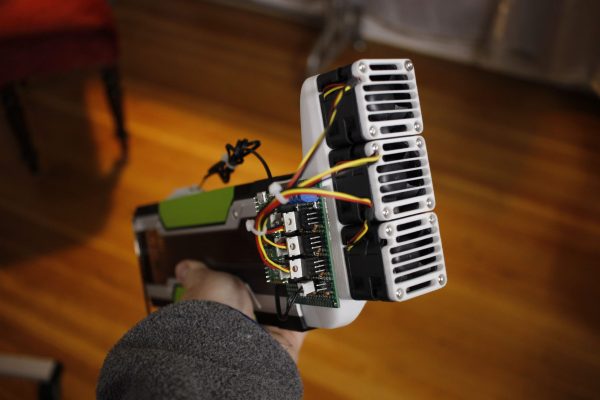
A GPU card with a home-made fan assembly

3D-printed Fan Mount Keeps Server GPU Cool In Desktop Case

Most readers of Hackaday will be well aware of the current shortages of semiconductors and especially GPUs. Whether you’re planning to build a state-of-the art gaming PC, a mining rig to convert your kilowatt-hours into cryptocoins, or are simply experimenting with machine-learning AI, you should be prepared to shell out quite a bit more money for a proper GPU than in the good old days.

Bargains are still to be had in the second-hand market though. [Devon Bray] chanced upon a pair of Nvidia Tesla K80 cards, which are not suitable for gaming and no longer cost-effective for mining crypto, but ideal for [Devon]’s machine-learning calculations. However, he had to make a modification to enable proper thermal management, as these cards were not designed to be used in regular desktop PCs.

The reason for this is that many professional-grade GPU accelerators are installed in rack-mounted server cases, and are therefore equipped with heat sinks but no fans: the case is meant to provide a forced air flow to carry away the card’s heat. Simply installing the cards into a desktop PC case would cause them to overheat, as passive cooling will not get rid of the 300 W that each card pumps out on full load.

[Devon] decided to make a proper thermal solution by 3D printing a mount that carries three fans along with an air duct that snaps onto the GPU card. In order to prevent unnecessary fan noise, he added a thermal control system consisting of a Raspberry Pi Pico, a handful of MOSFETs, and a thermistor to sense the GPU’s temperature, so the fans are only driven when the card is getting hot. The Pi Pico is of course way more powerful than needed for such a simple task, but allowed [Devon] to program it in MicroPython, using more advanced programming techniques than would be possible on, say, an Arduino.

We love the elegant design of the fan duct, which enables two of these huge cards to fit onto a motherboard side-by-side. We’ve seen people working on the opposite problem of fitting large fans into small cases, as well as designs that discard the whole idea of using fans for cooling.

Continue reading “3D-printed Fan Mount Keeps Server GPU Cool In Desktop Case”

Putting Thousands Of Minecraft Players On The Same Server

Multi-threading was the common go-to technique for extracting more performance from a machine for several years. These days it’s all about horizontal scaling or adding more virtual machines to a pool of workers. The Minecraft server is still stuck in the past in some ways as it supports neither multi-threading nor horizontal scaling. [Jackson Roberts] decided to change all that by hacking Minecraft to support thousands of players rather than dozens.

Since the server is single-threaded, having more than 100 players on a single server can slow it to a crawl. Some mods try to optimize and speed up the existing server but [Jackson] wanted more. An early proof of concept was to slice the world into separate servers, each holding 64×64 chunks (chunks are what Minecraft defines as a 16x256x16 volume of the world). When crossing a boundary, entities such as players and zombies were transferred from one server to another. While workable, the demo had issues such as parts of the world being inaccessible if a server went down. The boundaries were also jarring as you had to reconnect and couldn’t see players outside your server.

Instead of splitting the world, [Jackson] took the approach to split the players and have some backing store for persisting and broadcasting changes. A proxy sits in front of several Minecraft servers, which each have a connection to a WorldQL server (a spatial database based on Postgres). Each server reports the player’s location to the WorldQL server and receives updates for their loaded locations. When a server comes online, it catches up with the changes stored in WorldQL and starts syncing, allowing servers to auto-scale. There are still a few core game mechanics that aren’t quite ready for prime-time such as NPCs and Redstone, but the progress so far is remarkable.

The code for the Minecraft plugin is up on GitHub, but more is coming in the future. So if you’re interested in something a little more vanilla, why not marvel at the completely playable Pokemon Red inside vanilla Minecraft?

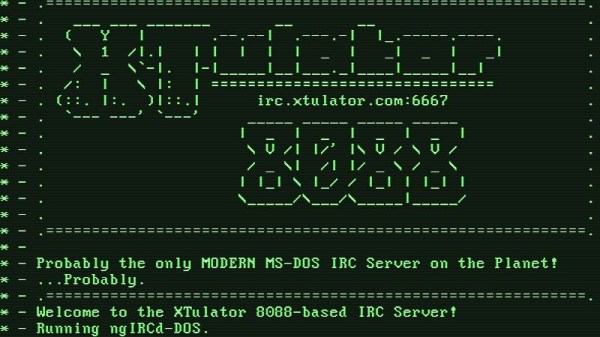
A computer green screen image of an IRC message of the day

IRC Server For MS-DOS

The recent flurry of projects based around Internet Relay Chat (IRC) should be a fair indication that the beloved protocol is not going anywhere. Now, thanks to [Mike Chambers], you can add to the IRC ecosystem by hosting your very own MS-DOS based IRC server.

This port of ngIRCd (Next Generation IRC Daemon) has already been spun up on 8088-based PCs running at just 4.77MHz, but you’ll still need at least 640KB of RAM. If your vintage IRC server takes off, you might want to think about dropping in an 10MHz V20 for a bit of a performance boost. Even so, it’s impressive that this server can get up on the 40-year-old IBM 5150, and should absolutely scream on an AT-class system.

The limitations of the 16-bit platform means that SSL and ZLIB are unsupported, and Mike has capped total connections at 50 in his port (however, this limitation can be adjusted by rebuilding from source, should you want to find out how far 640KB of RAM can take you). You’ll also need a few other things to get your server up and running, such as a packet driver for your network card and an mTCP configuration file.

Setting up your own IRC server is arguably a right rite of passage for most hackers and tinkerers, but getting this up and running on a decades-old beige box would make for a fun weekend project. [Mike] has all the juicy details on GitHub, and you can check out a test server running the latest build over at irc.xtulator.com.

Also, don’t forget to visit the #hackaday IRC channel over on irc.libera.chat.

[Thanks Sudos for the hot tip]

Portable GPS Time Server Powered By The ESP8266

Most Hackaday readers will be familiar with the idea of a network time server; a magical box nestled away in some distant data center that runs the Network Time Protocol (NTP) and allows us to conveniently synchronize the clocks in our computers and gadgets. Particularly eager clock watchers can actually rig up their own NTP server for their personal use, and if you’re a true time aficionado like [Cristiano Monteiro], you might be interested in the portable GPS-controlled time server he recently put together.

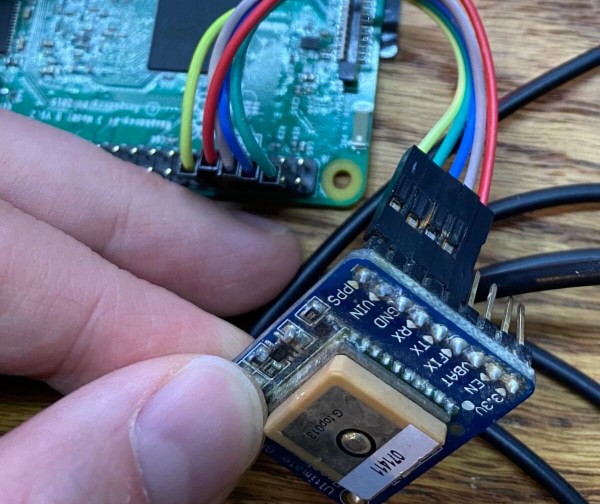
The heart of the build is a NEO-6M GPS module which features a dedicated pulse per second (PPS) pin. The ESP8266 combines the timestamp from the GPS messages and the PPS signal to synchronize itself with the atomic clock aboard the orbiting satellite. To prevent the system from drifting too far out of sync when it doesn’t have a lock on the GPS signal, [Cristiano] is using a DS3231 I2C real-time clock module that features a high accuracy temperature-compensated crystal oscillator (TCXO).

Continue reading “Portable GPS Time Server Powered By The ESP8266”

Raspberry Pi Server Cluster In 1U Rack-Mount Case

[Paul Brown] wants to take advantage of off-site server colocation services. But the providers within [Paul]’s region typically place a limit of 1A @ 120V on each server. Rather than search out commercial low-power solutions, [Paul] embraced the hacker spirit and built his own server from five Raspberry Pi 4b single board computers.

The task involves a little bit more than just mounting five Pi4s in a chassis and calling it done. There is an Ethernet switch connecting all the modules to the network, and each Pi has a comparatively bulky SSD drive + enclosure attached. By far the most annoying part of the assembly is the power supply and distribution cabling, which is further complicated by remote controlled power switching relays (one of the computers is dedicated to power management and can shut the other four modules on and off).

Even if you’re not planning on building your own server, check out the thoroughly documented assembly process and parts list — we particularly liked the USB connector to screw terminal breakout connector that he’s using for power distribution. For all the detailed information, assembly instructions and photos, we think a top-level block diagram / interconnection drawing would be very helpful for anyone trying to understand or replicate this project.

There are a lot of connections in this box, and the final result has a messy look-and-feel. But in fairness to [Paul]’s craftsmanship, there aren’t many other ways to hook everything together given the Raspberry Pi form-factor. Maybe a large and costly PCB or using CM4 modules instead of Raspberry Pi boards could help with cable management? In the end, [Paul] reckons he shelled out about $800 for this unit. He compares this expense with some commercial options in his writeup, which shows there are some cheaper and more powerful solutions. But while it may be cheaper to buy, we understand that strong urge to roll your own.

We’ve written about many Pi cluster projects in the past, including this one which contains a whopping 750 Raspberry Pis. Have you ever used a colocation service, and if so, did you use a DIY or an off-the-shelf server?

Super Mario Bros. 35 Lives Again With A Fan-Made Server

If you liked playing Super Mario Bros. 35, the unique multiplayer battle royale Mario game that Nintendo released last year on the Switch to celebrate 35 years since the original NES version of Super Mario Bros, then it’s likely that you have been disappointed since April. The gaming giant ended support and removed the game’s servers once their 35 year celebrations were over, leaving the game’s players hanging. Happily there’s a solution, because [Kinnay] has presented a reverse-engineered Nintendo game server replacement along with a game patch, that should keep gamers in multi-Mario fun forever.

While it’s a boon for fans of this particular game, the real value here is in introducing us to the reverse engineering work on those Nintendo servers. We learn about their various foibles over several generations of console, and perhaps most importantly we learn something of their inner workings.

Usually when a game server is turned off it’s because the platform it supports is so ancient as to have hardly any users. This time-limited game on an up-to-date platform is unusual then, but since it was made available to subscribers to Nintendo’s online service for free it’s less of a surprise. Certainly not in the same class as the loss of servers for an entire platform.

Thanks [Digiaap] for the tip.

Header image: Elvis untot, CC BY-SA 4.0.

Is It A Lawnmower? Is It An RPi IRC Server? It’s Both!

Although first presented to the world as an April 1st joke, [Jotun]’s IRC-enabled lawnmower began life as the result of casual bantering among folk on the Undernet IRC network. When the project worked out better than probably anyone could have expected, it was presented as the Green Future of Undernet on April 1st. Joking aside, the project actually is pretty interesting and well-executed.

At the core is a Remington RM110, a fairly basic gas-powered push lawnmower. After years of use it wasn’t running so well any more, so [Jotun] took it apart and cleaned the engine, despite never having done so before. With that grimy task completed, a subsequent remark in an Undernet channel about linking the lawnmower to Undernet led to a Raspberry Pi 4 and various other components being ordered.

The view from the driver’s seat with the server box installed.

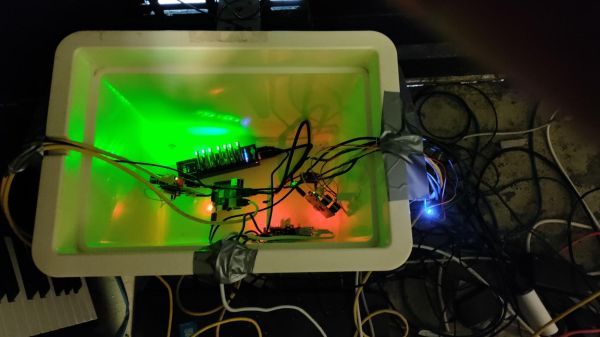
The write-up by [Jotun] provides a pretty good overview of the project’s history: from getting the Raspberry Pi 4 working with a UPS add-on, to getting the IRC server software working and serving clients, and putting a weather- and dust-proof box together with enough filtered ventilation to ensure that the freshly mowed grass doesn’t clog up the Raspberry Pi while keeping everything cool.

As a bonus, the system tracks the wheel revolutions so that [Jotun] can keep track of the square kilometers of grass he has cut, and reports this with an IRC bot to anyone interested on Undernet, in the channel #lawnmower. The only thing that isn’t working well yet so far is the live camera feed from the lawnmower, due to the obvious vibration issues, but [Jotun] reckons that can be solved in time.