Playstation 3 controller and console

Digital PlayStation 3 Purchases May Only Live As Long As Your PRAM Battery Without Sony Servers

Word of Sony shutting down PlayStation storefront servers for PS3 this summer spread like wildfire on the internet Monday. The discourse in comment sections were filled with anti-DRM rhetoric and renewed pledges of physical-only game collections, because without content servers to connect to, your digital PS3 purchases will eventually become unplayable. Even if legitimate purchases are installed to the console’s hard drive before Sony “flips the switch”, they may only live on as long as the internal clock stays in sync. Which is why this guide to replace a PS3 PRAM battery written by [Andrew] has renewed importance. After a battery replacement the internal clock needs to be reset and this requires validation from the PlayStation network (you know, the one that’s soon to be shut down).

Game preservationist group [Does it play?] drove home the impact of such a business decision by Sony on Twitter. The thread is quick to point out that even if users are quick to re-download all of their purchases to a PS3 system before the purported July 2nd deadline, those games will eventually become unplayable if the system clock becomes desynchronized. Replacing the PRAM battery and reconnecting to the PlayStation Network prior to Sony shuttering their servers should buy the user some more playtime. However, without any further changes to Sony’s licensing policy little else can be done physically to ensure those digital PS3 games will work in perpetuity.

Sony isn’t the only one to have drawn the ire of digital rights advocates in regards to terminating their online services. Nintendo shuttered the DSI-Shop in 2017 and Microsoft turned off access to the original Xbox LIVE servers in 2010. The big three console makers have all let their consumers down by removing the ability to reacquire purchases in some way, but the fact that so many PS3 exclusives were only ever available digitally just further exacerbates issues with digital rights. Dropping in a fresh coin-cell may not be the permanent solution everyone is looking for at the moment, but it couldn’t hurt to re-familiarize yourself with the Cell processor.

Continue reading “Digital PlayStation 3 Purchases May Only Live As Long As Your PRAM Battery Without Sony Servers”

3D Printed Server Case Holds 14 Raspberry Pis

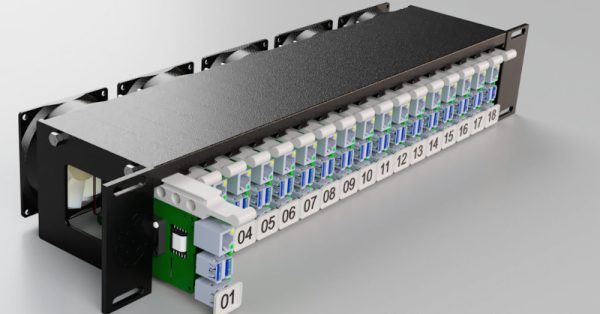
If you ever need to cluster up to 14 Raspberry Pis and an equal number of 2.5 inch hard drives, you might want to look at the Raspberry Pi Server Mark III case from [Ivan Kuleshov]. The original Mark I design came from Thingiverse, but the Mark III is a complete redesign.

The redesign allows for more boards along with a reduction in the number of parts. That takes less plastic and less time to print. The design is also modular, so there should be new components in the future.

Continue reading “3D Printed Server Case Holds 14 Raspberry Pis”

Faster Desktop Ethernet With Server Network Adapters

As far as consumer network hardware goes, we’re all expected to be pretty happy with 802.11n WiFi and Gigabit Ethernet over Cat 6 cables. For most home users, that’s plenty of bandwidth for streaming movies and posting K-pop fancams to Twitter on a daily basis. If you want a fatter pipe, things can get expensive, fast. However, [TobleMiner] found a way to use surplus server-grade cards in a regular PC – providing huge bandwidth on a budget.

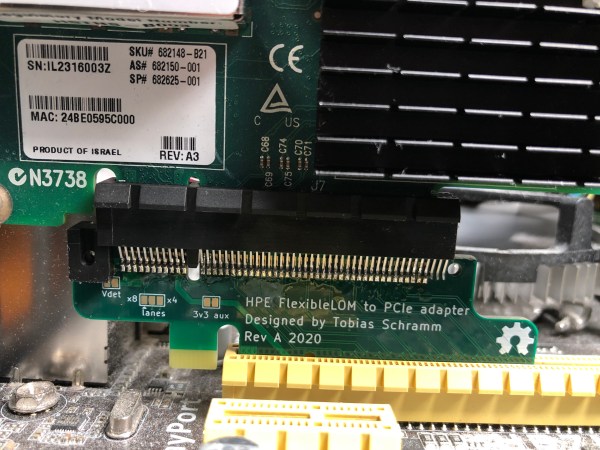
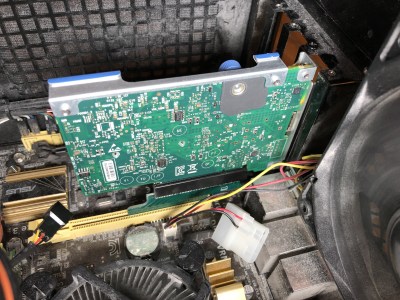
The adapter is designed to allow a FlexibleLOM card to fit into a regular ATX PCI-E card slot. A small additional bracket should be used to fix the card in place with the typical bracket retention screw.

HPE’s FlexibleLOM standard consists of a special edge connector on HPE servers that lets the end-user fit a variety of network adapters in a form factor designed specifically for blade and rack mount servers. At the electrical level, it’s simply PCI-Express 8x. FlexibleLOM network cards are built for high-speed data center use, often featuring SFP+ and QSFP+ interfaces capable of 10 gigabit and 40 gigabit speeds, respectively.

These cards can be had for under $20 on eBay, but won’t fit in a standard PCI-Express slot. Enter [ToberMiner]’s adapter, which hooks up the relevant PCI-Express lines to where they need to go, and mechanically adapts the FlexibleLOM hardware to fit in a regular ATX PC case.

It’s a great way to get server-grade network adapters in your home rig, without breaking the bank. We’ve featured other attempts at high-speed home networking before, too. If you’ve got the low down on a great way to get multi-gigabit speeds out of cheap surplus hardware, you know who to call.

[Thanks to Marco for the tip!]

Displaying Incoming Server Attacks By Giving Server Logs A Scoreboard

In the server world, it’s a foregone conclusion that ports shouldn’t be exposed to the greater Internet if they don’t need to be. There are malicious bots everywhere that will try and randomly access anything connected to a network, and it’s best just to shut them off completely. If you have to have a port open, like 22 for SSH, it’ll need to be secured properly and monitored so that the administrator can keep track of it. Usually this is done in a system log and put to the side, but [Nick] wanted a more up-front reminder of just how many attempts were being made to log into his systems.

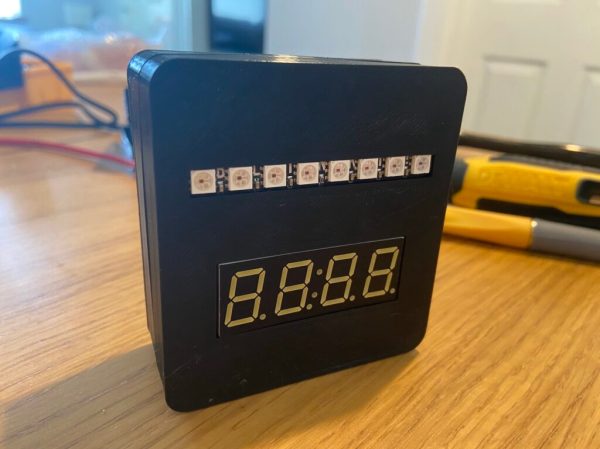
This build actively monitors attempts to log into his server on port 22 and notifies him via a numerical display and series of LEDs. It’s based on a Raspberry Pi Zero W housed in a 3D-printed case, and works by interfacing with a program called fail2ban running on the server. fail2ban‘s primary job is to block IP addresses that fail a certain number of login attempts on a server, but being FOSS it can be modified for situations like this. With some Python code running on the Pi, it is able to gather data fed to it from fail2ban and display it.

[Nick] was able to see immediate results too. Within 24 hours he saw 1633 login attempts on a server with normal login enabled, which was promptly shown on the display. A video of the counter in action is linked below. You don’t always need a secondary display if you need real-time information on your server, though. This Pi server has its own display built right in to its case.

Continue reading “Displaying Incoming Server Attacks By Giving Server Logs A Scoreboard”

A Cyclopic LCD Case For Your Raspberry Pi Server

If you’ve got a personal website that needs hosting or a few hundred gigabytes of files that could use a centralized storage location, the Raspberry Pi’s small size and extreme energy efficiency make it a compelling server choice compared to that curbside Pentium 4 box you’ve been trying to find a home for. All you need is something to put in.

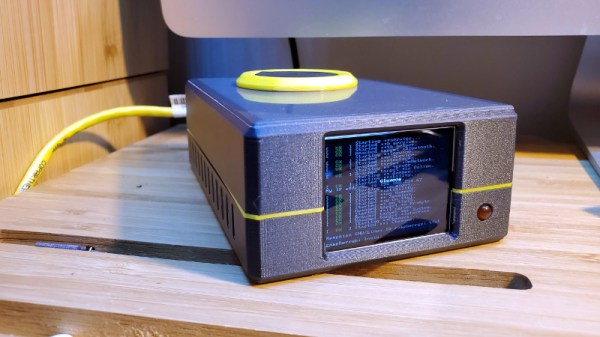
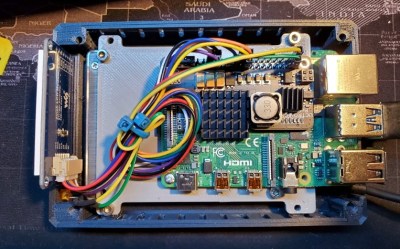
Of course there’s no shortage of Pi case designs ready to be extruded from your 3D printer, but we recently found ourselves particularly taken with this unique one designed by [Ken Segler]. It’s not only small and sleek with a dash of futuristic flair, but it includes a front-mounted two inch 240 x 320 IPS display that connects to the Pi over SPI. At the minimum that gives you a way to see all those beautiful boot messages on startup, but with a little code, it could provide you with various system statics and status messages at a glance.

While the LCD is clearly the star of the show here, the case also has a few other nice features that make it worthy of your consideration. The magnetically attached fan filter on the the top, for one. The stacked layout that puts the Pi directly above the SSD also makes for a relatively compact final product.

One thing to note though is that [Ken] is using Power-over-Ethernet, meaning there’s no spot for a dedicated power jack on the case. It’s an easy enough feature to add into your own build, but naturally not everyone’s network is suitably equipped. In that case, beyond the normal annoyances of editing STL files, it shouldn’t be too much trouble to add one in without having to literally hack your way through the printed plastic.

A Very Buttoned Up Raspberry Pi Media Server

Projects that turn the Raspberry Pi into a low-cost Network Attached Storage (NAS) solution are very common; all you need is the right software, the Pi itself, and some USB storage devices. But unless you particularly like the “Medusa” look, with loose cables running all over the place, you’ll probably want to put the hardware into a suitable enclosure. Unfortunately, that’s where the somewhat unusual layout of the Pi can make things tricky.

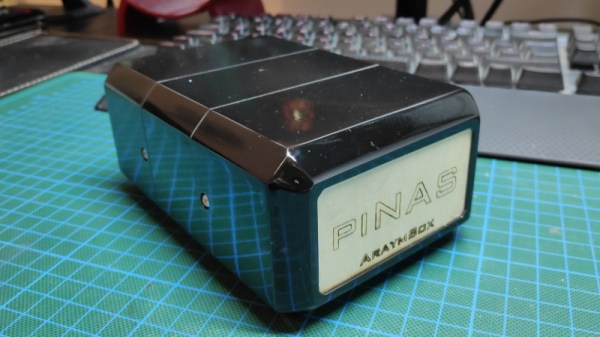
Which is why [AraymBox] came up with this unique “capsule” enclosure for the Raspberry Pi and two USB-attached hard drives. Every effort has been made to keep the outside of this design as clean and streamlined as possible. The asymmetrical loops of wires that we so often see on other projects are gone, with everything been brought inside thanks to some clever wiring. This enclosure looks like a professional product, and if you’re willing to put in the effort, you can have one to call your own.

The good news is that the 3D printed enclosure only has four parts, albeit rather large ones, and none of which require support material. So it should be an easy print even on a relatively low-end machine. Of course, you’re not going to get that futuristic metallic look without a little work. You’ll need to do a considerable amount of sanding, filling, and paint work to get that kind of a surface finish. Then again, that rough “just printed” look has a certain cyberpunk appeal to it as well.

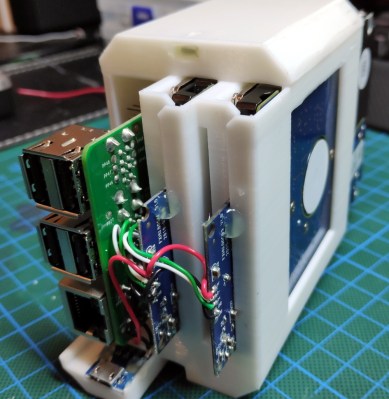
But the printed enclosure is only half the battle. Inside, [AraymBox] has soldered the USB to SATA adapter cables directly to the Raspberry Pi to keep things tight and compact. A micro USB breakout board was then used to add a power connector on the back of the device where the Ethernet and USB ports are, solving the issue of having one lonely USB cable coming out of the side of the case.

In the past we’ve seen other attempts to create a 3D printable enclosure for Pi servers, with varying levels of success. While some would argue that the better solution is to just throw the Pi and the drives in a large enough enclosure that it doesn’t matter what the wiring looks like, we appreciate the effort that some hackers are willing to put in to make something custom.

Custom Lego Server Case Looks As Though It Came Straight From A Data Center

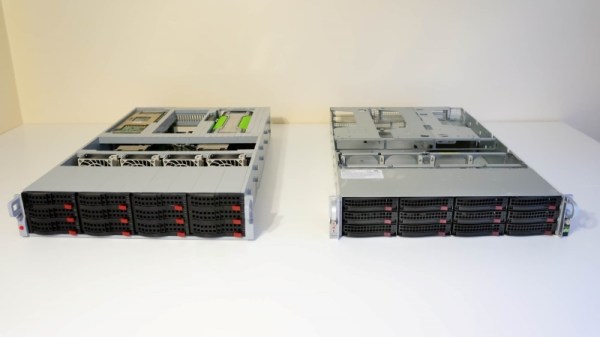
The picture above appears to show two unremarkable 2U rack servers, of the kind that are probably hosting the page you’re reading right now. Nothing special there – until you look carefully and realize that the rack server case on the left is made entirely from Lego. And what’s more, the server even works.

When it comes to building Lego computers, [Mike Schropp] is the guy to call. We’ve previously featured hisĀ Lego gaming computer, a striking case wrapped around what was a quite capable machine by 2016 standards, as well as an earlier case that reminds us a little of a NeXT. His reputation for Lego-clad computers led server maker Silicon Mechanics to commission a case for a trade show, and [Mike] jumped at the challenge.

Making a home-grade machine is one thing, but supporting all the heavy drives, power supplies, and fans needed to make the machine work is something else. He used a combination of traditional Lego pieces along with a fair sampling of parts from the Lego Technics line to pull off the build, which looks nearly perfect. Sadly, the Lego unit sizes make the case slightly taller than 2U, but that’s a small quibble when everything else matches so well, even the colors. And the fact that the server works, obviously important for a trade show demo, is pretty amazing too. The power supplies are even hot-swappable!

Congratulations to [Mike] on yet another outstanding Lego creation.