The Best Threaded Holes For Resin Parts

Threaded inserts are great for melting into FDM prints with a soldering iron. The process isn’t so simple for resin prints, since they don’t generally soften with heat. Off course, you can also print the threads directly, screw a bolt into an un-threaded hole, or tap a hole. Following his usual rigorous testing process, [Stefan] from CNC Kitchen investigated various ways of adding threaded holes to resin prints.

After establishing a pull-out force on PLA using threaded inserts (205 kg) and tapped holes (163 kg), [Stefan] tested parts printed with Prusament Tough Anthracite resin. Un-threaded and tapped holes failed at 44 kg and 55 kg respectively, while printed threads were almost twice as strong, reaching 106 kg before breaking. Stephan also tried gluing inserts into the parts using resin and CA glue. The resin didn’t cure properly in the opaque parts (6 kg) while CA was comparable to plastic threads, failing at 52 kg.

Chart of results
TLDR: Print your threads for best results

[Stefan] also tested regular ELEGOO Translucent resin. The higher hardness of the cured resin allowed the parts to hold on to around 100 kg for un-threaded and tapped holes, while printed threads reached 120 kg. Threaded insert glued with resin did better on the transparent parts thanks to improved UV penetration, but were very inconsistent. Inserts glued with CA performed about the same as on the Prusament parts, failing at 56 kg.

In an attempt to improve the performance of the inserts [Stefan] printed some parts with stepped holes to match the geometry of the inserts, which had the advantage of preventing the insert from falling through during gluing. It only made a marginal difference on the Prusament parts but boosted the strength of CA-glued inserts on the ELEGOO resin to 82 kg. Two-part epoxy was also tried, which matched the un-threaded holes in strength.

So for resin parts you’ll probably be best served by just modeling the threads in CAD and printing them directly. If you need to be able to repeatedly screw and unscrew fasteners in a hole without stripping, threaded holes with CA or epoxy might be a better solution.

Continue reading “The Best Threaded Holes For Resin Parts”

Hackaday Links Column Banner

Hackaday Links: October 30, 2022

Sad news for kids and adults alike as Lego announces the end of the Mindstorms line. The much-wish-listed line of robotics construction toys will be discontinued by the end of this year, nearly a quarter-century after its 1998 introduction, while support for the mobile apps will continue for another couple of years. It’s probably fair to say that Mindstorms launched an entire generation of engineering careers, as it provided a way to quickly prototype ideas that would have been difficult to realize without the snap-fit parts and easily programmed controllers. For our money, that ability to rapidly move from idea to working model was perhaps the strongest argument for using Mindstorms, since it prevented that loss of momentum that so often kills projects. That was before the maker movement, though, and now that servos and microcontrollers are only an Amazon order away and custom plastic structural elements can pop off a 3D printer in a couple of hours, we can see how Mindstorms might no longer be profitable. So maybe it’s a good day to drag out the Mindstorms, or even just that big box of Lego parts, and just sit on the carpet and make something.

Continue reading “Hackaday Links: October 30, 2022”

Hackaday Podcast 191: Researchers Parse Starlink, Switches Sense Muscles, And LFT Plays The Commodordion

This week, Editor-in-Chief Elliot Williams and Staff Writer Dan Maloney get together for a look at everything cool under the hardware-hacking sun.

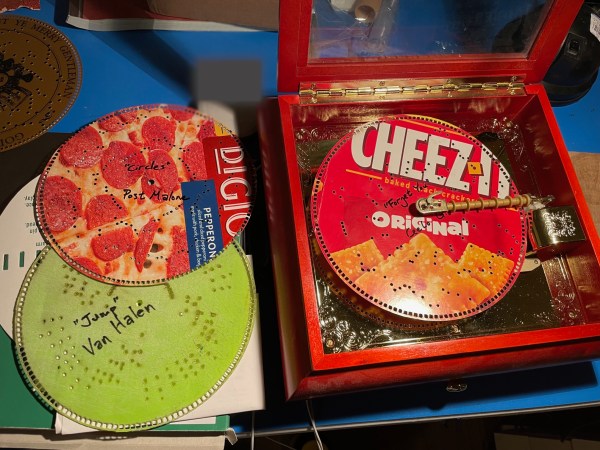
Think you need to learn how to read nerve impulses to run a prosthetic hand? Think again — try spring-loaded plungers and some Hall effect sensors. What’s Starlink saying? We’re not sure, but if you’re clever enough you can use the radio link for ad hoc global positioning. Historically awful keyboards, pan-and-scan cable weather stations, invisibility cloaks, plumbing fittings for electrical controls — we’ll talk about it all. And if you’ve never heard two Commodore 64s and a stack of old floppies turned into an electronic accordion, you really don’t know what you’re missing.

Download it your own bad self!

Check out the links below if you want to follow along, and as always, tell us what you think about this episode in the comments!

Continue reading “Hackaday Podcast 191: Researchers Parse Starlink, Switches Sense Muscles, And LFT Plays The Commodordion”

Build This Halloween-Themed TensEGGrity Sculpture

Tensegrity sculptures are fun things, and often sold as office desk toys or scientific novelties. You can build your own too, and [seabirdhh] has whipped up a fun holiday-themed version.

The first part to build is the egg-hat-stand. This consists of the base of the structure, with the “hat” of the egg character hanging in the center. The other half of the structure is built separately, with the rest of the “egg head” sitting in a cup in the bottom of the upper structure. A series of nylon threads are then tied between the components. These can then be tensioned to give the structure its shape, allowing the egg’s “hat” to hover above its “head”. [seabirdhh] passes the nylon threads through small pieces of rubber that allow the tension to be adjusted just right. Too little and the structure falls down, but too much, and it will bend over time. Tuning it carefully is key.

It’s a fun build, and a cheap way to experiment with tensegrity concepts at home. You can even use these same techniques to build a quadcopter, or apply them in the world of LEGO. Video after the break.

Continue reading “Build This Halloween-Themed TensEGGrity Sculpture”

3D Printed Strain-Wave Gearbox Turns Up The Torque

3D printers are good for a lot of things, but making parts for power transmission doesn’t seem to be one of them. Oh sure, some light-duty gears and timing belt sprockets will work just fine when printed, but oftentimes squooshed plastic parts are just too compliant for serious power transmission use.

But that’s not a hard and fast rule. In fact, this 3D-printed strain-wave transmission relies on the flexibility of printed parts to work its torque amplification magic. In case you haven’t been briefed, strain-wave gearing uses a flexible externally toothed spline nested inside an internally toothed stationary gear. Inside the flexible spline is a wave generator, which is just a symmetrical cam that deforms the spline so that it engages with the outside gear. The result is a high ratio gear train that really beefs up the torque applied to the wave generator.

It took a couple of prototypes for [Brian Bocken] to dial in his version of the strain-wave drive. The PLA he used for the flexible spline worked, but wasn’t going to be good for the long haul. A second version using TPU proved better, but improvements to the motor mount were needed. The final version proved to pack a punch in the torque department, enough to move a car. Check it out in the video below.

Strain-wave gears have a lot of applications, especially in robotic arms and legs — very compact versions with the motor built right in would be great here. If you’re having trouble visualizing how they work, maybe a Lego version will clear things up.

Continue reading “3D Printed Strain-Wave Gearbox Turns Up The Torque”

Learning By Playing

Summer break has started over here, and my son went off to his first of a few day-camp-like activities last week. It was actually really cool – a workshop held by our local Fablab where they have the kids make a Minecraft building and then get to 3D-print it out. He loves playing and building in Minecraft, so we figured this would be right up his alley.

TinkerCAD model of a Lego Minecraft fox. Kiddo trifecta!

I had naively thought that it would work something like this: the kids build something in Minecraft, and then some software extracts the build and converts it into an STL file. Makes sense, because they already are more-or-less fluent in Minecraft modelling. And as I thought about that, it was a pretty clever idea.

But the truth was even sneakier. They warmed up by making something in Minecraft, then they opened up TinkerCAD, which was new to all of the kids, and built a 3D model there. Then they converted the TinkerCAD models into Minecraft, and played with what they had just built while the 3D printers hummed away.

The kids didn’t even flinch at having to learn a new 3D modelling tool, and the parallels to what they were already comfortable doing in Minecraft were obvious to them. My son came home and told me how much easier it was to do your 3D modelling in “this other Minecraft” – he meant TinkerCAD – because you don’t need to build everything out of single blocks. He thought he was playing games, but he’d secretly used his first CAD tool. Nice trick!

Then I look back and realize how much I must have learned about computers through playing as a kid. Heck, how much I still learn through playing. And of course I’m not alone – that’s one of the things that shines through in a large number of the projects we feature. Hack on and have fun!

Trying Out A 3D Printed Microscope Lens Adapter

If you want to take pictures of tiny things close up, you need a macro lens. Or a microscope. [Nicholas Sherlock] thought “Why not both?” He designed a 3D-printed microscope lens adapter that you can find on Thingiverse. Recently, [Micael Widell] tried it out with a microscope lens and you can see the results in the video below.

A $20 microscope lens allows for some amazing shots. There are two designs that fit different cropped-image and full-frame cameras. As you might expect, the depth of field is razor-thin, probably sub-millimeter. Additionally, with a 4X lens on a 35 mm sensor, the field of view is about 9 mm so you have to have a steady hand just to keep everything in frame.

Continue reading “Trying Out A 3D Printed Microscope Lens Adapter”