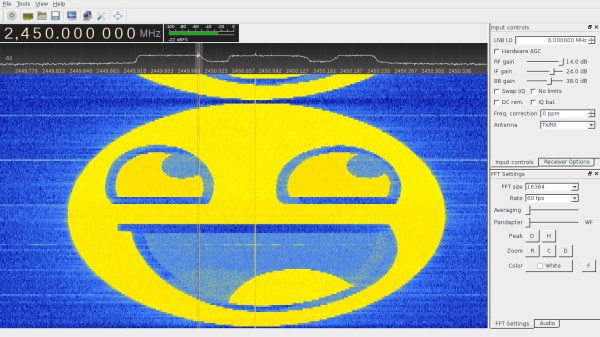
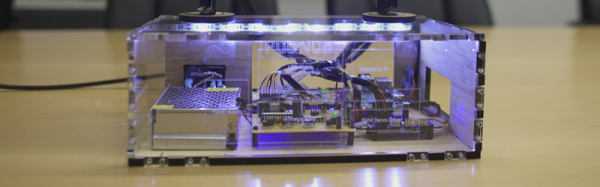
Give a software-defined radio (SDR) platform to a few thousand geeks, and it’s pretty predictable what will happen: hackers gotta hack. We’re only surprised that it’s happening so soon. Spectrum Painter is one of the first cool hacks to come out of the rad1o badge given out at the CCCamp 2015. It makes it dead-simple to send images in Hellschreiber mode on a few different SDR hardware platforms.
What we especially like about the project is its simplicity. Don’t get us wrong, we’re tremendous fans of GNURadio and the GNURadio Companion software radio hacking environment. But if you just want to do something simple, like send a picture of a smiley-face, the all-capable GNURadio suite is overkill.
The Leap controller is one of those gadgets that is probably better for its cool factor rather than its practicality. The time of flight optical sensor reads gestures, but it is hardly a substitute for a mouse in many cases. It seems like the best uses for it we’ve seen are dedicated systems that need to know where your hands are. [Justin Platz] and [Kurt Clothier], for example, have an interesting demo that uses a Leap to control a Raspberry Pi. The Pi commands servo motors that move LED blocks to track your hand motion. Their code is available on GitHub.
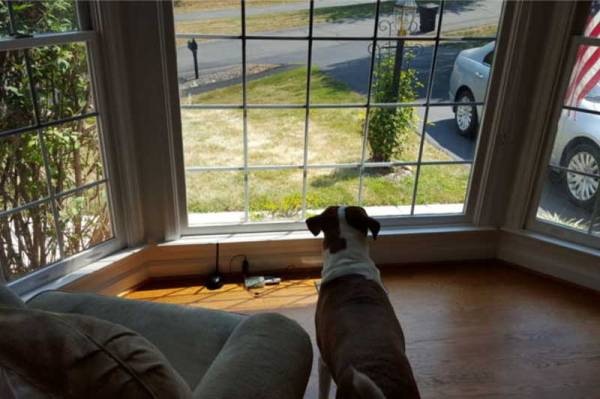
Dogs are remarkable creatures. Anybody who has lived with one will know that they are very vocal beasts, with barks that range from noting the presence of a squirrel in the yard to the warning whine that says “I am about to pee on your shoes if you don’t take me outside.” [Henry Conklin] decided to computerize the analysis of these noises, putting his dog [Oliver Twitch] on Twitter so he could hear what he was saying while he was at work. [Henry] that is: [Oliver] stays at home.
He did this using a Raspberry Pi, which is set to record sound above a certain volume. With the system sitting by [Oliver’s] favorite window, this records his barks. The recordings are then analyzed using PyAudioAnalysis, a library that analyzes sounds, compares them to reference ones and classifies them. The Raspberry Pi then posts the results onto twitter using Python-twitter.
The setup used by [Oliver] to capture the barks: a USB microphone, Raspberry Pi and WiFi USB dongle.Or rather, it will when [Henry] fixes a few bugs: right now it just posts a random string that is based on the length of the bark, not the type. [Henry] says he is working on the dog translation at the moment. It’s still a neat project that shows you how simple it is to use a few small bits of code to gather info from your environment and share these over the Internet. [Henry] also says that the next step is creating a weekly podcast for [Oliver]. I, for one, will be subscribing to hear his thoughts on how annoying the postman is, and how vexing it is to see a squirrel and not be able to chase them.
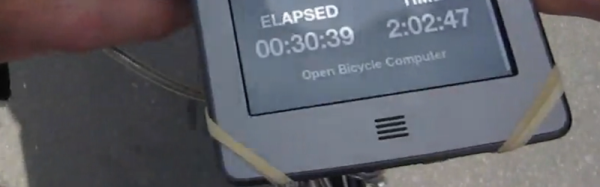
[David Schneider] had trouble seeing his bike computer in the sunlight and wanted a navigation solution that would be both readable and not require a smart phone. In good hacker fashion, [David] married a Raspberry Pi and a Kindle Touch (the kind with the E-ink display). The Kindle provides a large and easy-to-read display.
[David] was worried about violating the DCMA by modifying the Kindle. Turns out, he didn’t have to. He simply used the book reader’s Web browser and set the Pi up as a wireless access point. One clever wrinkle: Apparently, the Kindle tries to phone home to Amazon when it connects to a wireless network. If it can’t find Amazon, it assumes there’s no valid network and treats the network as invalid. To solve this issue, [David] causes the Pi to spoof the Kindle into thinking it gets a valid response from Amazon.
The other work around was to change how the Python application on the Pi updates the screen. [David] found that without that optimization, the constant redrawing on the E-ink display was annoying. The Pi-related hardware includes a GPS, some reed switches, and a WiFi dongle.
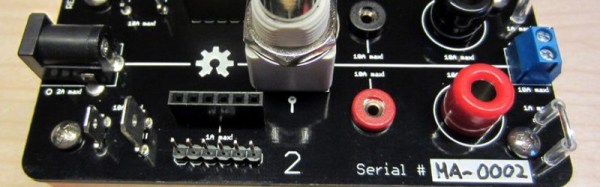
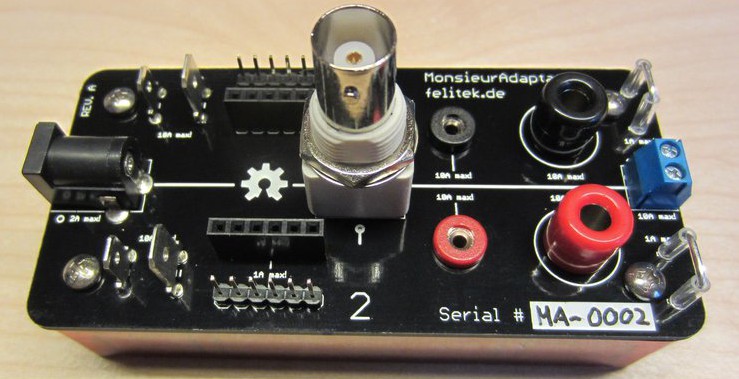
It seems that any time you have a circuit on the bench, there’s wires. Lots of wires. If you are working on something new, it is a good bet that some of those wires are clipped to other wires using some field expedient, especially the power wires. We often have an alligator clip awkwardly grabbing the shell of a BNC. [Felicitus] got tired of this, so he created Monsieur Adaptateur, a breakout board that has common connectors you’ll need when working on a prototype.
What kind of connectors?
DC Jack 2.1mm
2mm Jacks
4mm Jacks
BNC Connector
Terminal Block
Scope probe connector
Standard 6 pin 0.1″ female header
Standard 6 pin 0.1″ male header
4.75 and 6.3mm blade connectors
The dual conductor items (like the 2.1mm jack and the BNC) connect to both sides of the board. The other connectors are in pairs. The idea is you can connect, for example, a BNC cable from a signal generator to some jumper wires on the male header, connect the scope to the scope probe connector, and still have the banana jacks to hook up, say, a digital meter.
No one would say this is going to change the world, but this is one of those things that is simple, but very useful. The plans are all on Github, and obviously you could adapt it with connectors that make sense for your specific situation.
Water: Life on earth wouldn’t exist without it. 71 percent of the Earth is covered by water. That only leaves 29 percent for us humans to live – and not all of that land is inhabitable. Water is so important that most human settlements start near water of some sort. Water to drink, or water to move goods. With all this water in oceans, lakes, and rivers, it is no surprise that hackers, makers, and engineers alike build some incredible projects that work on and under the water.
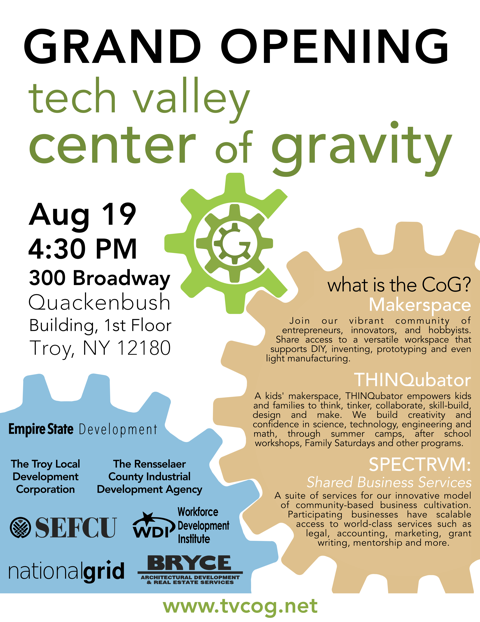
Last week we got an invitation in the Hackaday tip line to attend the grand opening of a hackerspace in Troy, New York. Styling itself the Tech Valley Center of Gravity, the group seemed intriguing – a combination of makerspace and business incubator. But what was this about a grand opening? Hackerspaces don’t open – they just occupy a found space and grow by accretion until they reach a critical mass of equipment and awesomeness. I decided I needed to see this for myself, and being only a two-hour drive from my home, I headed off with my kids in tow and a small pile of Hackaday swag to see what a ribbon cutting for a hackerspace would be like. Plus I absolutely had to find out what in the world a “Quackenbush Building” was.
I was not disappointed. The Center of Gravity is a really special group of folks with an incredible vision of what it means to be hackers. Hackerspaces make a lot of things – great projects and gadgetry, plus sawdust, metal chips, and the occasional puff of Magic Blue Smoke. The Center of Gravity makes all of that, but it also makes entrepreneurs, businesses, and actual products. And it can reasonably claim to have a hand in community renewal.
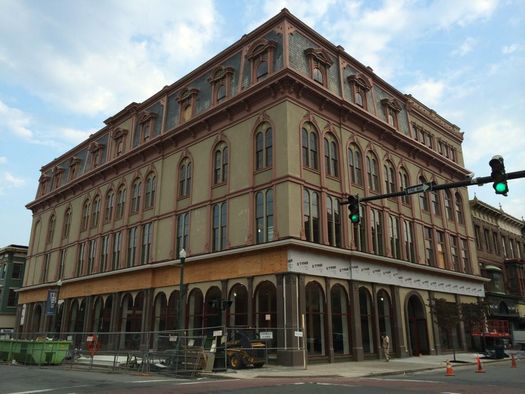
The Quackenbush
The Quackenbush Building [source 1=”<a” 2=”href="http://alloveralbany.com/archive/2015/08/19/tech-valley-center-of-gravity-quackenbush-building">All” 3=”Over” 4=”Albany</a>” language=”:”][/source]I have to admit my first impression of the event was a little confused. There was a huge crowd stuffed into the high-ceilinged first floor of an old building taking up most of a city block. There were a few 3D printers set up on tables, and groups of people demonstrating cool stuff – my son was especially keen to try the Airsoft rifle interface to Counterstrike. But the whole thing had a decidedly science fair atmosphere to it, with obvious civilians mixing and mingling with the black t-shirted hackers. There were also quite a few folks in business attire, plus white-shirted wait staff circulating with appetizers and drinks. But where was the machine shop? The laser cutters? The electronics benches and oscilloscopes and function generators? Where were the projects in various states of assembly? Had I driven all this way just to see a community outreach event?
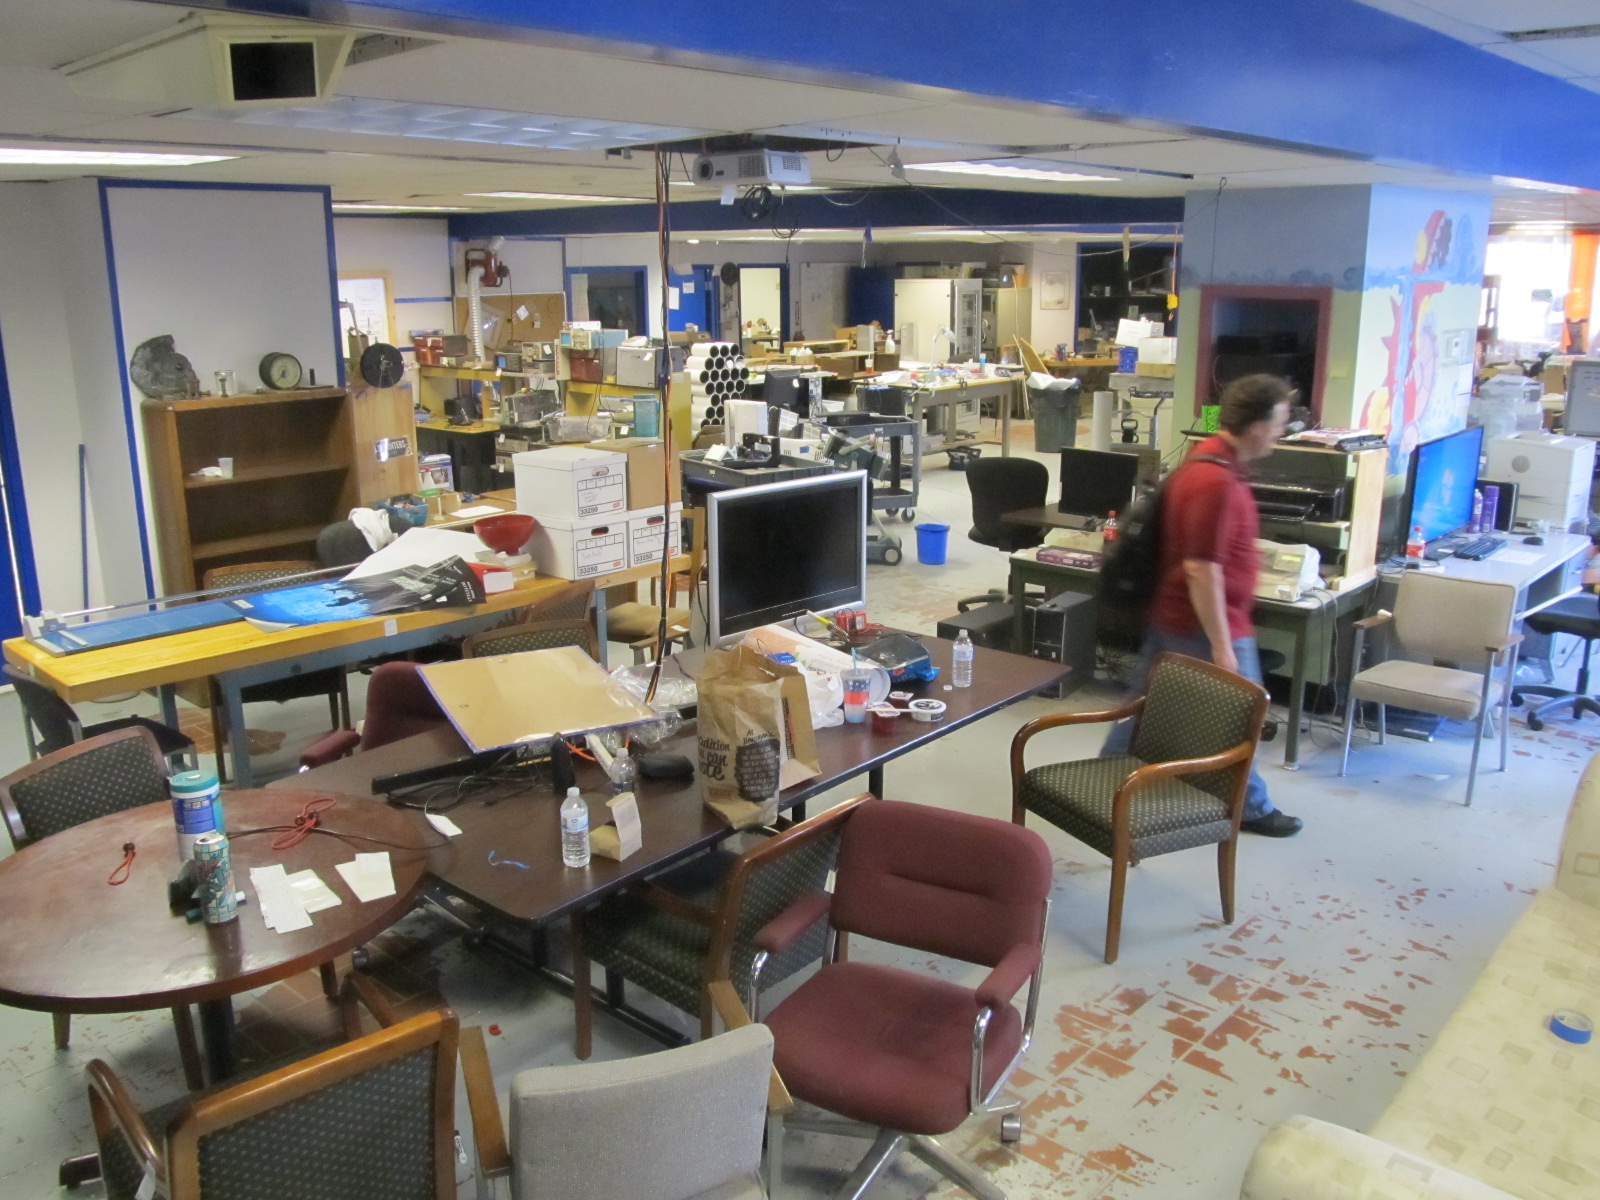
Disappointed, I headed down the stairs to the basement, which was mercifully cooler than the first floor. Ah, ha! Here were the shops – huge and brand new, with separate areas for woodwork and metalwork. And here I met [Bob Bownes], vice president of CoG, serial entrepreneur, and the fellow who invited me. And this is where I finally learned the full story of what was going on.
The CoG woodshop – still has that new hackerspace smell.
The ribbon cutting that was going on upstairs – the ribbon being a copper braid and the scissors being a MIG welder – was the official start of the CoG’s residency in its new space in the renovated Quackenbush Building. Built in the 1850s, it was home to the Quackenbush Department Store until the 1930s, when it switched hands to another chain. It finally became a Rite Aid pharmacy which, in a sign of the hard times Troy would fall upon, closed in the early 2000s. The beautiful old building was purchased by a local developer, renovated with the help of various state grants, and its 48,000 square feet were turned over to the CoG group, who could now move out of their cramped and confining home in the bottom of a parking garage that was once a McDonald’s and an off-track betting parlor.
Making Businesses
It wasn’t just good fortune that lead to the CoG being able to expand so dramatically. As [Bob] explained, the CoG had been designed from the ground up to be a business incubator as well as a hackerspace. If you have an idea, you can turn it into a product in the CoG hackerspace, then turn the product into a business in the incubator. The upper two floors of the Quackenbush are devoted to the incubator, which provides fledgling companies with access to administrative functions, provides conference and office space, and helps get businesses off the ground.
The old CoG, in a former McDonald’s.
One such business is Vital Vio, a maker of visible light disinfection fixtures. Vital Vio got its start in the aforementioned former McDonald’s, and will take advantage of the 3,000 square foot light manufacturing swing space in the basement of the Quackenbush to ramp up its production. The goal is to have Vital Vio and the companies that will no doubt follow it move on to space of their own, at which point the next company will take over the swing space for their first manufacturing operation – hack, rinse, repeat. With quite a few businesses already in the incubator stage, it should be exciting to watch what comes out of the CoG over the next few years.
Making Community
I had been to Troy a few times back in the ’80s and ’90s, and I wasn’t impressed. It always seemed seedy and run down to me, like so many towns and cities in the northeast US that had their manufacturing hearts ripped out of them in the 1970s. But the Troy we saw on Wednesday was a totally different place – vital and happening, with bistros and bakeries and funky public spaces. [Bob] explained that CoG had plenty to do with that – at least six new companies had relocated to the area around the Quackenbush specifically because of CoG. And it’s hoped that the businesses that spin off the incubator will choose to stay close to the nest, which will attract more businesses and more people to the area. That’s quite a change from the point where even a McDonald’s and an off-track betting parlor are no longer viable.
My trip to the Tech Valley Center of Gravity was not your typical hackerspace tour, but the CoG is not your typical hackerspace. There’s a lot to be said for the vision that created this place, and the model they’ve adopted for churning out businesses really seems to be working. Almost the entire incubator space is spoken for already, so there are plenty of companies waiting to be born there. That’s not to say that the average hacker who just wants a place to play won’t feel at home in the CoG – there’s plenty of room for them too, and the CoG even welcomes families with special memberships and STEM outreach programs. But if you have the germ of an idea, it can go from product to business with the help of a place like this, and that’s a pretty cool idea.
My thanks to [Bob], [Matt] and [Tait] for taking so much time out of their celebration to show us around. I hope we can visit again once everything is moved and you’re settled into your awesome new home.
![The setup used by [Oliver] to capture the barks: a USB microphone, Raspberry Pi and WiFi USB dongle.](https://hackaday.com/wp-content/uploads/2015/08/bark-details.jpg)