How A Real 3D Display Works

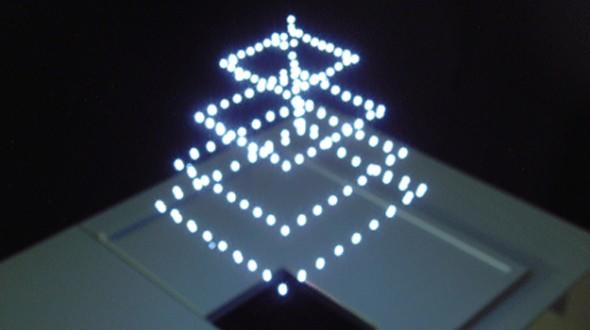
There’s a new display technique that’s making the blog rounds, and like anything that seems like its torn from [George Lucas]’ cutting room floor, it’s getting a lot of attention. It’s a device that can display voxels in midair, forming low-resolution three-dimensional patterns without any screen, any fog machine, or any reflective medium. It’s really the closest thing to the projectors in a holodeck we’ve seen yet, leading a few people to ask how it’s done.

This isn’t the first time we’ve seen something like this. A few years ago. a similar 3D display technology was demonstrated that used a green laser to display tens of thousands of voxels in a display medium. The same company used this technology to draw white voxels in air, without a smoke machine or anything else for the laser beam to reflect off of. We couldn’t grasp how this worked at the time, but with a little bit of research we can find the relevant documentation.

A system like this was first published in 2006, built upon earlier work that only displayed pixels on a 2D plane. The device worked by taking an infrared Nd:YAG laser, and focusing the beam to an extremely small point. At that point, the atmosphere heats up enough to turn into plasma and turns into a bright, if temporary, point of light. With the laser pulsing several hundred times a second, a picture can be built up with these small plasma bursts.
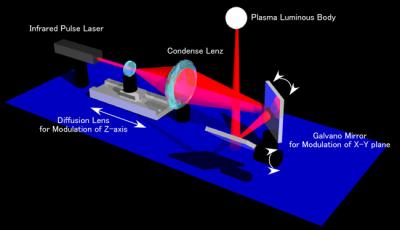
2-fig2

Moving a ball of plasma around in 2D space is rather easy; all you need are a few mirrors. To get a third dimension to projected 3D images, a lens mounted on a linear rail moves back and forth changing the focal length of the optics setup. It’s an extremely impressive optical setup, but simple enough to get the jist of.

Having a device that projects images with balls of plasma leads to another question: how safe is this thing? There’s no mention of how powerful the laser used in this device is, but in every picture of this projector, people are wearing goggles. In the videos – one is available below – there is something that is obviously missing once you notice it: sound. This projector is creating tiny balls of expanding air hundreds of times per second. We don’t know what it sounds like – or if you can hear it at all – but a constant buzz would limit its application as an advertising medium.

As with any state-of-the-art project where we kinda know how it works, there’s a good chance someone with experience in optics could put something like this together. A normal green laser pointer in a water medium would be much safer than an IR YAG laser, but other than that the door is wide open for a replication of this project.

Thanks [Sean] for sending this in.
Continue reading “How A Real 3D Display Works”

Undershield, DIY Arduino Battery Shield

Battery Shield Mounts Underneath The Arduino

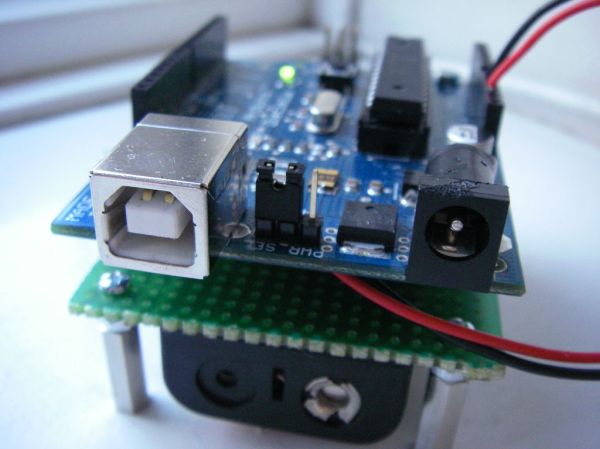
So, what do you do when your Arduino project needs to operate in a remote area or as a portable device? There are LiPo battery shields available, and although they may work well, recharging requires access to a USB port. You can also go the 9v battery route plugged into the on-board regulator of the Arduino but the low mAh rating of a 9v won’t allow your project to stay running for very long. [AI] needed a quick-change battery option for his Arduino project and came up with what he is calling the AA Undershield.

As the name implies, AA sized batteries are used in the project, two of them actually. Yes, two AA batteries at 1.5v each would equal only 3 volts when connected in series. The Arduino needs 5v so [AI] decided to use a MAX756 DC-to-DC step-up regulator to maintain a steady stream of 5v. This article has some nice graphs showing the difference in performance between a 9v battery being stepped down to 5v verses two AA’s being bumped up to 5v.

The ‘under’ in Undershield comes from this shield being mounted underneath the Arduino, unlike every other shield on the planet. Doing so allows use of a standard 0.100″-spaced prototype PCB and is an easy DIY solution to that odd-sized space between the Arduino’s Digital 7 and 8 pins. The Arduino mounts to the Undershield via its normal mounting holes with the help of some aluminum stand offs.

[AI] did a great job documenting his build with schematics and lots of photos so that anyone that is interested in making one for themselves can do so with extreme ease.

Very Large Touchpads For Very Old Computers

Way back when most of our demographic was in diapers, engineering workstations had huge touchscreens for plotting drawings in CAD programs, drawing, and just about everything a Wacom tablet does today. Finding one of these touch pads now is a fool’s errand, more so than finding the computer it was attached to, but [Daniel] figured out a way to relive those days of large touchpads and old computers with a resistive touchscreen and an MSX computer (portuguese, google translatrix).

[Daniel] is using a touchscreen normally used for a monitor, and with the right bit of code on a PIC16F micro, pressure on the touchscreen can be translated into X and Y coordinates. Using the PIC was a great choice in this instance: it’s possible to multiplex ports on an ADC pin with a PIC, making the entire system extremely efficient and easy to calibrate.

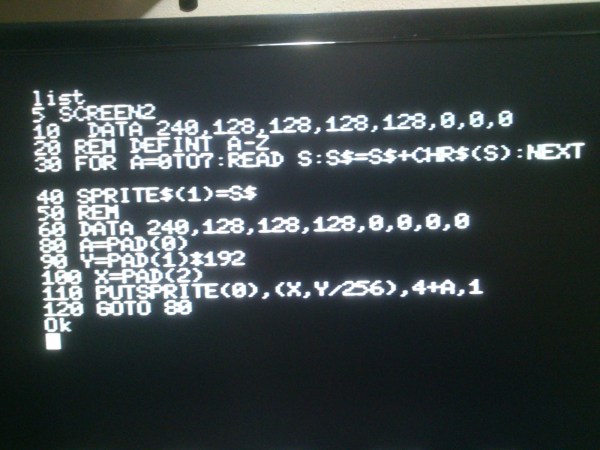
After that, it’s just a matter of plugging the output of the microcontroller into the touchpad connector of the MSX and writing a few lines of BASIC to draw a point on the screen. Video below.

Continue reading “Very Large Touchpads For Very Old Computers”

3D Printed Drone Follows The Leader

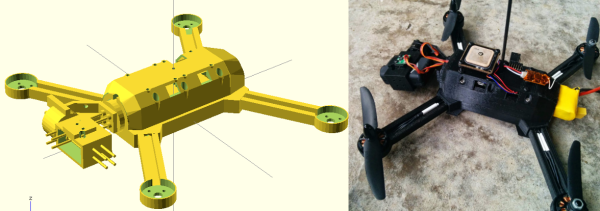
[peabody124, aka James] has been active in the drone world for several years now, first with OpenPilot, then TauLabs, and now with his own Spark and Sparky2 boards. [James]’ latest creation is a 3D printed quadcopter using both his Sparky2 board and his Sparky2BGC Brushless Gimbal Controller.

[James] had always wanted a quad which would follow him and his friends while they were having fun, sort of like his own flying camera platform. His current setup is finally approaching that goal. [James] designed his new quadcopter to use his Sparky2 flight controller and the KISS 18 amp Electronic Speed Controller (ESC). He also incorporated a brushless gimbal to keep his Mobius action cam pointed at a whatever the drone may be tracking.

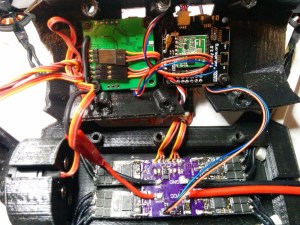
To keep the internal intern-boardslayout clean, [James] designed a power distribution board which solders right up to the ESCs. The internal layout is seriously clean, with flat panels which keep the electronics safe during crashes.
The crash protection turned out to come in handy, as [James] managed to hit a couple of drone-eating trees during testing. Thankfully, having a 3D printed quad means spare parts are just a few hours of printing away. Check out the video below for footage of [James]’ test flights, and of the quad tracking his cell phone via an RF link.

Continue reading “3D Printed Drone Follows The Leader”

Redesigned Bike Light Controller

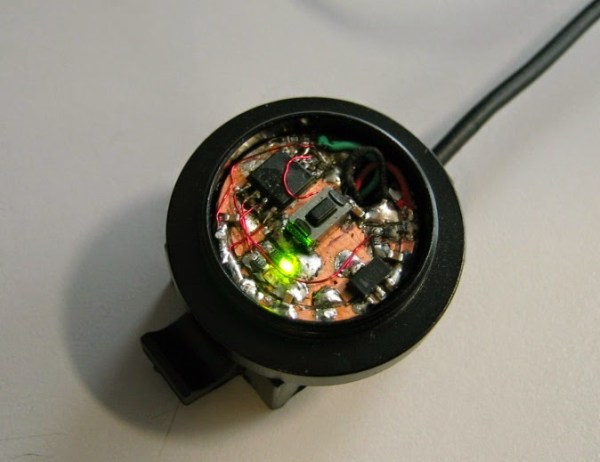
[JP] was looking for a bicycle light to do some night biking around his home. He found a reasonably priced light that suited his needs, but when he started using it he found that the controller was a little lackluster. To solve some of its problems, he ended up building his own lighting controller from scratch.

The original controller’s main problem was that the it didn’t debounce the input from the single pushbutton. This meant that a single press of the button might cause it to cycle through two or three different modes, which was inconvenient and annoying. The new controller took care of this along with implementing several new brightness modes and a “strobe” mode for commuting to work to help alert other drivers of [JP]’s presence on his bicycle.

While [JP] notes that an Arduino would have been very easy to use in this situation, it wouldn’t have fit in the original enclosure. He went with an 8-pin ATtiny45, which was perfectly sized for what he needed. Everything fit together perfectly and is much more useful than the original. Maybe next he could pair it with a light that is even brighter than the one he’s currently using.

Recording Time Lapse Of Endangered Reptiles Hatching

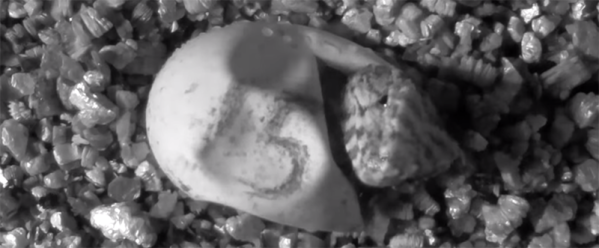
The tuatara is a reptile native to New Zealand, and thanks to the descendants of stowaway rats on 17th century ships, these little lizards are critically endangered. [Warren] was asked if he could film one of these hatchlings being born and pulled out a Raspberry Pi to make it happen.

[Warren] constructed a small lasercut box to house the incubating egg, but he hit a few snags figuring out how to properly focus the Raspi camera board. The original idea was to use a Nikkor macro lens, without any kind of adapter between it and the camera board. A bit of googling lead [Warren] to this tutorial for modifying the focus on the Raspi camera, giving him a good picture.

The incubator had no windows and thus no light, making an IR LED array the obvious solution to the lighting problem. Time was of the essence, so an off-the-shelf security camera provided the IR illumination. After dumping the video to his computer, [Warren] had a video of a baby tuatara hatching. You can check that out below.

Continue reading “Recording Time Lapse Of Endangered Reptiles Hatching”

Create A Buzz With The Mini Electric Ukulele

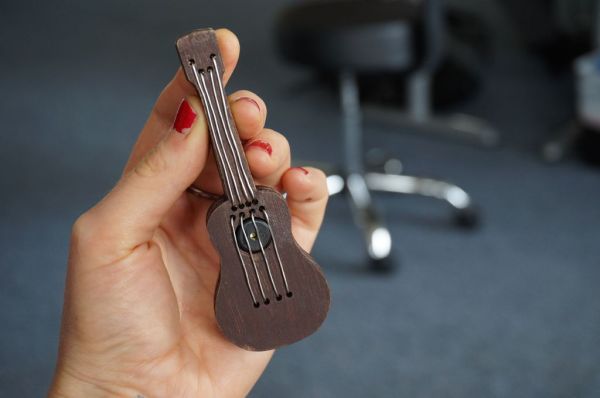
Everyone’s heard of the “World’s Smallest Violin,” but we think it’s time for something more upbeat. [Simone Giertz] of Punch Through Design has created a mini electric ukulele using a LightBlue Bean. The Bean is an Arduino-compatible microcontroller that you can wirelessly program using Bluetooth low energy (BLE).

The ukulele’s frame is made of laser-cut plywood.  Four 1M ohm resistors are soldered to individual wire strings. A different set of wire strings in the ukulele’s neck are connected to the same ground as the Bean. In order to play this tiny instrument, a finger must be kept on the “ground” strings while the other “tone” strings are touched by a different finger. [Simone] uses Arduino’s Capacitive Sensing Library to determine which string is being touched and what the tone will be (indicated in Hz). A piezo buzzer provides the sound. There is no need to fret when the battery is depleted from using this at an all-night luau: the frame can be unscrewed with easy access to the battery. [Simone] has uploaded the Bean’s code to GitHub.

There’s no shame going solo, but we’d enjoy a show of dueling mini-ukuleles. A duet with the 3D-printed ukulele is always a possibility. Or, play this little guy while running up and down some piano stairs while the kettle fife blows off some steam.  It’ll be a musical way to brighten anyone’s day. Check out the video of the mini ukelele after the break. You can also see more of [Simone’s] work at her website.

Continue reading “Create A Buzz With The Mini Electric Ukulele”