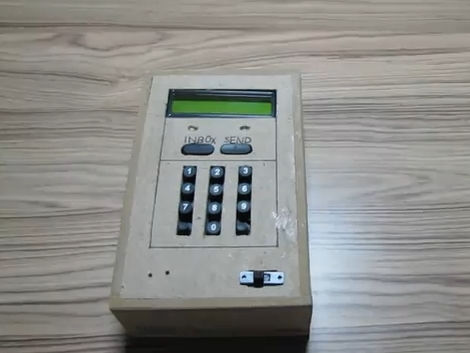
Chatbox Wireless IM Client

[Utpal Solanki] wanted to do some text chatting from the comfort of the couch. He built this wireless chat client that he calls Chatbox using a microcontroller, a character LCD screen, and a keypad that he built himself.

The device communicates via an Infrared emitter and receiver. It pairs up with an Arduino using an IR shield that [Utpal] built. The handheld unit flashes a pair of white LEDs whenever it receives a message from the Arduino. You can then hit the Inbox button and scroll through to read what was received. To reply  just type on the keypad the same way you would with a cellphone, then hit the send button to shoot that message back to the Arduino.

On the computer side of things the messages are being relayed to and from the Arduino over a USB connection. Early on in the video demonstration (embedded after the break) [Utpal] shows his Chat Box program communicating via the handheld unit in the same way that other messenger programs work.

Looks to us like he’s built his own non-pink version of what the IM-ME was originally intended to do.
Continue reading “Chatbox Wireless IM Client”

DTMF Shield Aimed At Ham Controlled Arduino

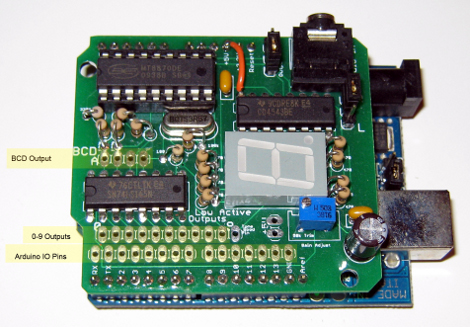
[Colin] wanted a way to reliably control an Arduino via ham radio. One of the easiest methods of automated radio control makes use of Dual-Tone Multi-Frequency signalling. To those who aren’t into amatuer radio you probably recognized DTMF as the touch-tone system for telephone communications. [Colin] built a shield that has an audio input and can decode DTMF signals.

The hardware is based around an MT8870 DTMF decoder chip. This is a popular choice for DTMF hardware because it does all of the decoding work for you. Whenever a valid tone is detected it outputs the associated value in binary on four output pins. There is a fifth pin that strobes after each new tone. [Colin’s] design offers a lot of feedback for what’s going on with the input signal. The DTMF value is displayed on a 7-segment display (controlled completely in hardware), the value is output on for Binary Coded Decimal pins, and mapped to a set of ten pins which pull to ground to match the digit received.

Webcam Turned Security Cam With Motion Detected Email Notifications

[Sean] used his old webcam to assemble a closed circuit television feed for his home. He already had a server up and running, so this was just a matter of connecting a camera and setting up the software. He wasn’t satisfied by only having a live feed, so he decided to add a few more features to the system.

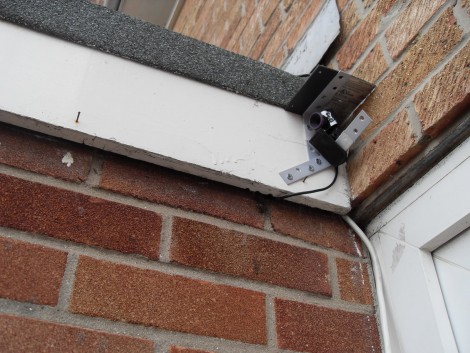
He started off by hanging a webcam near the front of his house. He mentions that he’s not sure this will last long exposed to the elements, but we think it’d be dead simple to build an enclosure with a resealable container and a nice piece of acrylic as a windows. But we digress…

The camera connects via USB to the server living in the garage. [Sean’s] setup uses Yawcam to create a live feed that can be access from the Internet. The software also includes motion detection capabilities. Since he wanted to have push notifications when there was action within the camera’s view he also set up Growl alert him via his iOS devices. You can see [Sean] demonstrate his completed CCTV system in the video below the fold.

Continue reading “Webcam Turned Security Cam With Motion Detected Email Notifications”

Hackaday Links: April 16, 2011

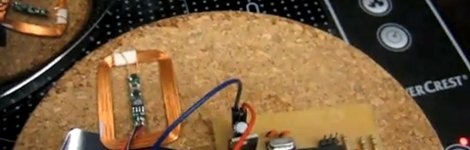
Induction cook top provides power too

We’re familiar with induction cook tops but we never thought to power a microcontroller with one. [Thanks Hadez]

Ping-Pong Uranium

We’ve been big fans of the chain reaction demonstration using ping-pong balls and mouse traps ever since we saw [Mr. Wizard] do it back in the day. If you don’t know what we’re talking about, check out this demonstration that is analogous of a fission reaction. [Thanks nateL]

Phone tripod enclosure

If you’re interested in using your smart phone for some photography, [Mike] has a nice wood and elastic mount for an iPhone which you might try yourself.

Bicycle snow tires

Admittedly we’re a bit late on this one. But keep it in mind for next year: you can use some zip ties for added traction on your bike when it snows. [Thanks Rob]

Now you can BE mario

A little Kinect script lets this gentleman play Super Mario Bros. with his body. Now you can have all the fun that goes along with being a pixellated character stuck in a two-dimensional environment (plus, there are shrooms). [Thanks Das_Coach via Slashdot]

Oscilloscope Piano Tuning 101

fft on scope

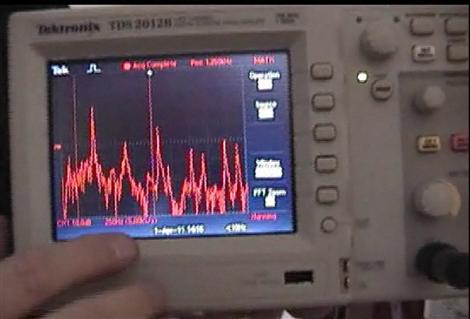
[Todd Harrison] recently wrote in to tip us off on his submission to the Tektronix oscilloscope contest – using a scope to tune a piano. In his video he demonstrates how a Fast Fourier Transform can be used to determine the fundamental frequency of the note being played. This is a quick and easy way to determine if that key is in tune, and if not, how far off it is from the desired frequency and in which direction.

He goes on to explain that a scope can only be used as a starting reference point since “mathematically correct” tuning on a piano doesn’t sound right to the human ear. It turns out that when struck, the stretched wires in the piano behave less than ideally. In the case of a piano, the overtones (the other peaks shown on the scope higher in frequency than the fundamental) are actually slightly sharper (higher in frequency) than the expected harmonic whole-number multiple of the fundamental frequency.  As a result, the frequency ranges of each octave must be “stretched” in order to accommodate this and sound correct when multiple notes are played together across octaves.

Typically, only the A4 key is actually tuned to its correct frequency of 440Hz and all of the other keys are manually tuned off of this baseline. The amount of necessary stretch applied to each octave increases as you get further away from this initial reference point in either direction and is unique to each and every individual instrument – thus there is no universal device capable of perfect tuning. Although [Todd] admits that he won’t attempt to tune the entire piano himself using this technique, he finds it a convenient way to keep the most heavily played center sections of the piano closer to true between professional tunings.

If you have any interesting or unique uses for your Techtronix scope, you can enter the contest here. Just don’t forget to tip us off too!  Thanks [Todd]!

The Basics Of Building A Multitouch Table

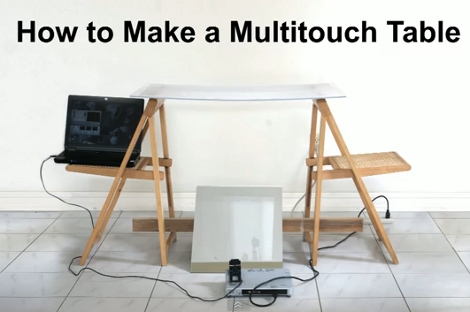
Here is a bare-bones multitouch table setup. We looked in on [Seth Sandler’s] multitouch work a few years ago when he completed the MTmini build. He’s scaling up the size a bit with the MTbiggie, and showing you how easy it is to put together. The demo rig seen above is just a couple of chairs, a sheet of acrylic, a mirror, a projector, a computer, and a diy infrared webcam.

The rig uses ambient infrared light to detect the outlines of your fingers when they touch the acrylic surface. A webcam with an exposed camera film filter feeds an image of the infrared light received below the surface to the computer. The incoming video is processed using Community Core Vision, where each individual point is isolated and mapped. Once the data is available the sky’s the limit on what you can develop. [Seth’s] demo packages include a mouse driver, some physics applications, an Angry Birds implementation, and a few others. See for yourself in the video after the break.

Continue reading “The Basics Of Building A Multitouch Table”

Pidato Box Adds Vibrato Effect To Digital Pianos

piano_vibrato_box

[Joren] likes his digital piano, but it was missing one key component that he wanted to use: the ability to produce vibrato while playing. Vibrato can be done in several different ways on regular pianos, but it seemed as if there was not a lot of consideration given to the effect when designing digital pianos.

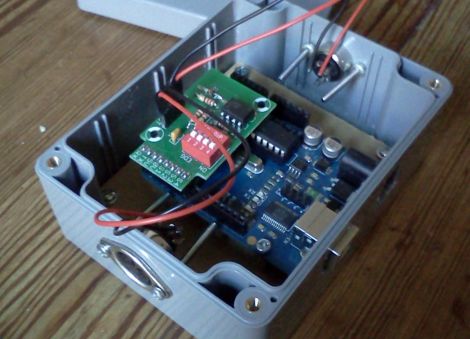
He enjoys playing all sorts of music, including solos from Franz Liszt which suggest using vibrato at times, so he decided to build himself a vibrato box. Constructed with a bit of assistance from the friendly folks at Hackerspace Ghent, his “Pidato” incorporates an Arduino and three-axis accelerometer to get the job done.

The Arduino is connected to both the MIDI output of the piano as well as to the accelerometer, which he has mounted on his wrist. While playing, all he needs to do is simply move his hand rapidly to produce the vibrato sound as you can see in the video below. The Arduino code filters out any other sorts of movements to ensure that he does not accidentally trigger the effect when it is not desired.

Check out the video below for a quick demonstration of the Pidato box.

Continue reading “Pidato Box Adds Vibrato Effect To Digital Pianos”