A CRT Audio Visualiser For When LEDs Just Won’t Do

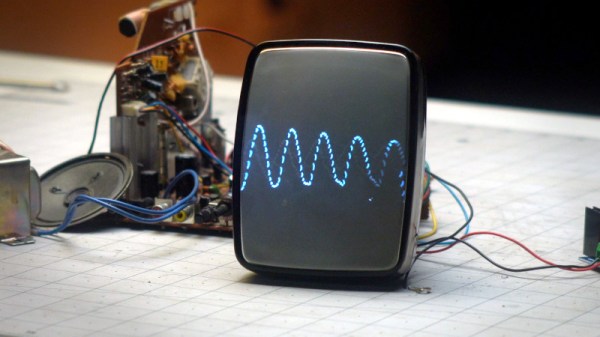
It has been a recurring feature of consumer audio gear since the first magic eye tube blinked into life, to have some kind of visualization of the sound being played. Most recently this has meant an LED array or an OLED screen, but [Thomas] has gone one better than this with a CRT television converted to perform as a rudimentary oscilloscope.

The last generation of commonly available monochrome televisions were small 5″ CRT models made in China. They never received digital tuners, so as digital TV has become the norm they are now useless to most people. Thus they can often be found for pennies on the second-hand market.

[Thomas]’s hack involves gutting such a TV and retaining its circuitry, but disconnecting the line driver from the deflection yoke. This would normally leave a vertical line on the screen as it would then be moved only by the frame driver at 50 Hz for PAL or 60 Hz for NTSC. By connecting an audio loudspeaker amplifier to the line deflection yoke he gets that low quality oscilloscope. It would be of limited use as an instrument, but few others will have such a cool audio visualizer. He’s viewing the screen in a portrait orientation, we’d be tempted to rotate the yoke for a landscape view.

It’s worth pointing out as always that CRT TVs contain high voltages, so we’d suggest reading up on how to treat them with respect.

Continue reading “A CRT Audio Visualiser For When LEDs Just Won’t Do”

Inspect The RF Realm With Augmented Reality

Intellectually, we all know that we exist in a complex soup of RF energy. Cellular, WiFi, TV, public service radio, radar, ISM-band transmissions from everything from thermometers to garage door openers — it’s all around us. It would be great to see these transmissions, but alas, most of us don’t come from the factory with the correct equipment.

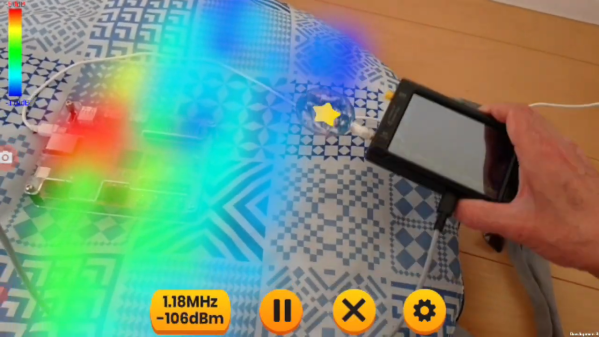
Luckily, aftermarket accessories like RadioFieldAR by [Manahiyo] make it possible to visualize RF signals. As the name suggests, this is an augmented reality system that lets you inspect the RF world around you. The core of the system is a tinySA, a pocket-sized spectrum analyzer that acts as a broadband receiver. A special antenna is connected to the tinySA; unfortunately, there are no specifics on the antenna other than it needs to have a label with an image of the Earth attached to it, for antenna tracking purposes. The tinySA is connected to an Android phone — one that supports Google’s ARCore — by a USB OTG cable, and a special app on the phone runs the show.

By slowly moving the antenna around in the field of view of the phone’s camera, a heat map of signal strength at a particular frequency is slowly built up. The video below shows it in action, and the results are pretty cool. If you don’t have a tinySA, fear not — [Manahiyo] has a version of the app that supports a plain old RTL-SDR dongle too. That should make it easy for just about anyone to try this out.

And if you’re feeling deja vu about this, you’re probably remembering the [Manahiyo]’s VR spectrum analyzer, upon which this project is based.

Continue reading “Inspect The RF Realm With Augmented Reality”

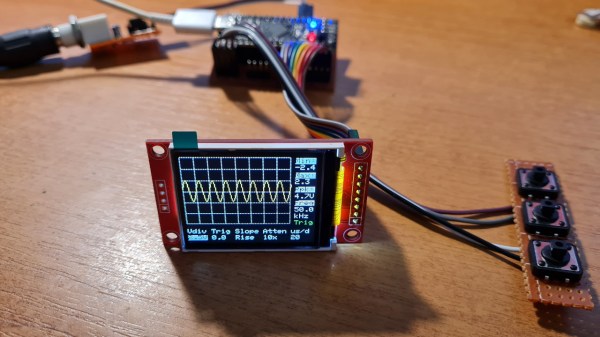
The completed oscilloscope in parts, with the screen in the front connected with prototyping wires, protoboarded buttons on the right, and the BlackPill board somewhere behind

DIY STM32 Scope Is Simple, Cheap, And Featureful

Would you like to have a small digital oscilloscope? Do you have a spare BlackPill (STM32F401) board and a TFT display laying around? [tvvlad1234] presents us with a simple and educational digital storage oscilloscope design that barely needs any components for you to build one, and it’s packed with features just like you would expect from a self-respecting open-source project. Not just that — it can even stream data to your computer, in a format compatible with the TekScope software!

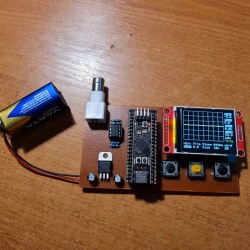
The same scope design, but now on a self-etched boardIt’s hard to overshadow just how easy this scope is to build, use, and hack on. You really don’t need much in the way of parts, a protoboard will do, though you can also etch or order your own PCBs. The front-end is super straightforward to find components for and assemble, a few opamps and resistors is all you need. So after jumper-wiring the LCD and three push buttons to your BlackPill, you’re golden.
Of course, the simple frontend results in the input range being from -3.3 V to 3.3 V, but as you could guess, this is exactly the kind of project where you could tweak the resistors and even upgrade it later on. Are you a bit lost in how oscilloscopes work? [tvvlad1234] has an explainer for you, too!

This build could easily take up a honorary “temporary turned permanent” place on your bench, thanks to its McGyver-esque qualities. It’s also, quite possibly, a better scope than the red “soldering kit” ones we’ve seen online. All in all, it’s a strong contender in the “simple and powerful DIY scope” arena, before this, we’ve seen one built with an Arduino Nano, and one with a Pi Pico.

Hunting For Space Pirates

Ever since the first artificial satellite was launched into orbit, radio operators around the world have been tuning in to their space-based transmissions. Sputnik 1 only sent back pulses of radio waves, but in the decades to follow ever more advanced radio satellites were put into service that could support two-way communications from Earth to space and back again.

Some of these early satellites were somewhat lacking in security, though, and have been re-purposed by various pirates around the world for their own ends. [Gabe] aka [saveitforparts] is here to show us how to hunt for those pirates and listen in on their radio traffic.

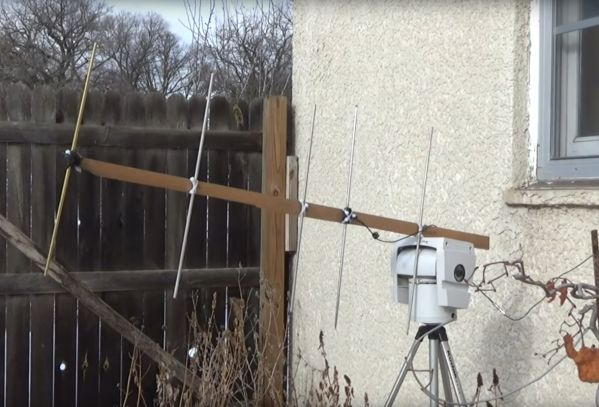
Pirates on these satellites have typically used them for illicit activities, and it is still illegal to use them for non-governmental or non-military purposes, so [Gabe] notes that he will only be receiving, not transmitting. The signals he is tuning in to are VHF transmissions, specifically around 220 MHz. That puts them easily within the reach of the RTL-SDR and common ham radio equipment, but since they are coming from space a more directional antenna is needed. [Gabe] quickly builds a Yagi antenna from scrap, tuned specifically to 255 MHz, and mounts it to an old remote-controlled security camera mount which allows him to point it exactly at the satellite and monitor transmissions.

From there he is able to pick up what looks like a few encrypted and/or digital transmissions, plus analog transmissions of likely pirates speaking a language he guesses to be Portuguese. He also hears what he thinks is a foreign TV broadcast, but oddly enough turns out to be NPR. These aren’t the only signals in space to tune to, either. There are plenty of purpose-built ham radio satellites available for any licensed person to use, and we’ve also seen this other RTL-SDR configured to snoop on Starlink signals.

Continue reading “Hunting For Space Pirates”

Sailing On A Sea Of Seven-Segment Displays

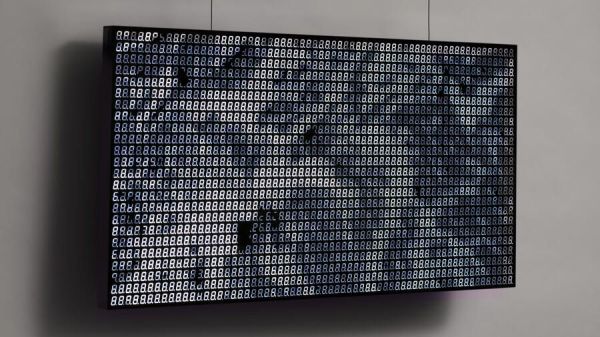
The amount of information the humble seven-segment display can convey is surprising. There are the ten numerals, dead-ringers or reasonable approximations for about half the alphabet, and even a few not-quite-canonical symbols. But when you put 12,288 segments to work, you get all that and much more.

Behold Sea of Segments, an art piece by [Will Gallia] that really pushes what’s possible with seven-segment displays. The piece, which looks about the size of a decent flat-panel TV, is composed of an 8×6 array of PCBs, each of which holds an 8×4 array of white LED seven-segment displays; each board also holds two TLC5920 LED drivers. [Will] designed the PCBs to tile horizontally and vertically, making it possible to take data either from the top or right side and output to the bottom or left. Power is distributed to the modules through a series of steel bus bars, which also provide structural support for the display. The whole thing lives in an enclosure with a smoked acrylic front panel, and hangs from a pair of steel cables that also provide power.

Under the hood, a PocketBeagle does all the heavy lifting of talking to the display and translating images onto the display. [Will] came up with an encoding scheme that gives about five bits of grayscale, and built a program to figure out which segments should be lit to create an image. The result is a smooth and convincing reproduction of videos of waves on a beach, which is where the project gets its name. Check out the results in the video below.

[Will] says he drew inspiration for this build from the DigitGrid by [Skot9000]. That was a great project too, but Sea of Segments takes the concept to another level.

Continue reading “Sailing On A Sea Of Seven-Segment Displays”

Illustrated Kristina with an IBM Model M keyboard floating between her hands.

Keebin’ With Kristina: The One Where Shift (Really) Happens

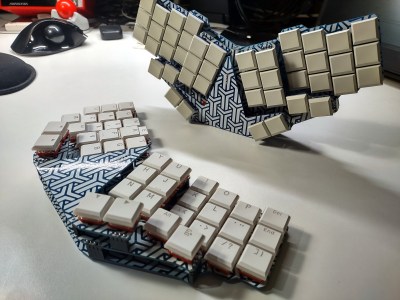
Hooray, the system works! [Sasha K.] wrote to let me know about their Thumbs Up! keyboard, which is the culmination of a long journey down the DIY rabbit hole to end game. (Seriously, it’s kind of a wild ride, and there’s a ton of pictures).

Thumbs Up! comes in both monoblock and full split versions, but both are designed for Kailh chocs. Fans of the Kinesis Advantage will dig the key wells and possibly the thumb cluster, which in this case is raised up a bit from the mainlands. I’m pretty fond of the naked PCB approach to keyboard building, especially when they’re stacked and look as good as these do.

While the full split only comes in RP2040 (not that there’s anything wrong with that), the monoblock split is available in Pro Micro, ATmega Mini, and RP2040 versions. You can find the STL for the tilt stand and other goodies on Thingiverse.

Continue reading “Keebin’ With Kristina: The One Where Shift (Really) Happens”

Linux Fu: Sharing Your Single WiFi

If you are trying to build a router or access point, you’ll need to dig into some of the details of networking that are normally hidden from you. But, for a normal WiFi connection, things mostly just work, even though that hasn’t always been the case. However, I ran into a special case the other day where I needed a little custom networking, and then I found a great answer to automate the whole process. It all comes down to hotel WiFi. How can you make your Linux laptop connect to a public WiFi spot and then rebroadcast it as a private WiFI network? In particular, I wanted to connect an older Chromecast to the network.

Hotel WiFi used to be expensive, but now, generally, it is free. There was a time when I carried a dedicated little box that could take a wired or wireless network and broadcast its own WiFi signal. These were actually fairly common, but you had to be careful as some would only broadcast a wired network connection. It was more difficult to make the wireless network share as a new wireless network, but some little travel routers could do it. Alternatively, you could install one of the open router firmware systems and set it up. But lately, I haven’t been carrying anything like that. With free WiFi, you can just connect your different devices directly to the network. But then there’s the Chromecast and the dreaded hotel login.

Continue reading “Linux Fu: Sharing Your Single WiFi”