Launching Paper Planes From Way, Waaaaaay Up

Every now and again we stumble across something a bit unexpected, and today that’s the fact that there have been quite a few efforts at launching paper planes from as close to space as possible. The current record for the highest paper plane launch is a whopping altitude of 35,043 meters.

That altitude is considerably short of what would be called “space”, but it’s still an awfully long way up and the air there is very thin compared to on the surface. Space is generally (but not universally) considered to be beyond 100 km above sea level, a human-chosen boundary known as the Kármán line. 35 km is a long ways into the stratosphere, but still within Earth’s atmosphere.

Even so, that doesn’t mean there haven’t been efforts to go considerably higher. There was a Japanese proposal to drop airplanes made from special heat-resistant paper from the International Space Station, roughly 400 km above Earth. Success would show that low-speed, low-friction atmospheric reentry is feasible — for pieces of paper, anyway. But one of the challenges is the fact that there is no practical way to track such objects on their way down, and therefore no way to determine where or when they would eventually land.

There have been many other high-altitude paper plane launches, but the current record of 35,043 meters was accomplished by David Green in the United Kingdom as part of a school project. Such altitudes are in the realm of things like weather balloons, and therefore certainly within the reach of hobbyists.

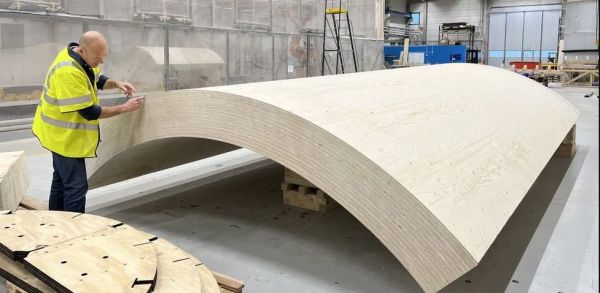
As for the airplanes themselves, the basic design pictured here probably won’t cut it, so why not brush up on designs with the Paper Airplane Design Database? Even if you don’t send them into the stratosphere (or higher), you might find something worth putting through a DIY wind tunnel to see how they perform.

An RPi-Powered Multi-DX7/TX816 Style Synth

[Kevin] over at Simple DIY ElectroMusic Projects has released a complete DIY modular design for simulating the classic 80s Yamaha TX816 DX/FM modular digital synthesizer. This beast of a synth was used by the cool bands of the 80s as well as TV studios, and ownership of the original machine is an expensive investment. But with the power of modern hackable electronics, and the MiniDexed firmware running bare-metal on a Raspberry Pi getting access to a compatible synth doesn’t have to break the bank.

[Kevin] wanted to emulate the look and feel of the original TX816 aesthetic, developing a custom PCB handling the user interface for four of the eight channels, and a second acting as an interface to the Raspberry Pi using a Pico. Also sitting on this PCB is the GY-PCM5102 I2S DAC, and the MIDI connectors needed to connect to the system controller. Both PCBs, including a PCB-based front panel, were developed with KiCAD. The firmware for the Pico part of the system can be found on the firmware GitHub. The video demo (embedded below) shows off the system running a very 80s-sounding rendition of Holst’s famous ‘Jupiter’ from the planet series, and we all agree it sounds pretty sweet. For a complete rundown of the build, here are the links for the blog series for ease of access: Intro, PCBs, Panel, Build Guide, Mechanical, Pico/TX816 IO code, and finally usage. Phew!

If MiniDexed sounds familiar, that is because we featured another of [Kevin’s] earlier MiniDexed projects a little while ago.

Continue reading “An RPi-Powered Multi-DX7/TX816 Style Synth”

Soviet-Era Computer Is Both A Mystery And A Disaster

There are plenty of bizarre computers around from the 70s through the 90s before the world somewhat standardized around various duopolies of hardware vendors and operating systems. Commodore, Atari, and even Apple had some bizarre machines from this era but for our money, the most unusual systems come out of the Eastern Bloc. We’ve featured plenty of these before, and the latest is a Robotron CM1910 which comes to us from [Chernobyl Family] via YouTube.

Built in East Germany behind the wall, the Robotron factories had easier access to Soviet than western parts, but the latter were also available when necessary. Hence it’s built on an Intel 8086 processor, which seems common enough for the era, but after opening the case some non-standard construction becomes apparent.

The first is a densely-packed array of circuit boards and wiring, far beyond what a western PC might have included in this time. This also partially explains its massive 25 kg weight. It does include a hard drive, two floppy disk drives, a large dedicated graphics card, and a modem which all contribute as well. The overall design philosophy of the machine was a headscratcher too, which would have involved near-complete dismantling of the machine to access or repair some of the parts, as well as some hidden peripheral and drive controllers in questionable locations.

From the looks of it, we doubt this computer will see any uptime anytime soon, although they did at least restore the keyboard. With all of the chips accessible on PCBs, it might be possible to get this machine up and running again although it would take a massive effort thanks to its non-standard design and construction, and might also require help from builds like this to replace or emulate some of the hardware.

Thanks to [Stephen] for the tip!

Continue reading “Soviet-Era Computer Is Both A Mystery And A Disaster”

The Forgotten Rescue Of The Salyut 7 Space Station

With only two space stations in orbit around Earth today in the form of the International Space Station and the Chinese Tiangong (‘Sky Palace’) station, it’s easy to forget how many space stations were launched in the previous century. And the Soviet Union launched by far the most, as part of the Salyut (Russian for ‘salute’ or ‘fireworks’) program. Although the program entailed both military (Orbital Piloted Station, or OPS) and civilian (Durable Orbital Station, or DOS) stations, it was the civilian stations that saw the most success, as well as the most daring rescue attempt with the recovering of the Salyut 7 space station.

Salyut 7 (DOS-6) was set to repeat Salyut 6’s success after its launch on April 19th 1982, until disaster struck in February 1985. Due to a series of electrical and other faults ground communication with the space station was cut off, and the at the time unmanned space station began to gradually tumble towards the Earth’s atmosphere. This left those in charge with two options: leave the station to burn up in the atmosphere, or stage a rescue mission.

Ultimately, on June 6th, 1985, Soyuz T-13 launched to rendezvous with Salyut 7. On board were cosmonauts Vladimir Dzhanibekov – who had previously manually docked with Salyut 7 – and Viktor Savinykh. Both men had done all they could to perform a manual docking and attempt to revive the stricken space station. Ultimately they managed to revive the station using what little charge was left in its batteries and the Soyuz’s thrusters, all the while braving freezing temperatures in the dead station’s interior.

Salyut 7 would continue to perform its duties until February 1991, with Mir (DOS-7, launched 1986) as the first modular space station taking over. The final DOS module (DOS-8) that directly traces its lineage to this era is still in orbit today as the ISS’ Zvezda module, keeping the Salyut legacy and the bravery of Dzhanibekov and Savinykh alive.

Op-Amp Challenge: A Low Noise Amplifier For Those Truly Low Noise Measurements

When something is described as “Low Noise”, it is by the nature of the language a relative phrase. The higest quality magnetic tape is low noise compared to its cheaper sibling for example, but still has noise many would consider unacceptable. In instrumentation however, “Low Noise” has to really mean just that, with a range of specialist techniques to produce circuitry with a truly low noise level for the most demanding of signal applications. As an example [Floydfish] has created a low noise instrumentation amplifier that should serve as a learning exercise for anyone interested in pushing low noise circuitry to the limit.

Anyone who can dredge the hazy recesses of their mind for barely-remembered electronics lectures will know that the overall noise figure of a system is dictated by that of its first component. Thus perhaps the most interesting part of the schematic is at the input, where a row of low-noise op-amps are presented in parallel. We have to admit having to look this one up, to find that it’s a technique whereby the signal outputs of each chip are the same and thus sum, while the noise output of each is different and thus the summed noise output is proportionally lower. This stage is then followed by a buffer and a set of filters for different output frequency ranges.

Our op-amp competition of which this is a part is certainly delivering the goods when it comes to the amny techniques with which these versatile parts can be used. Few of us may need to make such a low noise amplifier, but at least now we’ve learned how.

Laser Triangulation Makes 3D Printer Pressure Advance Tuning Easier

On its face, 3D printing is pretty simple — it’s basically just something to melt plastic while being accurately positioned in three dimensions. But the devil is in the details, and there seems to be an endless number of parameters and considerations that stand between the simplicity of the concept and the reality of getting good-quality prints.

One such parameter that had escaped our attention is “pressure advance,” at least until we ran into [Mike Abbott]’s work on automating pressure advance calibration on the fly. His explanation boils down to this: the pressure in a 3D printer extruder takes time to both build up and release, which results in printing artifacts when the print head slows down and speeds up, such as when the print head needs to make a sharp corner. Pressure advance aims to reduce these artifacts by adjusting filament feed speed before the print head changes speed.

The correct degree of pressure advance is typically determined empirically, but [Mike]’s system, which he calls Rubedo, can do it automatically. Rubedo uses a laser line generator and an extruder-mounted camera (a little like this one) to perform laser triangulation. Rubedo scans across a test print with a bunch of lines printed using different pressure advance values, using OpenCV to look for bulges and thinning caused when the printer changed speed during printing.

The video below gives a lot of detail on Rubedo’s design, some shots of it in action, and a lot of data on how it performs. Kudos to [Mike] for the careful analysis and the great explanation of the problem, and what looks to be a quite workable solution.

Continue reading “Laser Triangulation Makes 3D Printer Pressure Advance Tuning Easier”

A miniature 486 desktop PC running Lemmings

Tiny 3D Printed Gaming PC Contains Real Retro Hardware

Emulators are easy and convenient, but for some retrocomputing enthusiasts nothing comes close to running classic software on actual era-appropriate hardware. This can become a problem, though, for those into vintage PC gaming: old PCs and their monitors are notoriously large and heavy, meaning that even a modest collection will quickly fill up a decent family home. There is a solution however, as [The Eric Experiment] demonstrates in his latest video. He designed and built a 3D-printed mini PC that runs on an actual 486 processor.

An ordinary desktop motherboard would have required a rather large case to begin with, so [Eric] started his project by buying an old industrial PC board. Such a device has the processor and all main motherboard components sitting on an ISA card, which then connects to other ISA cards through a backplane. This way, a complete system with expansion cards can be made way more compact than even the sleekest desktop PCs of the time. An SD-card-to-IDE converter makes for an extremely slim hard drive replacement, while a Gotek floppy emulator allows the system to boot as if there’s actually a floppy drive present.

A small 486 tower case being assembled
Even the side panels slide in exactly like they do on real PC cases.

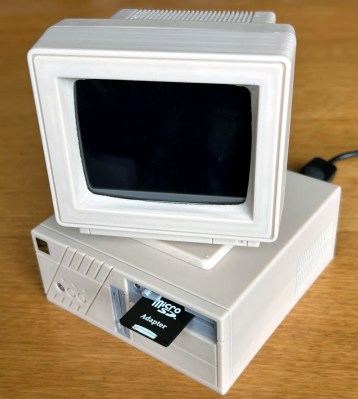
All of this is pretty neat to begin with, but by far the most impressive parts of the Tiny 486 project are the enclosures that [Eric] designed for the PC and its accompanying monitor. Both were modelled off real-world examples and are accurate down to the smallest details: the tilting stand that clips onto the base of the monitor for instance, or the moving latch on the faux 5.25″ floppy drive. That latch operates a cleverly hidden door that reveals the USB connector for the floppy emulator. The compulsory seven-segment LED display on the mini tower’s front panel now finally serves a useful purpose – indicating which floppy image is currently active.

Sporting an Intel 486-DX4 100 MHz processor, 32 MB of RAM, a Tseng ET4000 video card and an ESS Audiodrive for sound, the tiny 486 can run DOS or Windows 95, although performance in the latter is a bit limited due to the lack of a local-bus video card. It’s perfectly fine for most DOS games though, and a lot more practical than a full-sized desktop PC.

There are several ways to make a tiny game PC, like using PC/104 standard boards or repurposing old network equipment. The crucial part needed to turn it into a gaming machine is a proper sound card, which you can even build from scratch if needed. Thanks for the tip, [Nathan]!

Continue reading “Tiny 3D Printed Gaming PC Contains Real Retro Hardware”