Rocket engines are known for one thing above all else, and that’s getting hot. It’s this very property that makes them such a challenge to build and run from a materials engineering standpoint. It’s hard enough to build one with advanced metal alloys, but [Integza] presses on with trying to make one on a 3D printer. Progress is being made, but success remains elusive. (Video, embedded below.)
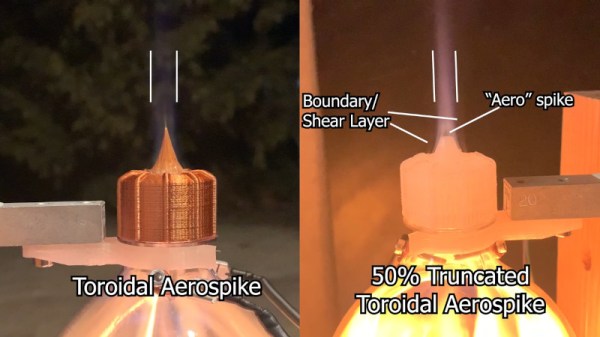
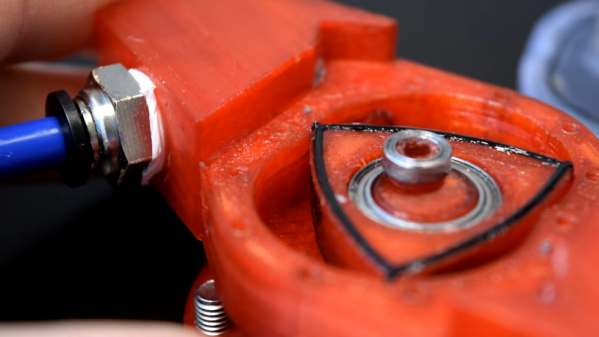
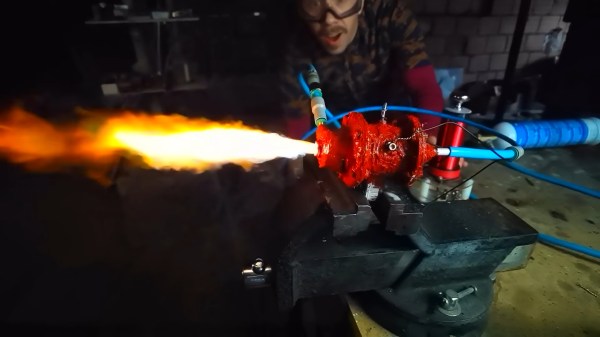
To try and mitigate the thermal effects of burning propellants in his engine design, [Integza] looked to vortex cooling. This is where oxygen is swirled around the outer edge of the combustion chamber in a vortex, acting as a buffer layer between the burning fuel and the chamber walls. With 3D printed chamber components, keeping temperatures as low as possible is key, after all. Unfortunately, despite using a special ceramic-laden resin for printing and lathering the rocket components in various refractory materials, it wasn’t possible to stop the chambers leaking. Solid combustion was possible for a few seconds at a time, but eventually each motor tested turned into a ball of flames as the walls broke down.
Thankfully, nobody was hurt in testing, and [Integza] has a clear idea of the problems that need to be fixed in the next iteration. We’ve featured other vortex cooled rockets before – the theory is sound. As always, the devil is in the implementation.
Continue reading “3D Printed Vortex Cooled Rocket Needs To Stop Leaking”