Thanks to the holiday gifting cycle, many homes are newly adorned with 3D printers. Some noobs are clearly in the “plug and play” camp, looking for a user experience no more complicated than installing a new 2D printer. But most of us quickly learn that adding a dimension increases the level of difficulty substantially, and tinkering ensues.
One such tinkerer, [Marco Reps], has been taking his new Cetus 3D printer to new places, and his latest video offers a trio of tips to enhance the user experience of this bare-bones but capable printer. First tip: adding a heated bed. While the company offers a heated aluminum bed for ABS and PETG printing at a very reasonable price, [Marco] rolled his own. He bolted some power resistors to the aluminum platen, built a simple controller, and used the oversized stock power supply to run everything.
To contain the heat, tip two is an enclosure for the printer. Nothing revolutionary here — [Marco] just built a quick cover from aluminum profiles and acrylic.
But the clear case allows for tip number three, the gem of this video: synchronized time-lapse photography. Unhappy with the jerky time-lapse sequences that are standard fare, he wrote a Python program that uses OpenCV to compare webcam frames and save those that are similar to the last saved frame. This results in super smooth time-lapse sequences that make it look like the print is being extruded as a unit. Pretty neat stuff.
Did you find a 3D printer under your Festivus Pole, and now you’re wondering what’s next? Check out [Tom Nardi]’s guide for 3D newbies for more tips.
We’ll admit that [3DSage] has a pretty standard design for a crystal radio. What we liked, though, was the 3D printed chassis with solderless connections. Of course, the working pieces aren’t 3D printed — you need an earphone, a diode, and some wire too. You can see the build and the finished product in the video below.
Winding the coil is going to take awhile, and the tuning is done with the coil and capacitance built into the tuning arrangement so you won’t have to find a variable capacitor for this build. There is a picture of the radio using a razor blade point contact with a pencil lead, so if you want to really scrimp on the diode, that works too, and you can see how at the end of the video.
We did like the use of cord ends from a sewing and craft supply store to serve as solderless springs. This would be a great item to print off a few dozen copies and use it for a school or youth group activity. You might want to pair it with an AM transmitter, though so the kids won’t be dismayed at what is playing on AM in most markets. [3DSage] uses a sink for ground — literally a kitchen sink. However, if you try this, make sure all the pipes are metal or you won’t get a good ground and you probably won’t pick up any stations.
We’d like to get some of those springs and make some other kind of starter projects with them like the kits many of us had as kids. This reminded us of the old foxhole radios, found during World War II.
If you’ve played Valve’s masterpiece Portal, there’s probably plenty of details that stick in your mind even a decade after its release. The song at the end, GLaDOS, “The cake is a lie”, and so on. Part of the reason people are still talking about Portal after all these years is because of the imaginative world building that went into it. One of these little nuggets of creativity has stuck with [Alexander Isakov] long enough that it became his personal mission to bring it into the real world. No, it wasn’t the iconic “portal gun” or even one of the oft-quoted robotic turrets. It’s that little clock that plays a jingle when you first start the game.
Alright, so perhaps it isn’t the part of the game that we would be obsessed with turning into a real-life object. But for whatever reason, [Alexander] simply had to have that radio. Of course, being the 21st century and all his version isn’t actually a radio, it’s a Bluetooth speaker. Though he did go through the trouble of adding a fake display showing the same frequency as the one in-game was tuned to.
The model he created of the Portal radio in Fusion 360 is very well done, and available on MyMiniFactory for anyone who might wish to create their own Aperture Science-themed home decor. Though fair warning, due to its size it does consume around 1 kg of plastic for all of the printed parts.
For the internal Bluetooth speaker, [Alexander] used a model which he got for free after eating three packages of potato chips. That sounds about the best possible way to source your components, and if anyone knows other ways we can eat snack food and have electronics sent to our door, please let us know. Even if you don’t have the same eat-for-gear promotion running in your neck of the woods, it looks like adapting the model to a different speaker shouldn’t be too difficult. There’s certainly enough space inside, at least.
The Repairs You Can Print Contest on Hackaday.io is a challenge to show off the real reason you bought a 3D printer. We want to see replacement parts, improved functionality, or a tool or jig that made a tough repair a snap. Think of this as the opposite of printing low poly Pokemon or Fallout armor. This is a contest to demonstrate the most utilitarian uses of a 3D printer. Whether you fixed your refrigerator, luggage, jet engine, vacuum cleaner, bike headlight, or anything else, we want to see how you did it!
The top twenty projects in the Repairs You Can Print contest will be rewarded with $100 in Tindie credit. That’s a Benjamin to spend on parts, upgrades, and components to take your next project to the next level!
Students and Organizations Can Win Big
This contest is open to everyone, but we’re also looking for the best projects to come from students and hackerspaces. We’ll be giving away two amazing 3D printers to the best Student entry and best Organization entry. These two top projects will be awarded an Original Prusa i3 MK3 with the Quad Material upgrade kit. This is one of the finest 3D printers you can buy right now, and we’re giving these away to the best student, hackerspaces, robotics club, or tool lending library.
If you have a project in mind, head on over to Hackaday.io and create a project demonstrating your 3D printed repair!
What is This Contest All About?
This contest is all about Repairs You Can Print, but what does that actually mean? Instead of printing Pokemon or plastic baubles on your desktop CNC machine, we’re looking for replacement parts. We’re looking for commercial, off the shelf items that were broken, but repaired with the help of a 3D printer. Is your repair good enough to show off as part of the contest? Yes! That’s the point, we want to see the clever repair jobs that people often don’t spend much time talking about because they just work.
Need some examples? Sure thing.
The underside of a vacuum cleaner
A 3D printed wheel for a broken vacuum cleaner
A while back, [Elliot Williams], one of the fantastic Hackaday Editors, had a broken vacuum cleaner. The wheels were crap, but luckily they were designed as a single part that snaps into a swivel socket. Over six or so years, the original wheels in this vacuum gave out, but a replacement part was quickly printed and stuffed into the socket. The new wheels have been going strong for a year now. That’s an entire year of use for a vacuum for five cents worth of plastic and an hour’s worth of printing time.
Need another example? My suitcase was apparently dragged behind a luggage cart for miles at either ORD or PHL. When it arrived on the baggage carousel, one wheel was shredded, and the wheel mount was ground down to almost the axle. The rest of the bag was still good, and I just removed the old wheel, salvaged the bearings, and printed a new wheel out of PLA. This suitcase has now traveled 60,000 miles with a 3D printed wheel, and it’s only now looking worse for wear.
How To Get In On The Action
We’re looking for the best repairs, jigs, and tools you’ve ever printed. To get started, head on over to Hackaday.io, create a new project, and document your repair. The Repairs You Can Print contest will run from Tuesday, January 16th, 2018 through 12 PM PST Tuesday, February 20th, 2018. Here’s a handy count down timer for ‘ya.
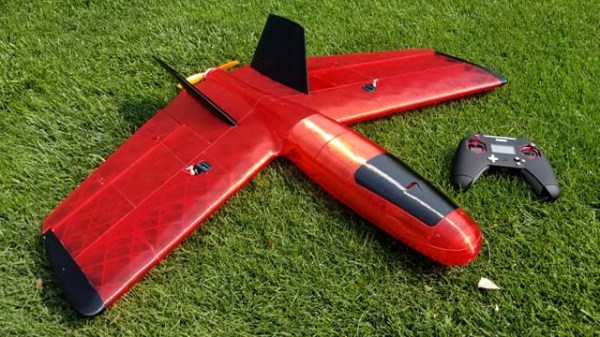
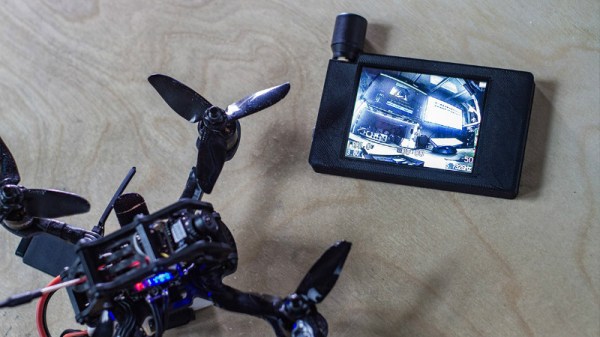
Before you smash the “Post Comment” button with the fury of Zeus himself, we’re going to go ahead and say it: if you want to build a decent quadcopter, buy a commercial frame. They are usually one of the cheaper parts of the build, they’re very light for how strong they are, and replacement parts are easily available. While you could argue the cost of PLA/ABS filament is low enough now that printing it would be cheaper than buying, you aren’t going to be able to make a better quadcopter frame on a 3D printer than what’s available on the commercial market.
Having said that, [Paweł Spychalski] has recently shown off his 3D printed FPV racing quadcopter frame with some surprising results. The frame ended up being surprisingly stiff, and while the weight is a bit high, it’s actually lighter than he expected. If you’re looking to build a quad with the absolute minimum of expense his design might be something to look into.
Of course, [Paweł] is hardly the first person to think about printing a quad frame. But he did give his design some extra consideration to try and overcome some of the shortcomings he noticed in existing 3D printed designs. For one, rather than have four separate arms that mount to a central chassis, his design has arms that go all the way across with a thick support that goes between the motors. The central chassis is also reassuringly thick, adding to the overall stiffness of the frame.
The key here is that [Paweł] printed all the parts with 2 mm thick walls. While that naturally equates to longer print times and greater overall weight, it’s probably more than worth it to make sure the frame doesn’t snap in half the first time it touches the ground.
Beyond the printed parts, all you need to assemble this frame are about a dozen M3 nuts and bolts. Overall, between the hardware and the plastic you’re looking at a total cost of under $5 USD. In the video below [Paweł] puts the frame through its paces doing some acrobatic maneuvers, and it looks like 5 bucks well spent to us.
Printing with plastic and even resin is getting fairly common. Metal printing, though, is still in the realm of the exotic. A company called Iro3D is aiming to change that with a steel printer that you can buy in beta for about $5000. That seems steep when you can get plastic printers for under $200, but it is sheer bargain basement for something that can print in real metal.
Of course, there’s a catch. The printer doesn’t create a solid metal object right away. What it does is prepares a crucible using sand and metal powder. You then place the crucible in a kiln and what comes out is the final product. You can see a video review of their prototype machine, below from [3D Printing Nerd]. The company’s promotional video that shows a part coming out of the kiln is also below.
In December 2016, [Bruno M.] was lucky enough to score a 70+ year old Logan 825 lathe for free from Craigslist. But as you might expect for a piece of machinery older than 95% of the people reading this page, it wasn’t in the best of condition. He’s made plenty of progress so far, and recently started tackling some broken gears in the machine’s transmission. There’s only one problem: the broken gears have a retail price of about $80 USD each. Ouch.
On his blog, [Bruno] documents his attempts at replacing these expensive gears with 3D printed versions, which so far looks very promising. He notes that usually 3D printed gears wouldn’t survive in this sort of application, but the gears in question are actually in a relatively low-stress portion of the transmission. He does mention that he’s still considering repairing the broken gears by filling the gaps left by the missing teeth and filing new ones in, but the 3D printed gears should at least buy him some time.
As it turns out, there’s a plugin available for Fusion 360 that helpfully does all the work of creating gears for you. You just need to enter in basic details like the number of teeth, diametral pitch, pressure angle, thickness, etc. He loaded up the generated STL in Cura, and ran off a test gear on his delta printer.
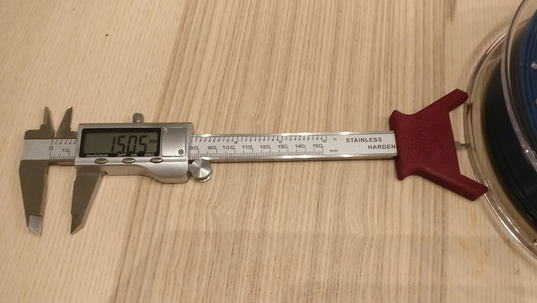
Of course, it didn’t work. Desktop 3D printing is still a finicky endeavour, and [Bruno] found with a pair of digital calipers that the printed gear was about 10% larger than the desired dimensions. It would have been interesting to find out if the issue was something in the printer (such as over-extrusion) or in the Fusion 360 plugin. In any event, a quick tweak to the slicer scale factor was all it took to get a workable gear printed on the third try.