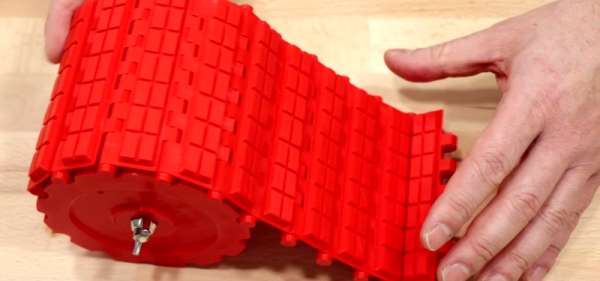
[Ivan] has been keeping his 3D printers busy with parts he’s experimenting with to build a tracked motion setup for a tank-like vehicle. His design uses several interlocking parts, so if you want to duplicate it, we hope your printer calibration is up to snuff. He’s still printing more parts and promises to release the files once the design proves out.
However, you can see he’s off to a good start. Small pieces fit together and accept a piece of filament as a sort of hinge. Some pins keep the filament from working out. Pads fit into the main parts and hold down with zip ties. The whole flexible tread locks into sprockets and a groove on a drive wheel.
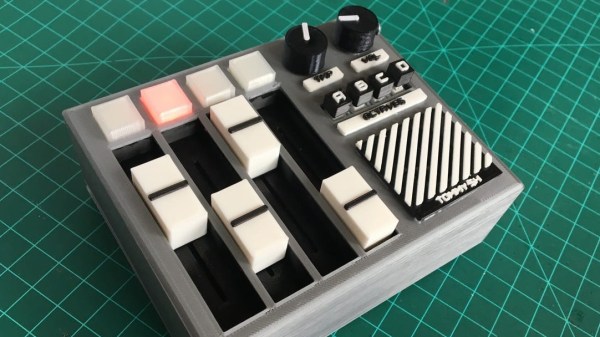
[Tommy] is a one-man-shop making electronic musical things, but that’s not what this post is about. This post is about the outstanding prototyping post-mortem he wrote up about his attempt to turn his Four-Step Octaved Sequencer into a viable product. [Tommy] had originally made a hand-soldered one-off whose performance belied its simple innards, and decided to try to turn it into a product. Short version: he says that someday there will be some kind of sequencer product like it available from him, “[B]ut it won’t be this one. This one will go on my shelf as a reminder of how far I’ve come.”
The unit works, looks great, has a simple parts list, and the bill of materials is low in cost. So what’s the problem? What happened is that through prototyping, [Tommy] learned that his design will need many changes before it can be used to create a product, and he wrote up everything he learned during the process. Embedded below is a demo of the prototype that shows off how it works and what it can do, and it helps give context to the lessons [Tommy] shares.
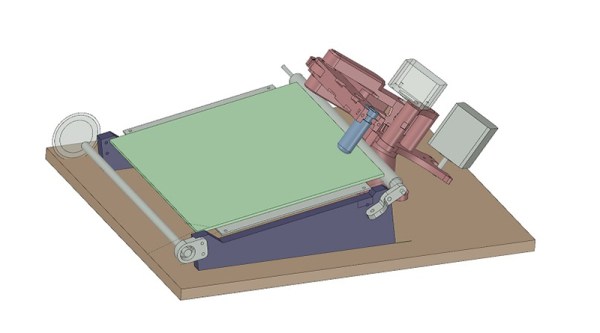
One of the most interesting developments in 3D printing in recent memory is the infinite build volume printer. Instead of a static bed, this type of printer uses a conveyor belt and a hotend set at an angle to produce parts that can be infinitely long in one axis, provided you have the plastic and electricity. For this year’s Hackaday Prize, [inven2main] is exploring the infinite build volume design, but putting a new spin on it. This is a printer with a conveyor belt and a SCARA arm. The goal of this project is to build a printer with a small footprint, huge build volume, no expensive rails or frames, and a low part count. It is the most capable 3D printer you can imagine using a minimal amount of parts.
Most of the documentation for this build is hanging around on the RepRap forums, but the bulk of the work is already done. The first half of this build — the SCARA arm — is well-traveled territory for the RepRap community, and where there’s some fancy math and kinematics going on, there’s nothing too far out of the ordinary. The real trick here is combining a SCARA arm with a conveyor belt to give the project an infinite build volume. The proof of concept works, using a conveyor belt manufactured out of blue painter’s tape. These conveyor belt printers are new, and the bed technology isn’t quite there, but improvements are sure to come. Improvements will also be found in putting a small crown on the rollers to keep the belt centered.
All the files for this printer are available on the Gits, and there are already a few videos of this printer working. You can check those out here.
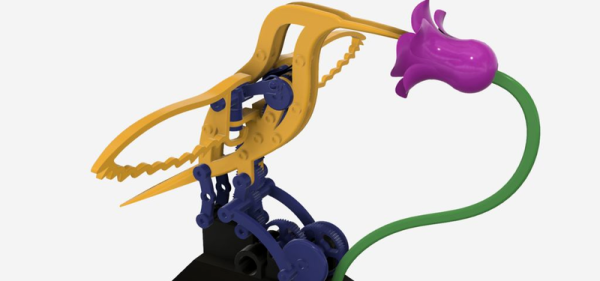
Long before the concept of A.I., as we know it today existed, humans started building machines that seemed to move and even think by a will of their own. For decades we have been building automatons, self-operating machines, designed to resemble humans and animals. Causing the designer to break down human and animal movements, behaviors, and even speech (by way of bellows and air tubes) into predetermined sequential actions.
[Greg Zumwalt] created what he calls a hummingbird themed automaton inspired by his wife’s love of watching hummingbirds gather near their home. His 3D printed and assembled hummingbird automaton moves almost as fluid as its organic counterpart. The design is simple yet created from an impressive number of 97 printed parts printed from 38 unique designs which he includes in his Instructable. Other than meticulous assembly design, the fluid motion lends itself to a process of test fitting, trimming, and sanding all printed parts. Plus adding petroleum jelly as lubrication to the build’s moving parts. Along with the print files, [Greg Zumwalt] also gives you the print settings needed to recreate this precision build and a parts list accounting for all the multiple prints needed for each design.Continue reading “Let’s Bring Back The Age Of Automatons”→
You’ve acquired your first 3D printer and are giddy with excitement. But like all new additive manufacturing adventurers, the more you do with your printer the more questions arise. Don’t worry, we’ve got your back.
Getting the most out of your time with a new 3D printer has a lot to do with the tools and accessories on hand and what you do with them. Let’s take a look at a few of the accessories that should accompany every 3D printer, be it in your home, school, or hackerspace. There’s already enough potential aggravation when it comes to 3D printing, the goal here is to ensure you won’t be without a tool or supply when you need it the most.
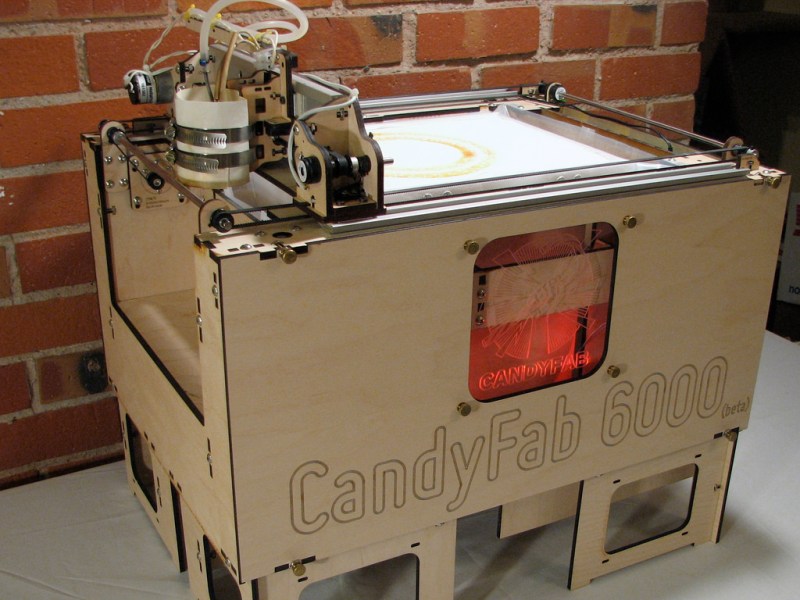
About a decade ago [Windell Oskay] and [Lenore Edman] spun out of Evil Mad Scientist Laboratories to work on CandyFab, an inexpensive 3D printer that used sugar as its medium. Wondering what happened to CandyFab? It’s been nearly that long since we last wrote about their work and Maker technology has moved on; nowadays 3D printers run the gamut from very inexpensive to production ready. The CandyFab project and nascent company are now shuttered, but there is a epilogue with some interesting lessons.
The CandyFab 6000
First of all, the saga of the CandyFab series of printers (above on the same page) is worth a read. Some of what these machines were capable of is still quite impressive by modern standards. Sure your Monoprice Mini Delta may be easy to use, fully assembled, functional when you take it out of the box, and quiet. But what if you need to print something up to 8.5″ x 11″ x 17″? The CandyFab 5000 can do that. Or even a humongous 24″ x 13.5″ x 9″? The CandyFab 4000 can do it, and for a measly $37 (if you printed a solid cube exactly the size of the build volume)! Sugar may have downsides but it’s still a pretty clever medium for some uses.
CandyFab credits the rise of MakerBot coupled with the complexity of iterating from a pile of “surplus junk” (their words) to something kitable. Reading their post-mortem brings to mind familiar problems from today’s hardware world. A spike of fantastic early publicity lead to the need to handle press while rapidly iterating from the aforementioned surplus parts to a reliable and manufacturable design. Then the complexity of balancing a day job and other side projects with the prospect of CandyFab as a business. Ultimately the need for the project in the first place (accessible inexpensive 3D printers) was alleviated by the market and the project came to a graceful close.
Give the post a read, we’re sure you’ll learn something!
The various development boards such as the NodeMCU or Wemos D1 make working with the ESP8266 an absolute breeze. If they have a downside, it is that they are larger than the bare ESP2866, and of course cost a bit more. Just as with the Arduino, once you have the wiring sorted out and the code more or less finalized, your best bet is to ditch the unnecessary support hardware and use the bare module to save space and money in your final design.
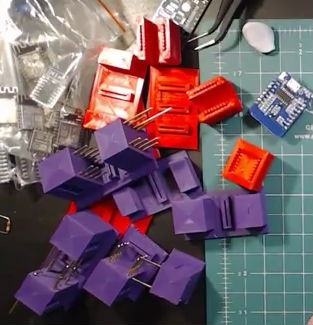
The design took a few revisions to get right
Unfortunately, the ESP8266 form factor isn’t terribly forgiving when it comes time for hooking up a programmer. Rather than having to solder a serial adapter to the chip to flash it, [Ryan] came up with a slick 3D printed programming jig that uses pogo pins. If you have to program these boards in bulk, a jig like this can save a massive amount of time and aggravation.
Beyond the 3D printed holder for the pogo pins, this programmer uses a FTDI USB-to-serial adapter, a couple passive components to smooth out the power going into the chip, and a couple buttons.
In the video after the break, [Ryan] walks through the many iterations it took to get the 3D printed aspect of the jig worked out. The design went through a few rather large revisions, including one that fundamentally changed the whole form factor. Even with the jig now working, he mentions that he might circle back around and try it from a different angle.