Evaluating the performance of 3D printers and component upgrades is a more difficult than it may seem at first glance, and subjective observations can lead to incorrect conclusions. To objectively determine the maximum flow rates of different FDM 3D printer hotends, [MirageC] is developing a robust testing standard backed by more than just visual observations.
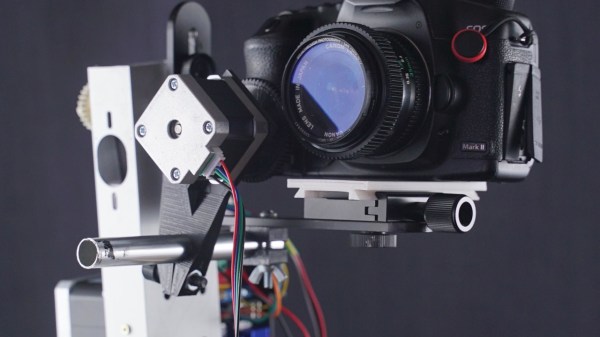
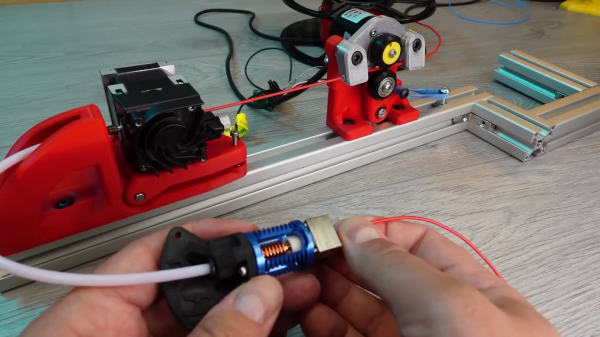
Defining the max flow rate threshold is not straightforward. A common method is to run a test print while slightly increasing the flow rate with each layer, and visually making a judgment on the last acceptable layer. It would be easy to miss errors, or unconsciously be inconsistent with observations over time. [MirageC] wanted to back up observations with measurements. To do this, he is measuring the true feed rate of the filament with an encoder wheel, and the backpressure of the filament on the extruder using a load cell. A Bowden tube helps to isolate the extruder from the vibration of the moving printhead.
After much testing, [MirageC] determined that the numerical threshold would be a specific deviation percentage between the desired and actual flow rate. At temperatures above 230°C, [MirageC] found that the last visually acceptable layer was consistently around 5.75% flow rate deviation for one specific PLA filament. It does not mean that 5.75% will be the magic number for all filaments and nozzle size, but it does provide a measurable parameter to back up visual observations.
In a world of questionable product reviews this dedication to objectivity is a breath of fresh air. If you are looking to upgrade your 3D printer’s hotend [MirageC]’s tests would be a good source of information.
Continue reading “Objective Hotend Performance Measurement Is Hard”