USB PD is a fun protocol to explore, but it can be a bit complex to fully implement. It makes sense we’re seeing new stacks pop up all the time, and today’s stack is a cool one as far as code reusability goes. [Vitaly] over on Hackaday.io brings us pdsink – a C++ based PD stack with no platform dependencies, and fully-featured sink capabilities.
If you don’t know much about the RP2040 or RP2350 here’s the basic run down: the original Raspberry Pi Pico was released in 2021 with the RP2040 at its heart, with the RP2350 making its debut in 2024 with the Pico 2. Both microcontrollers include a feature known as Programmed I/O (PIO), which lets you configure tiny state machines and other facilities (shift registers, scratch registers, FIFO buffers, etc) to process simple I/O logic, freeing up the CPU to do other tasks.
The bottom line is that you can write very simple programs to do very fast and efficient I/O and these programs can run separately to the other code running on your micro. In the video below, [piers] explains how it works and how he’s used it in his One ROM project.
Have trouble sleeping, or getting to sleep in the first place? You’ve no doubt heard of white noise machines, but know it would be much cooler to make your own. Enter Noise Maker, a DIY sound sculpture by [optimus103733], who wanted to learn something in the process of creating.
The best thing about this sound sculpture aside from the looks is that you can not only play five different sounds (e.g. birds, traffic, water, frog, white noise), you can mix them together into a rich but relaxing cacophony.
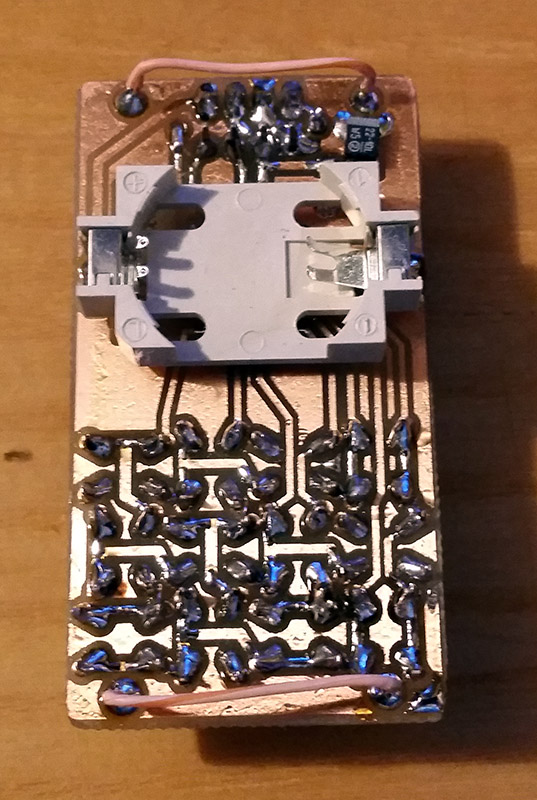
As you can probably see from the picture, Noise Maker is based on the ESP32 and uses an SD card module, an amplifier, and five six pots. Be sure to check out the pictures, because there are three layers of copper connections and a lot of careful bending to make it all come together. In the video after the break, you can hear it in action.
It seems [optimus103733] isn’t completely satisfied and wants to make a few improvements in the future, such as a voltage regulator, a power switch, and a timer to automatically stop playback once (we assume) sleep has come. Evidently the ESP32 struggles a little with mixing six audio sources, but hey, lesson learned.
Once upon a time, owning a calculator watch was the epitome of cool. Well, for a very specific subset of the population with our own definition of “cool” anyway. The only thing cooler than wearing a calculator watch? Making a calculator watch, of course! If you do it as part of developing your own SDK for a popular RISC V microcontroller, all the better. That’s what [Miroslav Nemecek] did with his Antcalc watch, which is one of the demo projects for the CH32Lib SDK, which is currently under development at version 0.35 as this is written.
It appears as though the solid core wire on the back of the homemade PCB is used to hold the watch band, a nice little hack.
As you might guess, CH32LibSDK is targeting the super-cheap CH32 series of RISC V microcontrollers. Perhaps because the SDK is so early in development, there’s not much documentation outside of the example projects. The examples are all worth looking at, but our tipster wanted us to cover the Antcalc calculator watch specifically.
The Antcalc watch uses the SOP16-packaged CH32V002A4M6 to drive a small OLED display while taking input in Reverse Polish Notation from a dozen small buttons. We’re not sure how the cool kids feel about RPN these days, but that’s got to be worth extra nerd cred. Using a RISC V chip doesn’t hurt in that department, either.
For something so small– 30 mm x 55 mm–it’s looks like a decent little calculator, with 10 registers holding a mantissa of 21 digits and exponents up-to +/-99 in binary coded decimal. Seven layers on the dozen-key input pad mean most of the scientific functions you could ask for are available, along with the ability to record and replay upto 10 macros. There are also ten memory slots, all of which go into the chip’s onboard flash so are non-volatile during a battery swap. (Of which many will be necessary, since this appears to run on a single coin cell.)
When the iconic “Boing Ball” first debuted 40 years ago, it was a wonder to behold. There was nothing like it in the home compuing world upto that time, and it showed that Commodore’s new “Amiga” was a powerhouse sure to last the test of time. Forty years later, the Amiga as we knew it then might not be with us anymore, but [Mark Wilson] is recreating its iconic demo on a microcontroller– but not just any microcontroller. “AMeagerBall” is an Arduino Uno exclusive, and it even tells the time.
Like the original “Boing Ball”, the demo is running at 320×240, though on a touch LCD shield instead of a CRT. Unlike some microcontrollers, the Uno doesn’t have the horsepower to just brute-force emulate a 1980s home computer, so [Mark] has had to recreate the boing ball from scratch. He’s not doing it with any graphics libraries, either. On the Uno that would be too slow, so [Mark] is driving the LCD directly to its appropriate registers, to stay close enough to the metal to make it work. That means if you’re going to try the code on his GitHub repository, you’ll need to be sure to use matching hardware or be prepared to port it.
One of the things about Amiga’s demo that was so impressive is that it hardly made use of the CPU, allowing the Workbench to be pulled up while the ball bounced. That’s not the case here, as the UNO doesn’t have any extra graphics chips. Still, [Mark] was able to squeeze enough horsepower out of everyone’s favourite ATmega to present us with an Amiga-styled clock– either analog, digital, or in the workbench title bar in that iconic blue-and-white. To keep the clock accurate, he’s squeezed an RTC module in, too. Lovely! The different clocks can be accessed via the touchscreen.
Oh, did we forget to mention that the touchscreen is implemented? This certainly stretches the hardware far enough to be considered a demo. If just a bouncing ball doesn’t work the UNO hard enough for you, try booting Linux.
Whenever there’s a superlative involved, you know that degree of optimization has to leave something else on the table. In the case of [PegorK]’s f32, the smallest ESP32 dev board we’ve seen, the cost of miniaturization is GPIO.
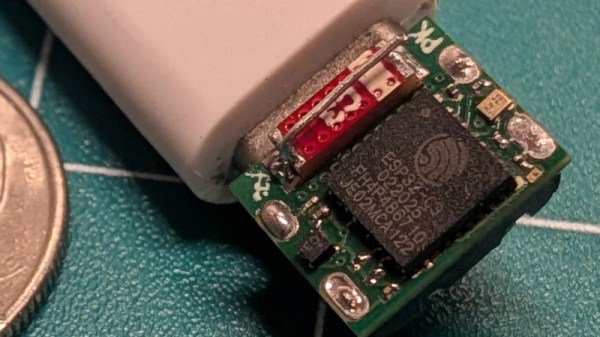
There’s only one GPIO pin broken out, and it’s pre-wired to an LED. That’s the bad news, and depending on what you want an ESP32 for, it might not phase you at all. What is impressive here, if not the number of I/O pins, is the size of the board: at 9.85 mm x 8.45 mm barely overhangs the USB-C socket that takes up one side of the board.
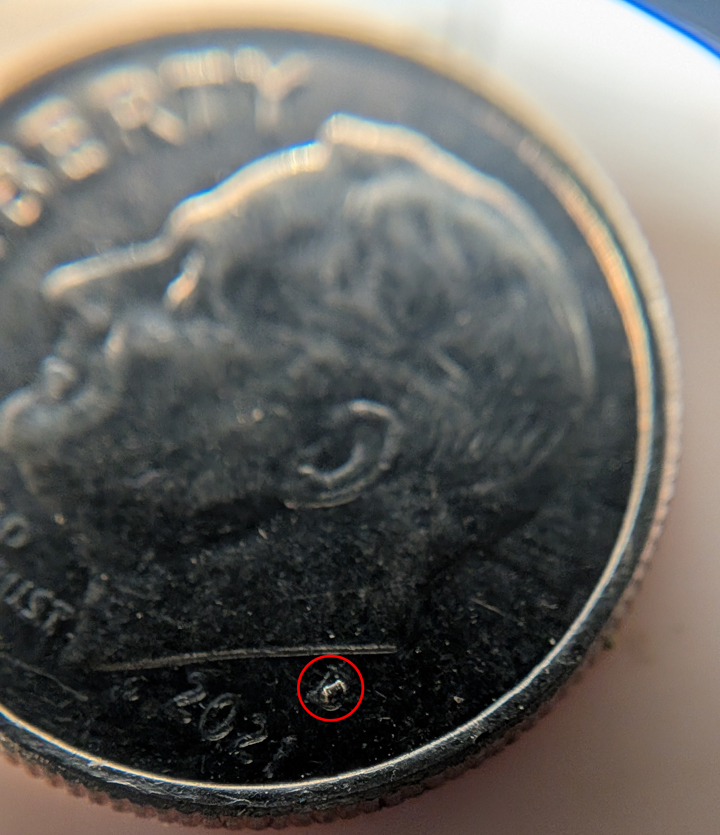
Pegor provides this helpful image in the readme so you know what you’re getting into with the 01005 resistors.
In order to get the ESP32-C3FH4 onto such a tiny board, all of the other support hardware had to be the smallest possible sizes– including resistors in 01005. If you don’t speak SMD, one could read that number code as “oh god too small” — at 0.4 mm x 0.2 mm it’s as minuscule as you’ll find– and [Pegor] hand soldered them.
OK, he did use a hot plate for the final step, but he did tin the pads manually with a soldering iron, which is still impressive. Most of us probably would have taken PCBWay up on their offer of assembly services, but not [Pegor]. Apparently part of the reason for this project was that he was looking for an excuse to use the really small footprint components.
Aside from leaving out GPIO and needing too-small SMD components, [Pegor] admits that pesky little details like antenna matching circuits and decoupling capacitors had to get cut to make the tiny footprint, so this board might be more of a stunt than anything practical. So what can you do with the smallest ESP32 board? Well, [Pegor] put up a basic web interface up to get you started blinking the built-in LED; after that, it’s up to you. Perhaps you might fancy a teeny-tiny minecraft server? If you can stand to increase the volume a little bit, we’ve seen how to hack a C3 for much better wifi performance.
Thanks to [Pegor] for the tip, and remember– submit your projects, big or small, we read ’em all!
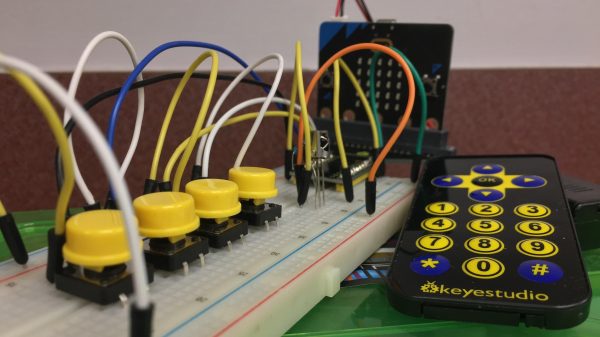
The Micro:bit is a fun microcontroller development platform, designed specifically for educational use. Out of the box, it’s got a pretty basic sound output feature that can play a single note at a time. However, if you’re willing to get a bit tricky, you can do some pseudo-polyphonic stuff as [microbit-noob] explains.
The trick to polyphony in a monophonic world? Rapidly alternating between the different notes you want to be playing at the same time. Do this fast enough and it feels like they’re playing together rather than seperately. [microbit-noob] demonstrates how to implement this with a simple function coded for the Micro:bit. Otherwise, it uses the completely stock sound hardware. However, the IR receiver is added to the device in order to allow a simple remote control to be used to command the notes desired, along with some extra tactile buttons to add further control.
Is it chiptune? Well, it’s a chip, playing a tune, so yes. Even if it is through a tiny speaker stuck to the PCB. In any case, if you’re trying to get some better bleeps and bloops out of the Micro:bit, this is a great place to start. If you’ve got other hacks for Britain’s educational little board, let us know on the tipsline!

![[Piers] explains his code](https://hackaday.com/wp-content/uploads/2025/11/One-ROM-PIO-banner.jpg?w=600&h=450)