IoT Safe Keeps Latchkey Kids’ Phones On Lockdown

Phones are pretty great. Used as telephones, they can save us from bad situations and let us communicate while roaming freely, for the most part. Used as computers, they often become time-sucking black holes that can twist our sense of self and reality. Assuming they pick up when you call, phones are arguably a good thing for kids to have, especially since you can hardly find a payphone these days. But how do you teach kids to use them responsibly, so they can still become functioning adults and move out someday? [Jaychouu] believes the answer is inside of a specialized lockbox.

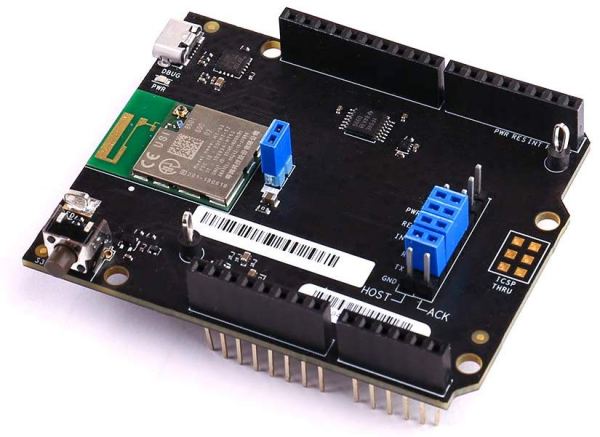
This slick-looking box has a solenoid lock inside that can be unlocked via a keypad, or remotely via the OBLOQ IoT module. [Jaychouu] added a few features that drive it out of Arduino lockbox territory. To prevent latchkey children from cheating the system and putting rocks (or nothing at all) in the box, there’s a digital weight sensor and an ultrasonic sensor that validate the credentials of the contents and compare them with known values.

Want a basic lockbox to keep your phone out of reach while you work? Here’s one with a countdown timer.

Continue reading “IoT Safe Keeps Latchkey Kids’ Phones On Lockdown”

Custom Game Pad Can Reprogram Itself

In the heat of the moment, gamers live and die by the speed and user-friendliness of their input mechanisms. If you’re team PC, you have two controllers to worry about. Lots of times, players will choose a separate gaming keyboard over the all-purpose 104-banger type.

When [John Silvia]’s beloved Fang game pad went to that LAN party in the sky, he saw the opportunity to create a custom replacement exactly as he wanted it. Also, he couldn’t find one with his desired layout. Mechanical switches were a must, and he went with those Cherry MX-like Gaterons we keep seeing lately.

This 37-key game pad, which [John] named Eyetooth in homage to the Fang, has a couple of standout features. For one, any key can be reprogrammed key directly from the keypad itself, thanks to built-in macro commands. It’s keyboard-ception!

One of the macros toggles an optional auto-repeat feature. [John] says this is not for cheating, though you could totally use it for that if you were so inclined. He is physically unable to spam keys fast enough to satisfy some single-player games, so he designed this as a workaround. The auto-repeat’s frequency is adjustable in 5-millisecond increments using the up /down macros. There’s a lot more information about the macros on the project’s GitHub.

Eyetooth runs on an Arduino Pro Micro, so you can either use [John]’s code or something like QMK firmware. This baby is so open source that [John] even has a hot tip for getting quality grippy feet on the cheap: go to the dollar store and look for rubber heel grippers meant to keep feet from sliding around inside shoes.

If [John] finds himself doing a lot of reprogramming, adding a screen with a layout map could help him keep track of the key assignments.

Homemade Wall Stops Roomba And Other Vacuum Tricks

If you have a Roomba, you know they are handy. However, they do have a habit of getting into places you’d rather they avoid. You can get virtual walls which are just little IR beacons, but it is certainly possible to roll your own. That’s what [MKme] did and it was surprisingly simple, although it could be the springboard to something more complicated. You can see a video about the build below.

As Arduino projects go, this could hardly be more simple. An IR LED, a resistor and a handfull of code that calls into an IR remote library. If that’s all you wanted, the Arduino is a bit overkill, although it is certainly easy enough and cheap.

Continue reading “Homemade Wall Stops Roomba And Other Vacuum Tricks”

Superbly Synchronized Servos Swaying Softly

LEDs and blinky projects are great, and will likely never fade from our favor. But would you look at this sweeping beauty? This mesmerizing display is made from 36 micro servos with partial Popsicle sticks pasted on the arms. After seeing a huge display with 450 servos at an art museum, [Doug Domke] was inspired to make a scaled-down version.

What [Doug] didn’t scale down is the delightful visuals that simple servo motion can produce. The code produces a three-minute looping show that gets progressively more awesome, and you can stare at that after the break. Behind the pegboard, a single, hardworking Arduino Uno controls three 16-channel PWM controllers that sweep the servos. We like to imagine things other than Popsicle sticks swirling around, like little paper pinwheels, or maybe optical illusion wheels for people with strong stomachs.

You won’t see these in the video, but there are five ultrasonic sensors mounted face-up on the back of the pegboard. [Doug] has optional code built in to allow the servo sticks to follow hand movement. We hope he’ll upload a demo of that feature soon.

Servos can be hypnotic as well as helpful, as we saw in this 114-servo word clock.

Continue reading “Superbly Synchronized Servos Swaying Softly”

Frequency Counting A Different Way

Counting frequency is one of those tasks that seems simple on the face of it, but actually has quite a bit of nuance. There are two obvious methods, of which the first is to count zero crossings for some period. If that period is one second you are done, otherwise it’s a simple enough case of doing the math. That is, if you count for half a second, multiply the result by 2, or if you count for 10 seconds, divide by 10. The other obvious method is to measure the period of a single cycle as accurately as you can. Then there’s this third method.from [WilkoL], which simultaneously counts a known reference clock alongside the frequency to be measured.  You can see the result in the video, below.

The first method is easy but the lower the frequency you want to measure, the longer you have to count to get any real resolution. Also, you need the time base to be exact. For the second method, you need to be able to make a highly precise measurement. The reason [WikolL] chose the third method is that it doesn’t require a very precise time base — a moderately accurate reference oscillator will do. The instrument gets good resolution quickly at both high and low frequencies.  Continue reading “Frequency Counting A Different Way”

Does Your Home Assistant Know When You Are Sleeping?

It always gives us a sense of wonder when we realize that what would be a simple task for a human child is a big deal for a computer. For example, if you asked someone if you or someone else was in bed, that’s a pretty simple thing to check. For you, that is. For a computer, it requires some sort of sensor. [Lewis] used load cells to tell if someone is in a particular bed or not. He uses Home Assistant and has a great post about how he created and interfaced the sensors. Of course, the sensors really only tell you if something heavy is in the bed. It doesn’t know who it is or even that it isn’t an overstuffed suitcase.

Load cells aren’t exactly high tech. There are several different types that use hydraulic pressure or pneumatics to measure force. However, the most common that we encounter use strain gauges. A strain gauge is a resistor that changes value when it deformed and a load cell usually has several strain gauges wired in a bridge configuration so that small forces create larger output changes.

Continue reading “Does Your Home Assistant Know When You Are Sleeping?”

Core Rope Memory Makes One Of The Oddest LED Flashers We’ve Ever Seen

If you’ve heard of core rope memory, it will probably be in the context of vintage computing equipment such as Apollo-era NASA hardware. A string of magnetic cores and sense wires form a simple ROM arrangement, which though long-ago-superceded by semiconductor memory remains possible to recreate by the experimenter. It’s a path [Nicola Cimmino] has trodden, as he’s not only made a few nibbles of core rope memory, but incorporated it with an Arduino as part of one of the most unusual LED flashers we’ve ever seen. The memory holds a known sequence of bits which is retrieved in sequence by the Arduino, and the LED is kept flashing as long as the read values conform to those expected.

The memory itself is simple enough (and not to be confused with magnetic core memory). The cores are ferrite rings that form a sequence of small transformers that become the bits of the memory. Individual bits are set high or low by either passing a sense wire through a core to create a primary, or bypassing it. Multiple sense wires can be used for separate nibbles in the same cores, so for example his four nibbles all share the same four cores. Pulses are sent down the wires, either passing through a core or not, and equivalently picked up or not on sense lines.

In this case the sense wire is driven directly to ground by Arduino pins which means that the circuit is relying upon the current limiting of the ATmega328 to avoid destroying itself, it’s possible we’d add a driver transistor. The bits are read meanwhile from the secondary windings through a diode rectifier and capacitor to an Arduino analogue pin.

Core memory has been paired with an Arduino before on these pages, though of the RAM variety.