AI On Raspberry Pi With The Intel Neural Compute Stick

I’ve always been fascinated by AI and machine learning. Google TensorFlow offers tutorials and has been on my ‘to-learn’ list since it was first released, although I always seem to neglect it in favor of the shiniest new embedded platform.

Last July, I took note when Intel released the Neural Compute Stick. It looked like an oversized USB stick, and acted as an accelerator for local AI applications, especially machine vision. I thought it was a pretty neat idea: it allowed me to test out AI applications on embedded systems at a power cost of about 1W. It requires pre-trained models, but there are enough of them available now to do some interesting things.

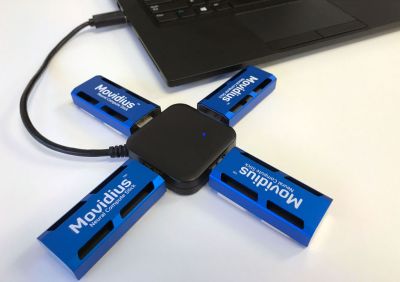
You can add a few of them in a hub for parallel tasks. Image credit Intel Corporation.

I wasn’t convinced I would get great performance out of it, and forgot about it until last November when they released an improved version. Unambiguously named the ‘Neural Compute Stick 2’ (NCS2), it was reasonably priced and promised a 6-8x performance increase over the last model, so I decided to give it a try to see how well it worked.


I took a few days off work around Christmas to set up Intel’s OpenVino Toolkit on my laptop. The installation script provided by Intel wasn’t particularly user-friendly, but it worked well enough and included several example applications I could use to test performance. I found that face detection was possible with my webcam in near real-time (something like 19 FPS), and pose detection at about 3 FPS. So in accordance with the holiday spirit, it knows when I am sleeping, and knows when I’m awake.

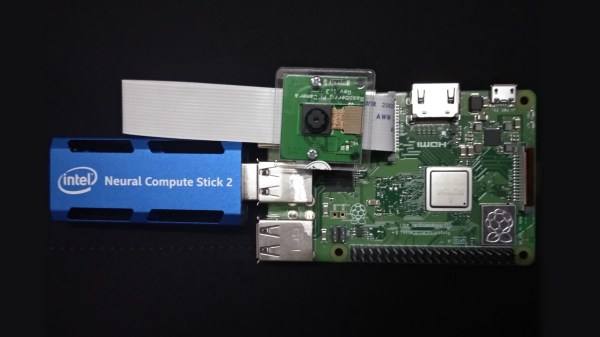
That was promising, but the NCS2 was marketed as allowing AI processing on edge computing devices. I set about installing it on the Raspberry Pi 3 Model B+ and compiling the application samples to see if it worked better than previous methods. This turned out to be more difficult than I expected, and the main goal of this article is to share the process I followed and save some of you a little frustration.

Continue reading “AI On Raspberry Pi With The Intel Neural Compute Stick”

A Pi Cluster To Hang In Your Stocking With Care

It’s that time of year again, with the holidays fast approaching friends and family will be hounding you about what trinkets and shiny baubles they can pretend to surprise you with. Unfortunately there’s no person harder to shop for than the maker or hacker: if we want it, we’ve probably already built the thing. Or at least gotten it out of somebody else’s trash.

But if they absolutely, positively, simply have to buy you something that’s commercially made, then you could do worse than pointing them to this very slick Raspberry Pi cluster backplane from [miniNodes]. With the ability to support up to five of the often overlooked Pi Compute Modules, this little device will let you bring a punchy little ARM cluster online without having to build something from scratch.

The Compute Module is perfectly suited for clustering applications like this due to its much smaller size compared to the full-size Raspberry Pi, but we don’t see it get used that often because it needs to be jacked into an appropriate SODIMM connector. This makes it effectively useless for prototyping and quickly thrown together hacks (I.E. everything most people use the Pi for), and really only suitable for finished products and industrial applications. It’s really the line in the sand between playing around with the Pi and putting it to real work.

[miniNodes] calls their handy little device the Carrier Board, and beyond the obvious five SODIMM slots for the Pis to live in, there’s also an integrated gigabit switch with an uplink port to get them all connected to the network. The board powers all of the nodes through a single barrel connector on the side opposite the Ethernet jack, leaving behind the masses of spider’s web of USB cables we usually see with Pi clusters.

The board doesn’t come cheap at $259 USD, plus the five Pi Compute Modules which will set you back another $150. But for the ticket price you’ll have a 20 core ARM cluster with 5 GB of RAM and 20 GB of flash storage in a 200 x 100 millimeter (8 x 4 inch) footprint, with an energy consumption of under 20 watts when running at wide open throttle. This could be an excellent choice for mobile applications, or if you just want to experiment with parallel processing on a desktop-sized device.

Amazon is ready for the coming ARM server revolution, are you? Between products like this and the many DIY ARM clusters we’ve seen over the years, it looks like we’re going to be dragging the plucky architecture kicking and screaming into the world of high performance computing.

[Thanks to Baldpower for the tip.]

Getting Started With Free ARM Cores On Xilinx

We reported earlier about Xilinx offering free-to-use ARM Cortex M1 and M3 cores. [Adam Taylor] posted his experiences getting things working and there’s also a video done by [Geek Til It Hertz] based on the material that you can see in the second video, below.

The post covers using the Arty A35T or Arty S50 FPGA boards (based on Artix FPGAs) and the Xilinx Vivado software. Although Vivado will allow you to do conventional FPGA development, it also can work to compose function blocks to produce CPUs and that’s really what’s going on here.

Continue reading “Getting Started With Free ARM Cores On Xilinx”

Blimpduino Hits Version 2

We always think that crossing the Atlantic in a blimp would be very serene — at least once they put heaters on board. The Hindenburg, the R-101, and the Shenandoah put an end to the age of the airship, at least for commercial passenger travel. But you can still fly your own with a helium balloon and some electronics. One notable project — the Blimpduino — has evolved into the Blimpduino 2. The open-source software is on GitHub. We couldn’t find the PCB layout, so we aren’t sure if it is or will be open. The 3D printed parts are available, though.

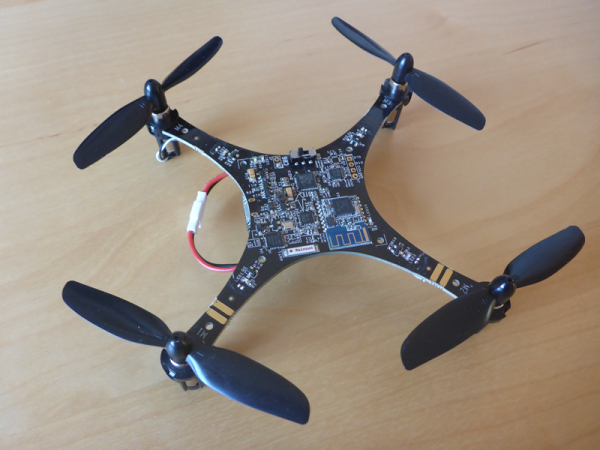
The PCB is the heart of the matter, a four-layer board with an ARM M0 processor, an ESP8266 WiFi module, four motor outputs, two servo motor outputs, a 9-axis inertial navigation system, an altimeter, and a forward object detection system. There’s also a battery charger onboard.

Continue reading “Blimpduino Hits Version 2”

Set Up A Headless Raspberry Pi, All From Another Computer’s Command Line

There are differences between setting up a Raspberry Pi and installing an OS on any other computer, but one thing in common is that if you do enough of them, you seek to automate the process any way you can. That is the situation [Peter Lorenzen] found himself in, and his solution is a shell script to install and configure the Raspberry Pi for headless operation, with no need to connect either a keyboard or monitor in the process.

[Peter]’s tool is a script called rpido, and with it the process for setting up a new Raspberry Pi for headless operation is super streamlined. To set up a new Pi, all [Peter] needs to do is:

  1. Plug an SD card into his laptop (which happens to be running Ubuntu.)
  2. Run: rpido -w -h myhostname -s which downloads and installs the newest version of Raspbian lite, does some basic setup (such as setting the hostname), configures for headless operation, and launches a root shell.
  3. Use the root shell to do any further tweaks or checks (like launching raspi-config for additional changes.)
  4. Exit the shell, remove the SD card from his laptop, and install the card into the Raspberry Pi.

There are clear benefits to [Peter]’s script compared to stepping through a checklist of OS install and setup tasks, not to mention the advantage of not needing to plug in a keyboard and monitor. Part of the magic is that [Peter] is mounting the SD card’s filesystem in a chroot environment. Given the right tools, the ARM binaries intended for the Pi run on his (Intel) Ubuntu laptop. It’s far more convenient to make changes to the contents of the SD card in this way, before it goes to its new home in a Pi.

Not everything has to revolve around an SD card, however. [Jonathan Bennet] showed that it’s possible to run a Raspberry Pi without an SD card by using the PXE boot feature, allowing it to boot and load its file system from a server on the same network, instead of a memory card.

Learn To Optimize Code In Assembly… For Android

When programming a microcontroller, there are some physical limitations that you’ll come across much earlier than programming a modern computer, whether that’s program size or even processor speed. To make the most use of a small chip, we can easily dig into the assembly language to optimize our code. On the other hand, modern processors in everyday computers and smartphones are so fast and have so much memory compared to microcontrollers that this is rarely necessary, but on the off-chance that you really want to dig into the assembly language for ARM, [Uri Shaked] has a tutorial to get you started.

The tutorial starts with a “hello, world” program for Android written entirely in assembly. [Uri] goes into detail on every line of the program, since it looks a little confusing if you’ve never dealt with assembly before. The second half of the program is a walkthrough on how to actually execute this program on your device by using the Android Native Deveolpment Kit (NDK) and using ADB to communicate with the phone. This might be second nature for some of us already, but for those who have never programmed on a handheld device before, it’s worthwhile to notice that there are a lot more steps to go through than you might have on a regular computer.

If you want to skip the assembly language part of all of this and just get started writing programs for Android, you can download an IDE and get started pretty easily, but there’s a huge advantage to knowing assembly once you get deep in the weeds especially if you want to start reverse engineering software or bitbanging communications protocols. And if you don’t have an Android device handy to learn on, you can still learn assembly just by playing a game.

A New Kid On The Mini ARM Block

The breadboard microcontroller experimenter has a host of platforms to work with that can be had in the familiar DIP format. Old-school people can still find classic 8-bit platforms, the Ardunisti have their ATMegas, and PIC lovers have a pile of chips to choose from. But ARM experimenters? Out of luck, because as we have previously reported, popular past devices such as the LPC810 in a DIP8 package are now out of production.

News comes from China though of a tiny ARM Cortex M0 for pennies that may not be in a DIP8, but is in almost the next best thing. The Synwit SWM050 can be had in a TSOP8, which though it’s not quite as friendly as its larger SOIC8 cousin, is still easily solderable onto a DIP8 adaptor for breadboard use. Spec-wise it’s 5 V tolerant, has an 8 kB FLASH and 1 kB of RAM, 6 GPIOs, and can clock away at a not incosequential 36 MHz.

We have [Sjaak] to thank for the discovery of this device, and for doing a lot of work including getting some die shots taken to dig up and make sense of the Chinese documentation, and to provide some dev tools should anyone want to play with it.  There’s even a small breakout board for the experimenter unwilling to design their own.

Earlier this year we marked the passing of the DIP8 version of the LPC810 microcontroller, and for those mourning it we made an important point. It’s now normal to use one of the vast array of single board computers instead of a bare microcontroller, you might wish to ask yourself why you would do so.

Thanks [Ziew] for the tip.