Hands On The Stellaris Launchpad

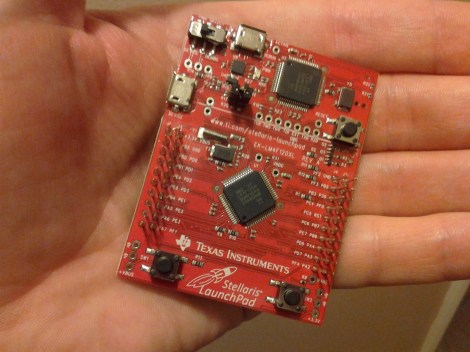
We just got our hands on a Stellaris Launchpad. We had placed an order when the preorder was originally announced, but the marketing folks at TI reached out an offered to send us one a bit sooner and took them up on it. We’ve embedded a quick unboxing video after the break but read on for some info that didn’t make it into that clip.

The look and feel of the board and its packaging are almost exactly the same as the MSP430 version of the Launchpad. But why not? After all it worked so well the first time. This board hosts an ARM Cortex-M4 processor. The two buttons on the bottom are user buttons, the one on the upper right is a reset button. The top of the board is the programmer, with a micro USB port for connectivity. The kit also includes about a 2′ cable for this connection. Next to that jack is a switch that selects a power source. You’ll also notice a USB port to the left, this because the processor includes USB functionality, with a free library available from TI. Power can come from the programmer/debugger USB port, or from this device USB port. There are dual pin headers to either side on the face of the board, and pin sockets on the back which break out pins of the processor. Just below the reset button is a RGB LED, and a clock crystal has also been populated just above the chip.

When plugged in via the programmer’s USB port the PWR LED lights up as does the RGB LED. The firmware that ships on the device fades through a range of colors and the user buttons scroll through a set of predefined colors. The device enumerates as: “Bus 002 Device 005: ID 1cbe:00fd Luminary Micro Inc.” on our machine. But if you connect it via the device USB jack it enumerates as: “Bus 001 Device 015: ID 04e8:689e Samsung Electronics Co., Ltd GT-S5670 [Galaxy Fit]”. Interesting.

We have no idea if there are programming tools for flashing the board using a Linux box, but we’ll be trying to figure it out. If you have some info please share it in the comments.

Continue reading “Hands On The Stellaris Launchpad”

Beginner’s Look At On-Chip Debugging

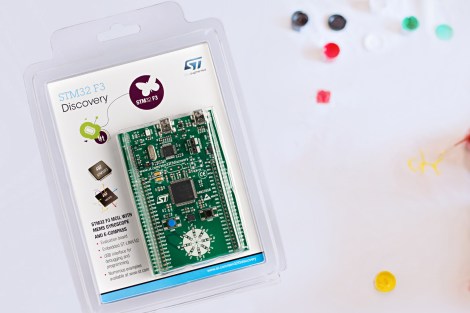
As your embedded applications get more complicated an On-Chip Debugger will save you a lot of time when things don’t run quite right. On-Chip Debugging (OCD) is just what it sounds like — a way to run your program on the target chip that lets you pause execution to examine values and change them if need be. The Arduino has no built-in method of using OCD, but the AVR chips used by the boards do. The caveat is that you need a proper AVR programmer to access the Debug Wire protocol, or a JTAG interface for some of the larger chips. In this case I’m going to be using an STM32 Discovery Board to give you an overview of OCD. But this will work the same way for any chip that has hardware debugging capabilities. Many IDE’s have debugging support built right in so that you can use a nice GUI as you work. But often these are just a front end for the command line tools I’ll be using. Join me after the break and we’ll get started.

Continue reading “Beginner’s Look At On-Chip Debugging”

Classic Game Of Snake On An ARM Controller

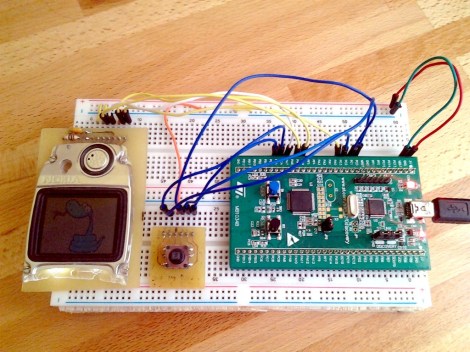
Every now and again we take a break from looking at all of your awesome projects and get to work on our own. I thought I’d take a minute to show off my game of Snake. It’s a classic that I remember playing on a graphing calculator (TI-83) back in high school. I had never written my own version and decided it would be a good reason to spend some more time on the ARM platform.

The dev board I’m using is the STM32 F0 Discovery board. Once I had a usable template for compiling the code on a Linux box everything else just started to fall into place. The screen is from a Nokia 3595. Several years back I cut off the keypad and made a breakout board for it. It’s pretty dim but it’s small and uses SPI so it tends to be my go-to display for prototyping. But I did get my hands on an SSD1289 TFT screen (after writing about this project) for about $16 and I’ve had some success with that. It uses a parallel interface so it’s not as easy to hook up and I’ve had some crosstalk issues when running at 24 MHz.

But I digress. Check out the demo video of my simple game after the break. There are more details about my programming choices at post link above. You will see this hardware again soon. I’m working on an On Chip Debugging primer and these ARM dev boards are perfect for it!

Continue reading “Classic Game Of Snake On An ARM Controller”

How To Build Your Own Dedicated Pandora Radio

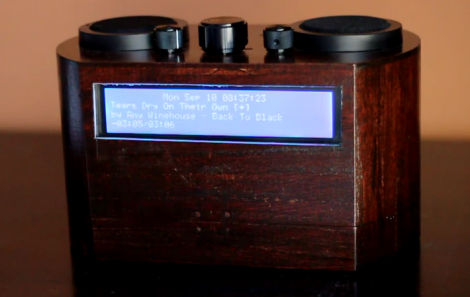
This mix of modern and retro acts as a standalone Pandora client. It’s certainly a radio upgrade, falling somewhere in between the passive listening of traditional broadcasts, and the complete control of music players that use playlists.

Inside the wooden case a BeagleBoard does most of the work. It’s running Ubuntu 12.04 on which pianobar, a command line interface package for Pandora is running. Those components alone would make a pretty nice listening experience, but since Pandora rolls different music into the mix it’s nice to be able to see what you’re listening to. The four-line LCD is wide enough to display plenty of information. It’s being controlled by a PIC24 microcontroller which also monitors the controls on the top. As you can see in the video after the break, the user interface offers almost everything you could want. It’s easy to switch stations, and you can still register your preferences on each track being played.

Continue reading “How To Build Your Own Dedicated Pandora Radio”

Programming An ARM With BASIC

For those of us old enough to remember the beginnings of the microcomputer revolution, we can look back fondly on ‘the programming environment is the OS,’ a ton of BASIC programs, and typing in small programs found in the backs of computer magazines. It’s a whole new world now with cell phones and Linux computers the size of credit cards, but some companies still remember the beginning.

Coridium is releasing an ARM microcontroller in the vein of old fashioned microcomputers updated for the 21st century. Based on the LPC1114 Cortex M0 ARM microcontroller stuffed into a DIP28 package, the Coridium ARM BASIC provides a programming environment in the firmware.

The ARM BASIC is a complete system on a chip, with Rx and Tx connections to connect to a serial terminal. To get this BASIC microcontroller up and running, all you’ll have to do is connect 3.3 Volts of power. Then, it’s a simple matter of plugging in an FTDI cable and pretending it’s 1989.

Coridium is planning on giving away a few hundred of these ARM BASIC chips to makers in a few days. I’ll put up the announcement of free microcontrollers up in a few days, but [Bruce] at Coridium is sending me one very shortly. Hopefully I’ll be able to do a demo before the stock of free chips is completely depleted.

Help Create A Universal ARM Programmer

The new crop of ARM Cortex M0/M3/M4 microcontrollers have a lot of interesting features for developers. In addition to supporting drag and drop programming via USB, the same hardware can also be used as a debugger. Setting breakpoints and inspecting memory at any point in the code is a wonderful feature, but not all the new ARM dev boards we’ve seen support this feature.

The folks over on SimpleCortex have a solution to this problem, but they need your help. To get their CMSIS-DAP hardware working with Open Source tools, they’re looking for a few good programmers and hardware developers to build a toolchain.

Right now, the hardware only works with Keil development tools. A closed source development environment is no good to anyone, so if you have some experience writing drivers and such, send the guys at SimpleCortex an email. They’ll give you a free board in return for a contribution to building an open source ARM toolchain.

Common sense requires us to mention that you should probably only send these guys an email if you actually plan on working on this problem. Still, it’s a great opportunity to contribute to open hardware.

Drag And Drop Code Onto This ARM Dev Board

On the continuing list of homebrew ARM dev boards we’ve seen over the past few months, [Squonk42]’s USBug is one of the best we’ve seen. Like many other ARM boards, it breaks out a member of the Cortex M0/M3 family into a 40-pin DIP, but unlike all the others, [Squonk] designed it so you can drag and drop code onto the microcontroller just like a USB thumb drive.

[Squonk]’s trick relies on a certain breed of NXP LPC11xx/LPC13xx microcontrollers. These chips feature a ROM-based mass storage, meaning you can compile code on your desktop and simply shuffle it over to the USBug, no external programmer required. Here’s the relevant app note (PDF in a zip file. Double whammy).

Of course, the USBug features the I/O you’d generally expect from the current crop of Cortex-M3 devices, all while serving up 64 kB of Flash and 12 kB of RAM.

[Squonk] says he’d like to put the USBug on Kickstarter, but unfortunately he’s not a US citizen. In the spirit of Open Hardware, perhaps some maker-based electronics manufacturer will pick up where [Squonk] is forced to leave off.