The design for the project was the so-called Ring of Power from Lord of the Rings. The print was created on a resin printer at a high quality level, washed thoroughly to remove any remaining resin, and then cured. The print was then post-processed with sandpaper to make it as smooth as possible. Conductive paint was then applied, ready to take on the plating layers. [HEN3DRIK] first started by plating copper to build up a tough base layer, then nickel to prevent mixing between the copper and gold. The gold is then finally plated on top. Plating the copper is done with the ring constantly rotating to get as even a coat as possible. In contrast, the gold plating is done with a brush to avoid wasting the highly-expensive plating solution.
The final result is a gleaming gold ring that probably feels strangely light in the hand. The technique is time consuming, thanks to the need to plate multiple layers, but the results are to die for. We’ve seen [HEN3DRIK]’s fine work before, too. Video after the break.
Once upon a time, we drove an old six-volt VW Beetle. One sad day, the wiper motor went out, and as this happened before the Internet heyday, there were no readily-available parts around that we were aware of. After briefly considering rubbing a potato on the windshield as prescribed by the old wives’ tale, we were quite grateful for the invention of Rain-X — a water-repelling chemical treatment for car windshields.
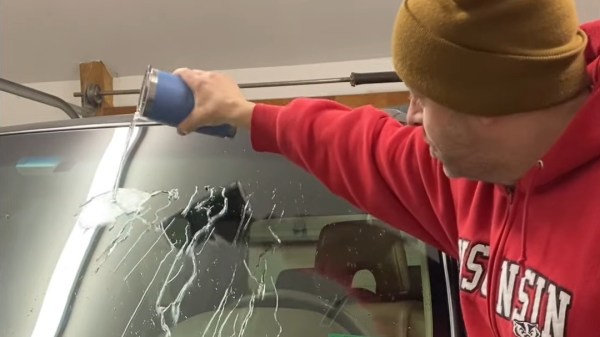
Boy would we have loved to know how to make it ourselves from readily-available chemicals. As you’ll see in the video below, it doesn’t take much more than dimethicone, sulfuric acid, and a cocktail of alcohols. [Terry] starts with dimethicone, which he activates with a healthy dose of concentrated sulfuric acid, done under the safety of an exhaust hood. After about 20 minutes on the stir mix-a-lot plate, [Terry] added ethanol and isopropyl alcohols. Finally, it was off to the garage with the mixture in a spray bottle.
After meticulously cleaning the windshield, [Terry] applied the solution in small areas and rubbed it in with a towel to create a thin bond between it and the glass. This creates a perfectly normal haze, which can be removed after a bit with a clean towel.
[Laena] and her colleagues at the La Trobe Institute for Molecular Science in Melbourne, Australia used a Raspberry Pi to make a low-cost electrochemiluminescence (ECL) detector to measure inflammation markers, which could be used to detect cardiovascular disease or sepsis early enough to give doctors a better chance at saving a patient’s life.
ECL reactions emit light as a result of an electrically-activated chemical reaction, making them very useful for detecting biochemical markers in blood, saliva, or other biological samples. ECL setups are fundamentally fairly straightforward. The device includes a voltage reference generator to initiate the chemical reaction and a photomultiplier tube (PMT) to measure the emitted light. The PMT outputs a current which is then converted to a voltage using a transimpedance amplifier (TIA). That signal is then sampled by the DAQCplate expansion board and the live output can be viewed in ppLOGGER in real-time.
Using the RPi allowed the team to do some necessary, but pretty simple signal processing, like converting the TIA voltage back to a photocurrent and integrating the current to obtain the ECL intensities. They mention the added signal processing potential of the RPi was a huge advantage of their setup over similar devices, however, simple integration can be done pretty easily on most any microcontroller. Naturally, they compared their device to a standard ECL setup and found that the results were fairly comparable between the two instruments. Their custom device showed a slightly lower limit of detection than the standard setup.
Their device costs roughly $1756 USD in non-bulk quantities with the PMT being the majority of the cost ($1500). Even at almost $2000, their device provides more than $8000 in savings compared to ECL instruments on the market. Though cost is much more than just the bill of materials, we like seeing the community making efforts to democratize science, and [Laena] and her colleagues did just that. I wonder if they can help us figure out the venus fly trap while they’re at it?
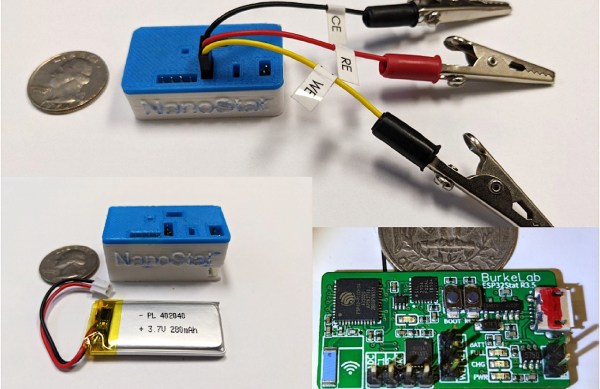
Ever wanted to make your own wireless chemical sensor? Researchers from the University of California, Irvine (UC Irvine) have got you covered with their ESP32-based potentiostat.
We’ve talked about potentiostats here on Hackaday before. Potentiostats are instruments that analyze the electrical properties of an electroactive chemical cell. Think oxidation and reduction reactions (redox) from your chemistry course, if you can remember that far back. Potentiostats can be used in several different modes/configurations, but the general idea is for these instruments to induce redox reactions within a given electroactive chemical cell and then measure the resulting current produced by the reaction. By measuring the current, researchers can determine the concentration of a known substance within a sample or even determine the identity of an unknown substance, to name a few potential applications.
These instruments have become mainstays in research labs around the world and have incredible utility in the consumer space. Glucometers, devices used to measure blood glucose levels, are an example of technologies that have made their way into everyday life due to the advances made in electrochemistry and potentiostat research over the last few decades. Given their incredible utility to scientific research and medical technologies, a great deal of effort has gone into democratizing potentiostats, making them more available to the general public for educational and hobbyist purposes. Of course, any medical applications must go through rigorous testing and approvals by each country’s appropriate governing bodies. So we’re talking more non-medical purposes here.
The first popular open-source, DIY potentiostat was the CheapStat, which we’ve covered here on Hackaday before. Since then, developing newer and more advanced open-source potentiostats has become a popular endeavor within the scientific community. The researchers from UC Irvine wanted to put their own special spin on the open-source potentiostat craze and they did so with their inclusion of the ESP32 as their main processor. This obviously opens up them up do a whole host (see what we did there) of wireless capabilities that others before them have not explored.
With the ESP32, they developed a nice web-based GUI that makes controlling and collecting data from the potentiostat very seamless and user-friendly. You can imagine the great possibilities here. Teacher-led classroom demonstrations where the instructor can easily access each student’s device over the cloud to help troubleshoot or explain results. Developing soil monitoring sensors that can be deployed all around a farm to remotely collect data on feed, soil composition, and plant health. The possibilities here sure are promising.
We hope you’ll dive into their paper as it’s well worth a read. Happy hacking, Hackaday.
Back when 3D printers were pretty new, most of us had glass beds with or without painter’s tape. To make plastic stick, you’d either use a glue stick or hair spray. Many people have moved on to various other build surfaces that don’t require help, but some people still use something to make the bed sticky and there are quite a few products on the market that claim to be better than normal glue or hairspray. [Jonas] wanted to try it, but instead of buying a commercial product, he found a recipe online for “3D printer goop” and made it himself.
You need four ingredients: distilled water and isopropyl alcohol are easy to find. The other two chemicals: PVP and PVA powder, are not too hard to source and aren’t terribly dangerous to handle. The recipe was actually from [MakerBogans] who documents this recipe as “Super Goop” and has another formula for “Normal Goop.” You’ll probably have to buy the chemicals in huge quantities compared to the tiny amounts you really need.
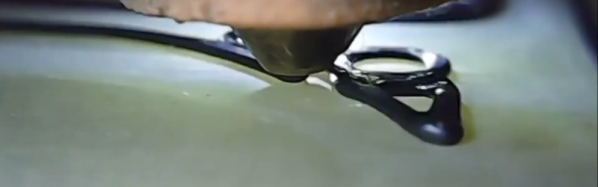
We assume the shots of the 3D printer printing its first layer is showing how effective the glue is. This looks like a very simple thing to mix up and keep in a sprayer. If you have some friends, you could probably do a group buy of the chemicals and it would cost nearly nothing for the small amounts of chemicals you need.
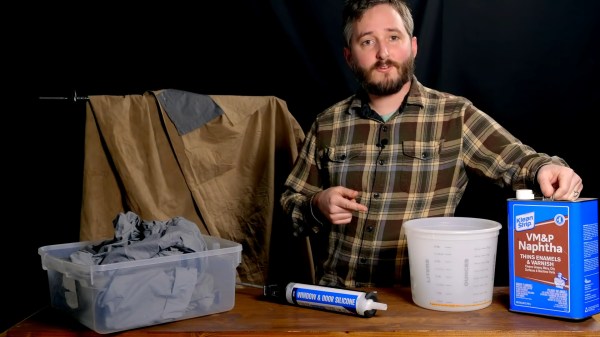
For hackers in the Northern Hemisphere, the seasons of wet and cold are upon us. Staying dry is every bit as important as staying warm, so what better than a hack or two to keep us warm and dry! All you’ll need is a bed sheet, some rope, and a run to the local hardware store, and a bit of knowledge. [NightHawkInLight] has us covered with the excellent video “Recycled Bedsheets Make The Best Waterproof Tarps” as seen below the break.
[NightHawkInLight] brings old traditional methods into the 21st century by turning away from oil, beeswax and canvas in favor of a recycled bed sheet made waterproof with silicone. The video goes into just enough detail so that you can reproduce their results without fear of working with the powerful solvent being used.
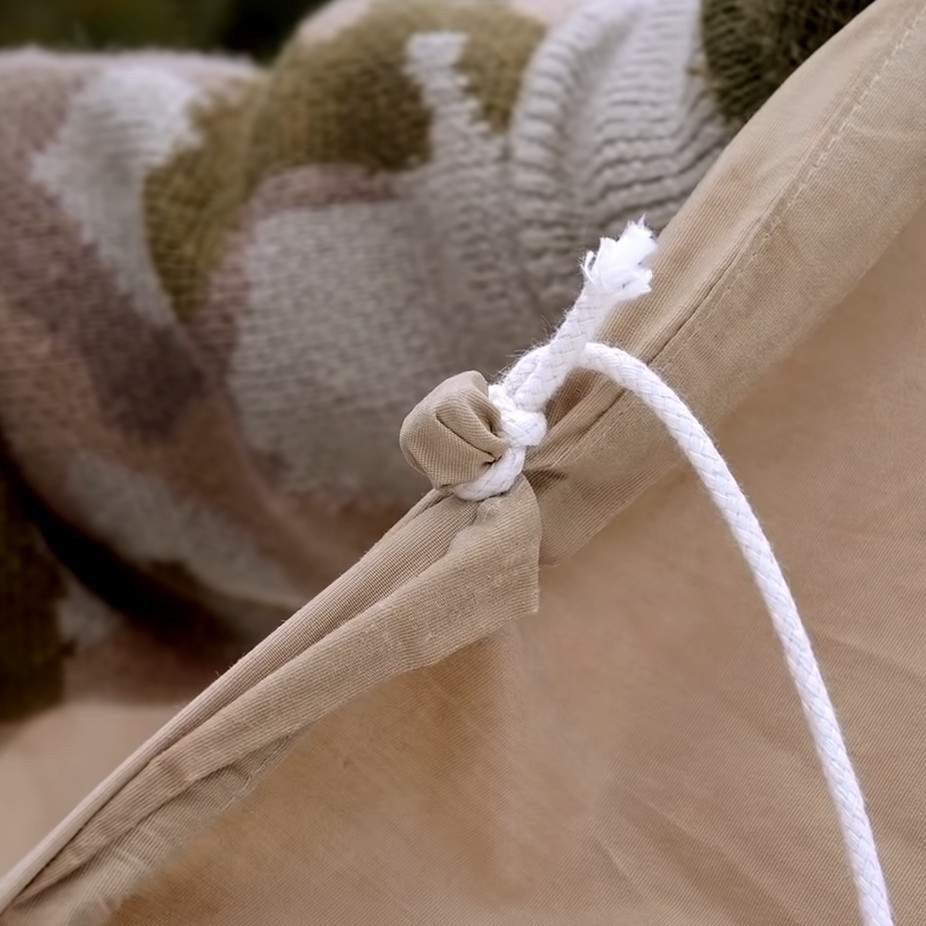
Cheap hardware store grade silicone sealant is thinned by naphtha, worked into the old bed sheet, and then hung out to dry overnight. The result? A perfectly waterproof sheet that’s just as pliable as before treatment. But how can you use it like a tarp, when there are no eyelets? If you watch the video for no other reason, check out the neat attachment trick at the end, where traditional technology is brought to the fore once again with nothing more than a rock and a slip knot.
We can imagine that the uses for such inexpensive, durable home made tarps are many. Perhaps one could put it to use when building your own Custom Cycling Camper.
Seasoned Hackaday readers may have noticed over the years, that some of us who toil under the sign of the Jolly Wrencher have a penchant for older tech. After all, what’s not to like in a dirt cheap piece of consumer electronics from decades past that’s just begging for a bit of hardware hacking? For me at the moment this is manifesting itself in a selection of 8mm movie cameras, as I pursue a project that will eventually deliver a decent quality digital film cartridge.
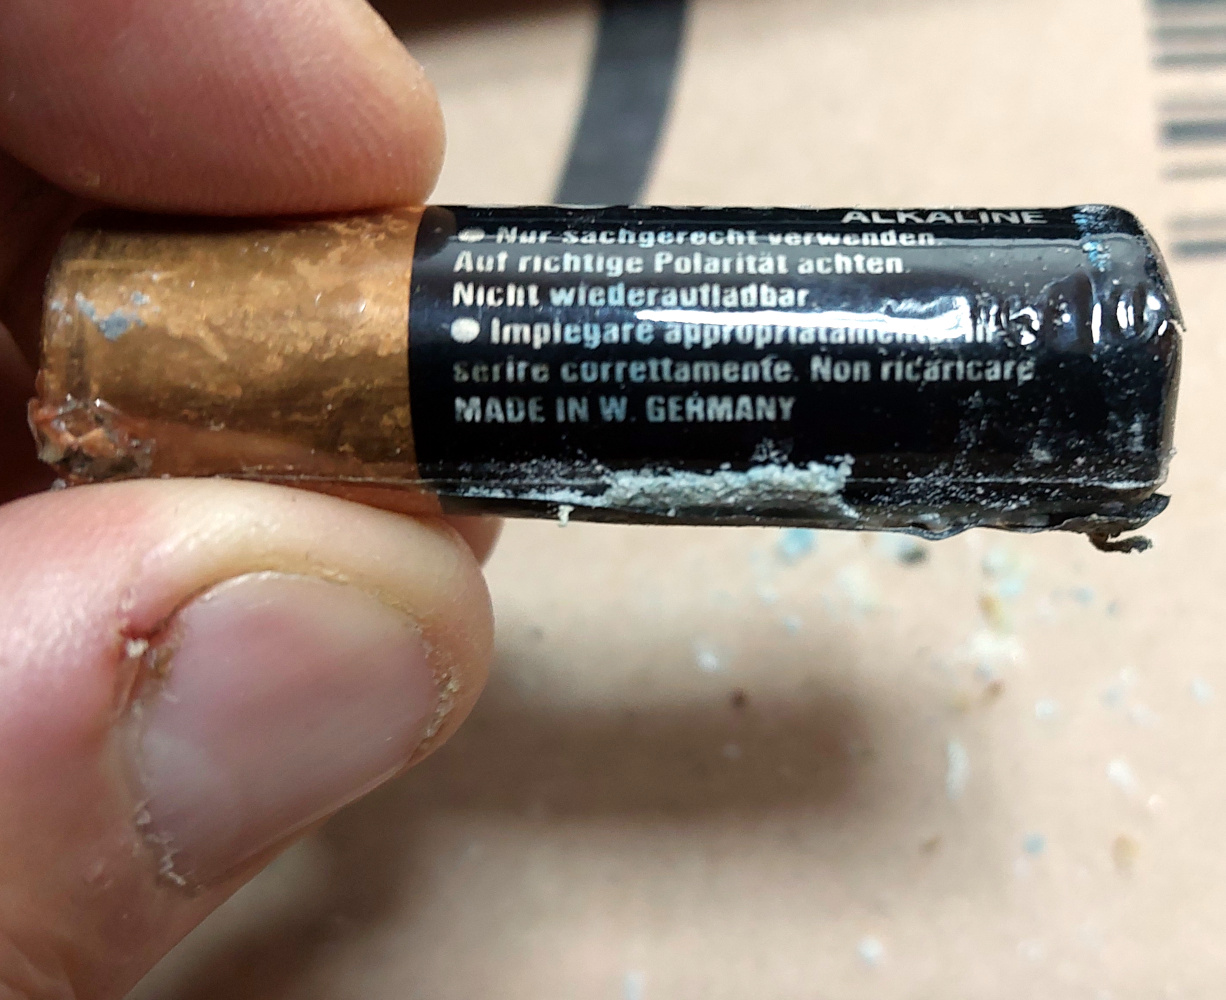
When A Cell Is From West Germany, You Know It’s Old
“Made in West Germany”
The trouble with scouring junk shops for a technology superseded four decades ago is that the cameras I find have in most cases been sitting in a drawer since the early 1980s. They were a valuable item back in the day so of course they were hung on to, then they were forgotten about until one day the grown-ups who were once the kids featured in the home movies are clearing the house, and they start their journey to my bench.
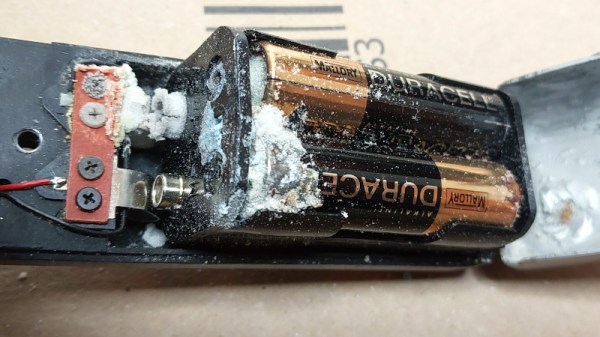
The problem is that very few owners of 8mm cameras had the good sense to remove their batteries before putting them away, so I inevitably end up with a battery compartment full of crusty 1980s Duracells and rusted contacts. This has left me curious, just what has happened here and how can I fix it?
What’s The Leaky Stuff?
Construction of a zinc-manganese “alkaline” cell. Tympanus, Public domain.
Non-rechargeable cells come in a variety of chemistries, but the commercial ones we’re most familiar with are zinc-carbon “dry cells”, and “Alkaline” zinc-manganese dioxide cells. The zinc-carbon variety are becoming less common here in 2022 and have an acidic zinc chloride or ammonium chloride electrolyte, while the alkaline cells have a higher capacity and a basic potassium hydroxide electrolyte. They both have different failure modes that result in the leaky cells, so it’s worth taking a look at each one.
The failure mode of a zinc-carbon cell is a chemical one, the acidic electrolyte reacts with the zinc can anode, and eventually eats through it. The leaking electrolyte then attacks the surrounding circuitry and battery clips. It’s hardly a concentrated acid, but it’s enough to do plenty of damage over the years.
Meanwhile an alkaline cell has a build-up of hydrogen as it degrades. It incorporates a vent which allows the hydrogen to escape, however the hydrogen pressure can instead force the electrolyte out through this vent. The electrolyte will then corrode the battery terminals and any other electronics it touches. A feature of alkaline cell leakage is a white crust, this is potassium carbonate formed from the reaction between the potassium hydroxide electrolyte and carbon dioxide in the air.
The Global Parts Bin To The Rescue
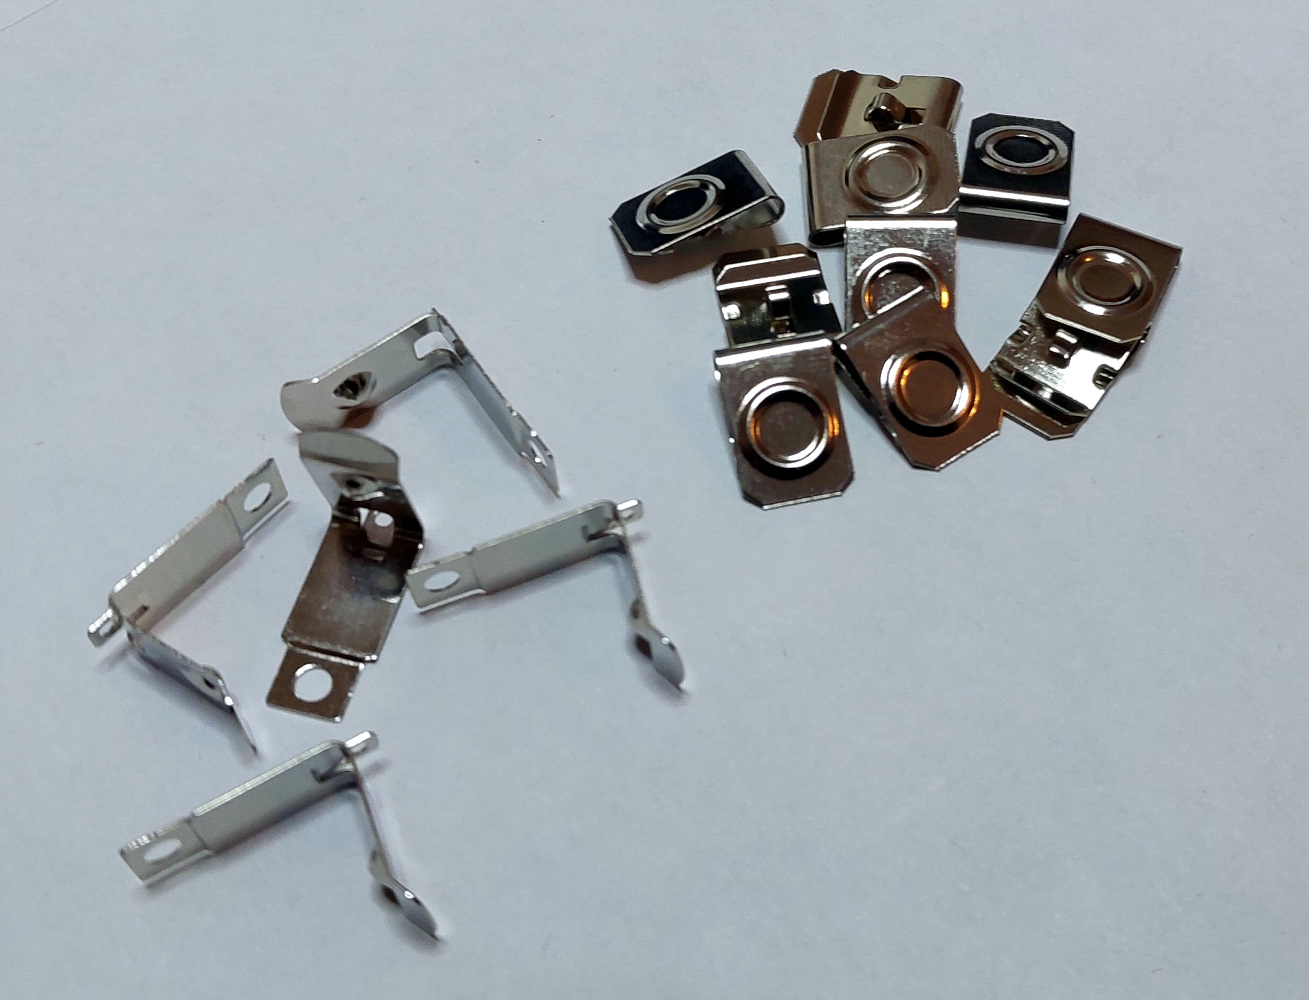
Fresh and new battery clips for AA holders
How much damage has been done is usually a function of how long the leaking batteries have been in the device. Sometimes one is lucky and the battery contacts are salvageable, otherwise they are too far gone and a replacement has to be found. A past me tried all sorts of home-made solutions using stiff copper wire and other materials, but today thanks to the miracle of international commerce it’s usually possible to find a contact the same as or very similar to the old one. A quick AliExpress search on terms such as “AA battery spring” will return numerous options, and it’s simply a case then of paging through to find the one you need on the terms you like.
So those of you who like retro tech will find something familiar in the last few paragraphs, but there’s a lesson to be found in dealing with ancient batteries. Here in 2022 we’re more likely to have lithium polymer cells in our consumer devices and so the need to keep a pile of Duracells at hand is reduced. But the thought of today’s equivalent of a Super 8 camera lying forgotten in a drawer for decades with a cheap li-po pouch cell inside it is far more frightening than something with some crusty manganese cells. Have we just found the root cause of house fires in the 2040s?