Making Fancy Dice PCBs At Home

These days, it’s easy to get high-quality custom PCBs made and shipped to your door for under $50. It’s something that was unfathomable only a decade ago, but now it’s commonplace. However, it doesn’t mean that the techniques of home PCB production are now completely obsolete. Maybe you live somewhere a little off the beaten track (Australia, even!) and need to iterate quickly on a project, or perhaps you’d like to tinker with the chemical processes involved. For your learning pleasure, [Emiliano] decided to share some tips on making SMD-ready PCBs with the TinyDice project.

The actual project is to create a small electronic dice, and [Emiliano] touches on the various necessary considerations such as how to decrease power consumption, and how to source good quality, organic random numbers from your local microcontroller. Though its far from an exhaustive discussion on either topic, it shows an understanding of the deeper factors at play here.

However, the real meat of the write-up is the PCB production process. The guide goes through several stages of etching to not only prepare the PCB but also to add solder mask and produce a solder paste stencil as well using an aluminum can. This gives the boards that colored finish we’re all used to and lets the boards be reflowed for easy SMD assembly.

It’s a tidy guide as to how to approach producing your own boards to be used with SMD components, and it’s complete with clear photos and instructions throughout. If you want to take your designs up another notch, why not consider putting your components inside the circuit board?

From Cop Car Data Terminal, To Retro Computer

It is possible that you will have lived your life without ever coming into contact with a Motorola MDT9100-T. The data terminal of choice for use in police cars across the globe was a computer with a full-sized QWERTY keyboard, a small CRT display, a mainboard sporting an Intel 386SX processor, and a custom version of Windows 3.1. [Trammell Hudson] and some friends from NYC Resistor scored some MDT9100s in an online auction and found them to be just too good an opportunity not to crack them open and see what could be done.

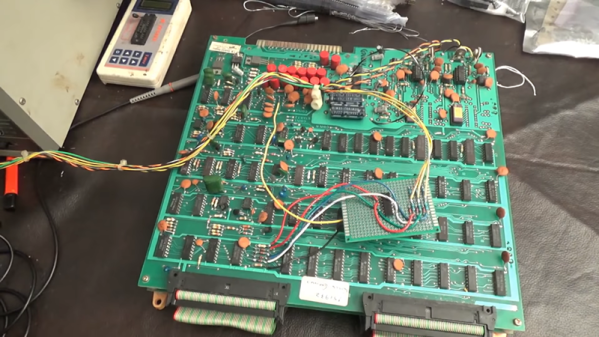
The custom Windows install could be bypassed with a DOS prompt for some period demoscene action, but [Trammell] wanted more. The 386SX wasn’t even quick when it was new, and this computer deserved the power of a BeagleBone! A custom cape was created on a prototyping cape to interface with the MDT9100 header carrying both keyboard and video. A bit of detective work revealed the display to be a 640×480 pixel mono VGA. The ‘Bone’s LVDS output can drive VGA through a resistor ladder DAC with the aid of an appropriate device tree overlay. The keyboard was then taken care of with a Teensy working as a USB device, resulting in a working Linux computer in the shell of an MDT9100.

It’s always good to see old technology brought up to date. Amusingly a couple of years ago we reported on the death of VGA, but retro projects like this one mean it’ll be a long time before we’ve heard the last of it.

Teardown: The Oregon Trail Handheld

If you were a school-age child in the 1980’s or 1990’s, you almost certainly played The Oregon Trail. Thanks to its vaguely educational nature, it was a staple of school computers until the early 2000’s, creating generations of fans. Now that those fans are old enough to have disposable incomes, we are naturally seeing a resurgence of The Oregon Trail merchandise to capitalize on one of humanity’s greatest weaknesses: nostalgia.

Enter the Target-exclusive The Oregon Trail handheld game. Priced at $24.99 USD and designed to look like the classic beige-box computers that everyone of a certain age remembers from “Computer Class”, it allows you to experience all the thrills of dying from dysentery on the go. Naturally there have been versions of the game for mobile devices in the past, but how is that going to help you when you want to make your peers at the coffee shop jealous?

But we’re not here to pass judgement on those who hold a special place for The Oregon Trail in their hearts. Surely, there’s worse things you could geek-out on than interactive early American history. No, you’re reading this post because somebody has put out a handheld PC-looking game system, complete with a simplified keyboard and you want to know what’s inside it. If there was ever a cheap game system that was begging to be infused with a Raspberry Pi and some retro PC games, this thing is it. Continue reading “Teardown: The Oregon Trail Handheld”

Respectfully Modifying The Amiga 500

Modifying the Amiga 500 to speed up access to RAM in a memory expansion pack is a well documented procedure, with guides on the process written in the early 1990’s when the hardware was only a few years old. But as they were written for contemporary hardware, they make no concessions for how one should be treating a vintage computer that’s now over 30 years old. In 1993, cutting traces on the Amiga 500 motherboard was just a last ditch effort to eek a few more months of service life out of an outdated desktop computer. But in 2018, it’s kind of like when that old lady tried to “restore” a fresco of Jesus in Spain; it might be done with the best of intentions, but you still screwed the thing up good and proper.

Such things don’t fly over at [Inkoo Vintage Computing]. There you can find a guide that details the impressive lengths one can go to if they want to perform the classic modification without any irreversible changes to the motherboard. To avoid the cut traces and soldered bodge wires, this version of the modification makes use of a novel adapter that breaks out the necessary connections on the 8372A chip.

The adapter is simply a homemade PCB with both male and female plastic leaded chip carrier (PLCC) connectors. The few pins on the chip that needed rerouting are exposed as solder pads on the adapter for easy wiring. There are even a couple jumpers on the adapter to turn the modifications on and off.

Not surprisingly, the trickiest part of building this adapter was sourcing the antiquated PLCC connectors. Assuming you can even find them, you are then left with the challenging task of soldering them together. Judging by the pictures on the [Inkoo Vintage Computing] page, it’s no walk in the park.

Another similar arrangement is used in the expansion bay of the Amiga, where a pin is virtually “cut” in the connector. A tiny PCB is soldered to a 3×2 header to reroute the signals, and another jumper is used to enable and disable the pin. Luckily, the long pins on the Amiga memory expansion are forgiving enough that the little board can fit in between them without breaking electrical contact.

We’re no stranger to the Amiga 500 around these parts. We’ve covered how to get the 1987-vintage machine online in the 21st century, as well as employing a Raspberry Pi to emulate the original floppy drive. You can even make your own faux-Amiga with a 3D printed case, if you suffer from a sort of existential dread when working on a computer that’s older than you are.

Open Source Hardware Video Game Music Player

[Aidan Lawrence] likes classic synthesized video game music in the same way that other people “like” breathing and eating. He spent a good deal of 2017 working on a line of devices based on the Yamaha YM2612 used in the Sega Genesis to get his feet wet in the world of gaming synths, and is now ready to take the wraps off his latest and most refined creation.

One of his earlier attempts at a hardware VGM player.

The YM2151 Arcade Classic is an open source hardware player for Video Game Music (VGM) files. It uses no emulation, the files are played on the device’s YM2151 chip in the same way they would have been on a real arcade cabinet at the time of their release. Interestingly, as some arcade machines were exceedingly rare or even scrapped before release, [Aidan] believes that his player may be the first time some of these songs have ever been played (at least in public) on real hardware.

The YM2151 synthesizer is powered by a STM32 “Blue Pill” board, which was selected as much for its capabilities as it was its low cost. The STM32 loads the VGM files from an SD card, and puts track information for the currently playing song on the 128×32 OLED display. A few tactile switches under the screen allow for shuffling through the songs stored on the card, and a slide switch for mute rounds out the simplistic but functional user interface.

In the GitHub repository, [Aidan] has provided the source code, schematics, Bill of Materials, and KiCad-generated Gerber files; everything you need to create your own version of his player. After listening to it rock out for a few minutes in the video after the break, we’re tempted to take him up on that offer.

This player reminds us of a similar design, also using original hardware, that we covered last year. The logical next step for this project would be to flesh out the UI and put it into an enclosure like this SNES chiptune player.

Continue reading “Open Source Hardware Video Game Music Player”

A Faster Grave Digger For Your Child

Children love speed, but so few of those electric ride on toys deliver it. What’s a kid to do? Well, if [PoppaFixit]’s your dad, you’re in luck.

This project starts with an unusually cool Power Wheels toy, based on the famous Grave Digger monster truck. During the modification process, it was quickly realised that the original motor controller wasn’t going to cut the mustard. With only basic on/off control, it gave a very jerky ride and was harsh on the transmission components, too. [PoppaFixit] decided to upgrade to an off-the-shelf 24 V motor controller to give the car more finesse as well as speed. The controller came with a replacement set of pedals, both accelerator and brake, to replace the stock units. On the motor side, a couple of beefier Traxxas units were substituted for the weedy originals.

Acceleration is now much improved, not just due to the added power, but because the variable throttle allows the driver to avoid wheelspin on hard launches. It also makes the car much more comfortable and safe to drive, thanks to the added controllability. Another way to tell the project was a success is the look of pure joy on the new owner’s face!

This was a fairly basic install, very accessible to the novice. These sort of electric vehicle hop-ups are commonplace enough that there are a wide variety of suppliers who sell easy-to-use kits for this sort of work. For that reason, we’ve seen plenty of hacks of this sort – like this modified scooter, or these Power Wheels set up for racing.

Continue reading “A Faster Grave Digger For Your Child”