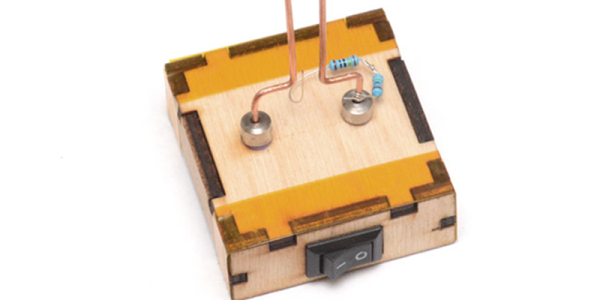
World War I began in 1914 as a fight among several European nations, while the United States pursued a policy of non-intervention. In fact, Woodrow Wilson was reelected President largely because “He kept us out of war”. But as the war unfolded in Europe, an intercepted telegram sent by the German Foreign Secretary, Arthur Zimmermann, to the Mexican government inflamed the U.S. public opinion and was one of the main reasons for the entry of the U.S. into WWI. This is the story of the encrypted telegram that changed the last century.
classic hacks2705 Articles
Bring A Modern Mouse To An Atari ST
Human input devices are a consumable on our computers today. They are so cheap and standardised, that when a mouse or a keyboard expires we don’t think twice, just throw it away and buy another one. It’ll work for sure with whatever computer we have, and we can keep on without pause.
On earlier machines though, we might not be so lucky. The first generation of computers with mice didn’t have USB or even PS/2 or serial, instead they had a wide variety of proprietary mouse interfaces that usually carried the quadrature signals direct from the peripheral’s rotary sensors. If you have a quadrature mouse that dies then you’re in trouble, because you won’t easily find a new one.
Fortunately there is a solution. In the intervening decades the price of computing power has fallen to the extent that you can buy a single board computer with far more than enough power to interface with a standard USB mouse and emulate a quadrature mouse all at the same time. This was exactly the solution [Andrew Armstrong] took to provide a replacement mouse for his Atari ST, he used a Raspberry Pi as both USB host and quadrature mouse emulator (YouTube link) through its GPIOs.
He’s put together a comprehensive description of his work in the video we’ve placed below the break, meanwhile if you’d like to have a go yourself you’ll find all you need to know in his GitHub repository.
An Eight Inch Floppy For Your Retrocomputer
For people under a certain age, the 8 inch floppy disk is a historical curiosity. They might just have owned a PC that had a 5.25 inch disk drive, but the image conjured by the phrase “floppy disk” will be the hard blue plastic of the once ubiquitous 3.5 inch disk. Even today, years after floppies shuffled off this mortal coil, we still see the 3.5 inch disk as the save icon in so many of our software packages.
For retro computing enthusiasts though, there is an attraction to the original floppy from the 1970s. Mass storage for microcomputers can hardly come in a more retro format. [Scott M. Baker] evidently thinks so, for he has bought a pair of Qume 8 inch floppy drives, and interfaced them to his CPM-running RC2014 Z80-based retrocomputer.
He goes into detail on the process of selecting a drive as there are several variants of the format, and interfacing the 50 pin Shuggart connector on these drives with the more recent 34 pin connector. To aid in this last endeavour he’s created an interface PCB which he promises to share on OSH Park.
The article provides an interesting insight into the control signals used by floppy drives, as well as the unexpected power requirements of an 8 inch drive. They need mains AC, 24VDC, and 5VDC, so for the last two he had to produce his own power supply.
He’s presented the system in a video which we’ve put below the break. Very much worth watching if you’ve never seen one of these monsters before, it finishes with a two-drive RC2014 copying files between drives.
Continue reading “An Eight Inch Floppy For Your Retrocomputer”
Recapture Radio’s Roots With An Updated Regenerative Receiver
Crystal radios used to be the “gateway drug” into hobby electronics. Trouble was, there’s only so much one can hope to accomplish with a wire-wrapped oatmeal carton, a safety-pin, and a razor blade. Adding a few components and exploring the regenerative circuit can prove to be a little more engaging, and that’s where this simple breadboard regen radio comes in.
Sometimes it’s the simple concepts that can capture the imagination, and revisiting the classics is a great way to do it. Basically a reiteration of [Armstrong]’s original 1912 regenerative design, [VonAcht] uses silicon where glass was used, but the principle is the same. A little of the amplified RF signal is fed back into the tuned circuit through an additional coil on the ferrite rod that acts as the receiver’s antenna. Positive feedback amplifies the RF even more, a germanium diode envelope detector demodulates the signal, and the audio is passed to a simple op amp stage for driving a headphone.
Amenable to solderless breadboarding, or even literal breadboard construction using dead bug or Manhattan wiring, the circuit invites experimentation and looks like fun to fiddle with. And getting a handle on analog and RF concepts is always a treat.
[via r/electronics]
New Caps And RAM Save Another Poly-1
1980s American teenagers, if they were lucky enough to attend a school with a computer lab, would have sat down in front of Apple IIs or maybe Commodore VIC20s. Similarly, their British cousins had BBC Micros. Solid and educational machines with all sorts of wholesome software, which of course the kids absolutely preferred to run in preference to playing computer games.
New Zealanders, at least a few of them, had the Poly-1. A footnote in the 8-bit microcomputer story, this was a home-grown computer with a built-in monitor clad in a futuristic one-piece plastic shell. Non-Kiwis never had the chance to encounter its 6809 processor and 64k of RAM, the global computer business being too great a challenge for a small New Zealand technology company, especially one whose government support had evaporated.
Decades after the end of Poly-1 production, some survive in the hands of enthusiasts. [Terry Stewart] has two of them, and has posted details of how he brought life back to one that was dead on arrival. It’s a story first of a failed electrolytic capacitor and tricky-to-dismantle PSU design, then of an almost-working computer whose random crashes were eventually traced to a faulty RAM chip. It seems swapping out that quantity of DIL RAM chips is rather tedious, and of course it had to be the final chip in the final bank that exhibited the problem.
Meanwhile it’s interesting to see the design of this unusual machine. A linear power supply contrasts with the switcher you’d have found in an Apple II at the time, and the motherboard is a huge affair. it’s easy to see why this was a relatively expensive machine.
We brought you [Terry]’s first Poly-1 last year, but so far he’s the only owner whose machine we’ve seen. More mainstream 8-bit machines are a common sight here, so for something else a bit esoteric read our coverage of home computers behind the Iron Curtain, and its companion piece on peripherals behind the Iron Curtain.
[via Hacker News]
Fixing Bugs In A 37 Year Old Apple II Game
Emulators are a great way to reminisce about games and software from yesteryear. [Jorj Bauer] found himself doing just that back in 2002, when they decided to boot up Three Mile Island for the Apple II. It played well enough, but for some reason, crashed instantly if you happened to press the ‘7’ key. This was a problem — the game takes hours to play, and ‘7’ is the key for saving and restoring your progress. In 2002, [Jorj] was content to put up with this. But finally, enough was enough – [Jorj] set out to fix the bug in Three Mile Island once and for all.
The project is written up in three parts — the history of how [Jorj] came to play Three Mile Island and learn about Apple IIs in the first place, the problem with the game, and finally the approach to finding a solution. After first discovering the problem, [Jorj] searched online to see if it was just a bad disk image causing the problem. But every copy they found was the same. There was nothing left for it to be but problem in the binary.
Continue reading “Fixing Bugs In A 37 Year Old Apple II Game”
C64 Keyboard Emulation Over Serial
There’s a lot of reasons you might want to emulate the keyboard on your Commodore 64. The ravages of time and dust may have put the original keyboard out of order, or perhaps you need to type in a long program and don’t fancy pecking away with the less-than-stellar feedback of the standard keys. [podstawek] has come up with the solution: a Commodore 64 keyboard emulator that works over serial.
It’s a simple concept, but one that works well. A Python script accepts incoming keypresses or pre-typed text, then converts them into a 6-bit binary code, which is sent to an Arduino over the serial connection. The Arduino uses the 6-bit code as addresses for an MT8808 crosspoint switch.

The MT8808 is essentially an 8×8 matrix of controllable switches, which acts as the perfect tool to interface with the C64’s 8×8 keyboard matrix. Hardware wise, this behaves as if someone were actually pressing the keys on the real keyboard. It’s just replacing the original key switches with an electronic version controlled by the Arduino.
[podstawek] already has the setup working on Mac, and it should work on Linux and Windows too. There’s a little more to do yet – modifying the script to allow complex macros and to enable keys to be held – so check out the Github if you want to poke around in the source. Overall it’s a tidy, useful hack to replace the stock keyboard.
The C64 remains a popular platform for hacking — it’s even had a Twitter client since 2009.