Some presentations get a bit technical, which isn’t bad, but what is so interesting about this one is the clear explanation of what the market was like, and what it was like for the user during this time. For example, one bit we found really interesting was the mention of later games not supporting some of the neat color hacks for CGA because they couldn’t emulate it fully on the VGA cards they were developing on. Likewise, It was interesting to see why a standard like RGBI even existed in the first place with his comparison of text in composite, and much clearer text in RGBI.
We learned a lot, and some mysteries about the bizarre color choices in old games make a lot more sense now. Video after the break.
The US Space Shuttle program is dead and buried. The orbiters can now be found in their permanent homes in the Air and Space Museum, Kennedy Space Center, and the California Science Center. The launch pads used by the shuttles over a career of 135 launches are being repurposed for vehicles from SpaceX and the Space Launch System. Yes, some of the hardware and technology will be reused for NASA’s next generation of heavy launch vehicles, but the orbiter – a beautiful brick of a space plane – is forever grounded.
The Space Shuttle was a product of the cold war, and although the orbiters themselves were never purely military craft, the choices made during the design of the Space Shuttle were heavily influenced by the US Air Force. The Soviet Union was keenly aware the United States was building a ‘space bomber’ and quickly began development of their own manned spaceplane.
While this Soviet Shuttle would not be as successful as its American counterpart — the single completed craft would only fly once, unmanned — the story of this spaceplane is one of the greatest tales of espionage ever told. And it ends with a spaceship that was arguably even more capable than its American twin.
Over at [Truthlabs], a 30 year old pinball machine was diagnosed with a major flaw in its game design: It could only entertain one person at a time. [Dan] and his colleagues set out to change this, transforming the ol’ pinball legend “Firepower” into a spectacular, immersive gaming experience worthy of the 21st century.
A major limitation they wanted to overcome was screen size. A projector mounted to the ceiling should turn the entire wall behind the machine into a massive 15-foot playfield for anyone in the room to enjoy.
With so much space to fill, the team assembled a visual concept tailored to blend seamlessly with the original storyline of the arcade classic, studying the machine’s artwork and digging deep into the sci-fi archives. They then translated their ideas into 3D graphics utilizing Cinema4D and WebGL along with the usual designer’s toolbox. Lasers and explosions were added, ready to be triggered by game interactions on the machine.
To hook the augmentation into the pinball machine’s own game progress, they elaborated an elegant solution, incorporating OpenCV and OCR, to read all five of the machine’s 7 segment displays from a single webcam. An Arduino inside the machine taps into the numerous mechanical switches and indicator lamps, keeping a Node.js server updated about pressed buttons, hits, the “Lange Change” and plunged balls.
The result is the impressive demonstration of both passion and skill you can see in the video below. We really like the custom shader effects. How could we ever play pinball without them?
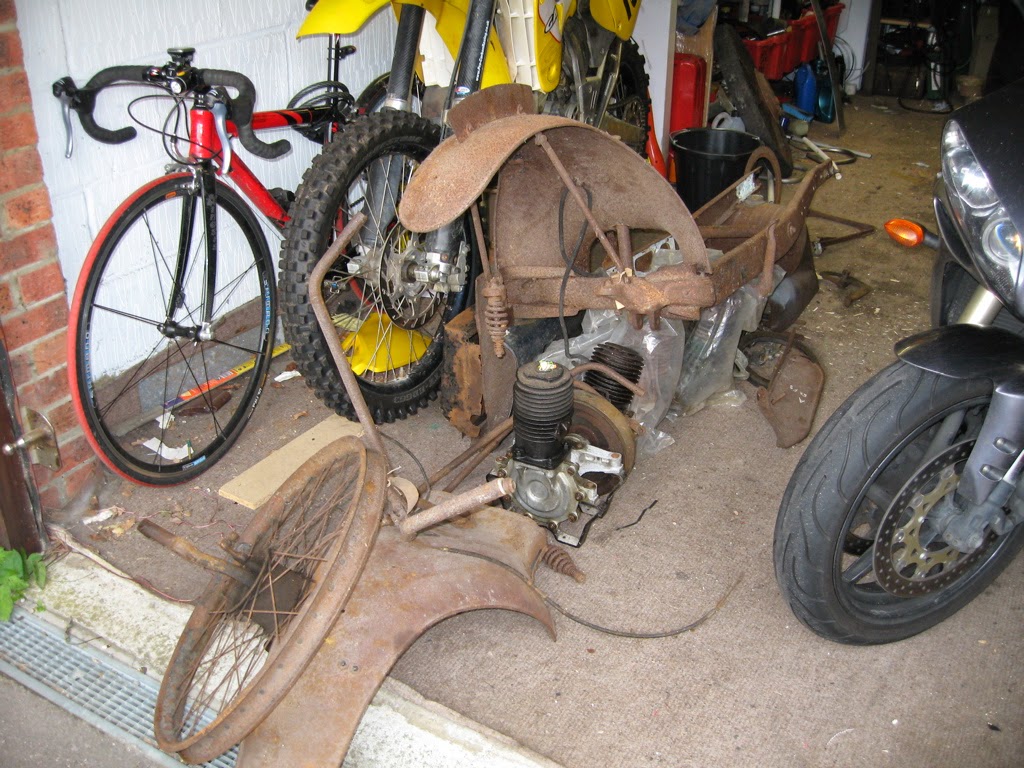
The Ner-a-Car. By Museumsfotografierer (Own work) [Public domain], via Wikimedia CommonsThe Ner-a-Car represents one of those eccentric dead-ends in automotive history. Designed in 1918 by an American, [Carl Neracher], its name is a play on both its designer and its construction and it is unique in that its design is closer to the cars of the era than that of a motorcycle. It has a car-style chassis, an in-line engine, and it was the first motorcycle to be produced with hub-centre steering. The rider sits on it rather than astride it, feet-forward, and the car-style chassis gives it a very low centre of gravity. They were manufactured in slightly different versions in both the USA and the UK, and [Andy]’s machine is an early example from the British production line. Not many Ner-a-Cars have survived and parts availability is non-existent, so his work has also had the unusual effect of satisfying a significant portion of world demand for the parts-bin of an entire marque.
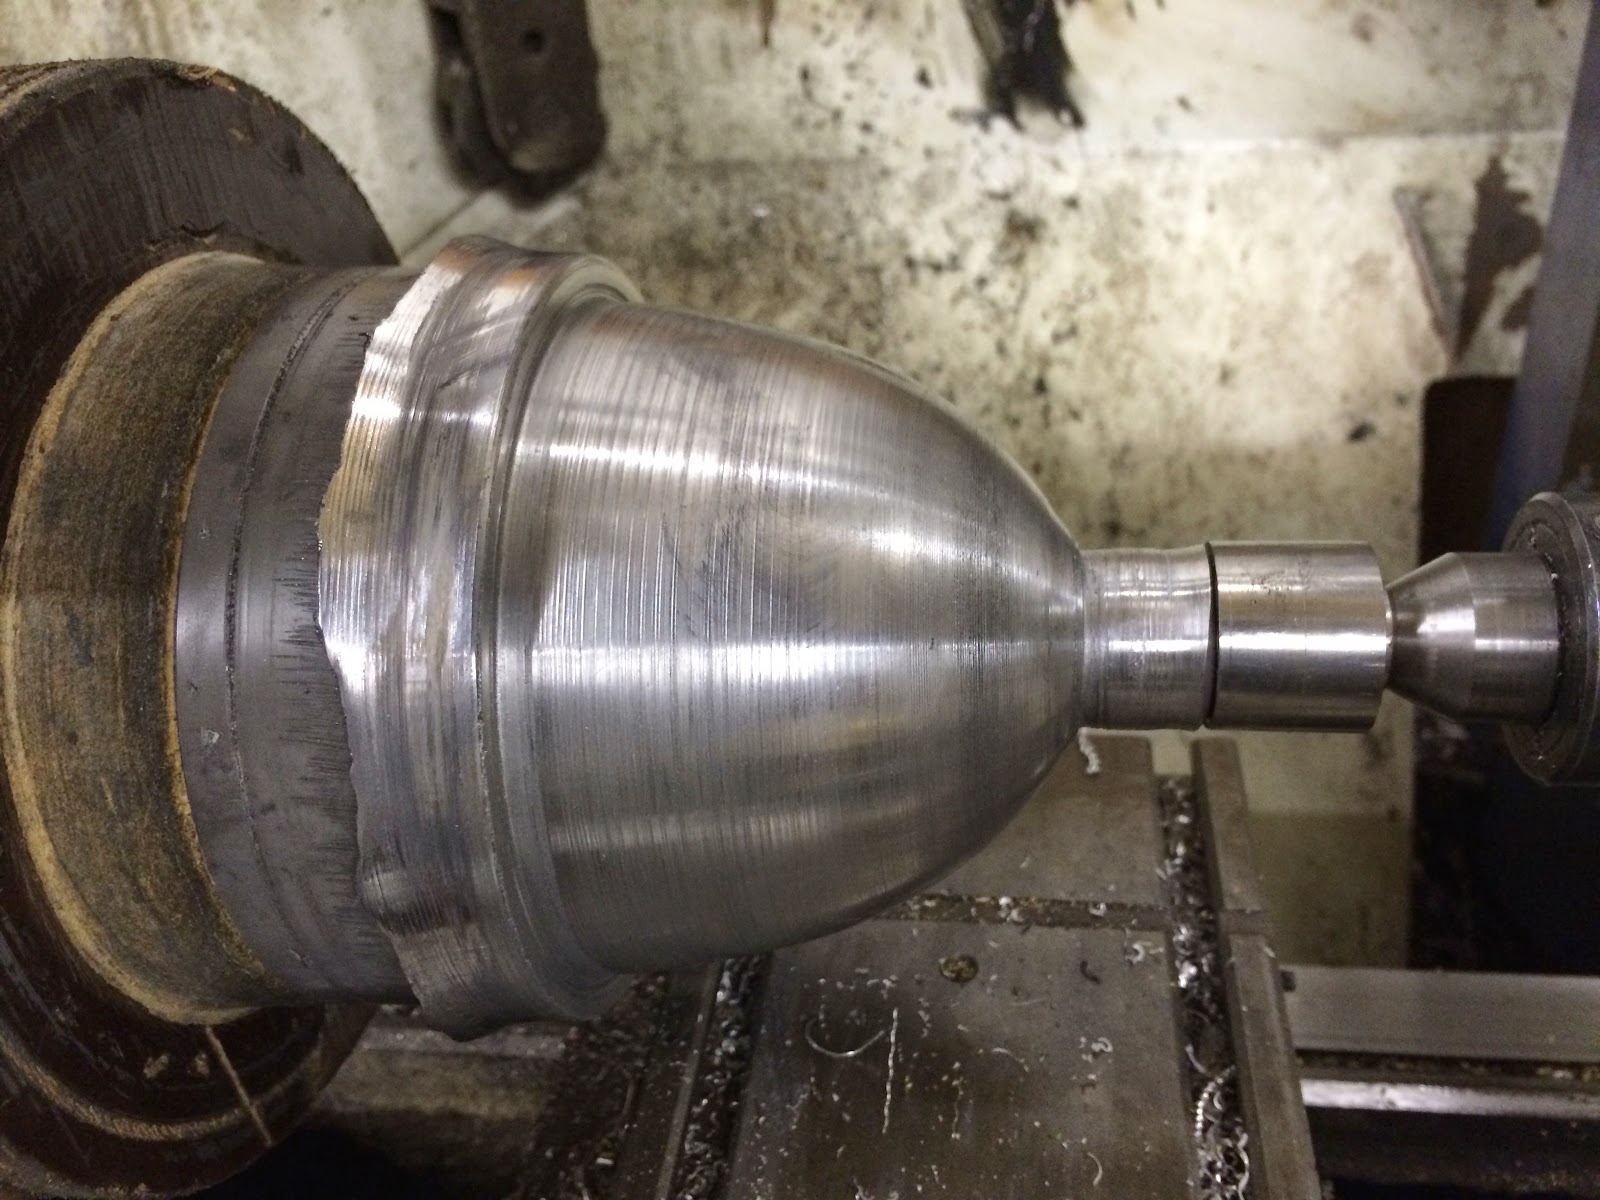
Spinning up a headlight shell
It’s usual for the first link in a Hackaday article to be to a page that encompasses the whole project. In this case when there is so much to see and the build is spread across twelve blog posts and nearly two years the link is to [Andy]’s first post in which he describes the project, sets to work on the chassis, and discovers the bent steering arm that probably caused the bike’s dismantling. He’s listed the posts in the column on the right-hand side of the blog, so you can follow his progress through the entire build. The work involved in remanufacturing the parts is to an extremely high standard, from machining press tools to reproduce 1920s footboard pressings through manufacturing authentic 1920s headlight switchgear and metal-spinning new aluminium headlight shells.
[Andy]’s most recent Ner-a-Car post details his trip to France on the completed bike, and tales of roadside repairs of a suddenly-not-working machine that should be familiar to any owner of a vintage internal combustion engine. But considering that the bike spent many decades as a pile of not much more than scrap metal the fact that it is now capable of a trip to France is nothing short of amazing.
This is the first rebuild of a vintage bike from a box of rusty parts we’ve featured here – indeed it could almost be a retrotechtacular piece in its detailed look at 1920s bike design. These pages have however seen many motorcycle related hacks over the years. We particularly like this from-scratch engine build and this gas-turbine bike, but it is the emergency motorcycle build in the desert from a Citroën 2CV car that has us most impressed. Please, ride safe, and keep them coming!
[Connor Krukosky] wanted to buy another computer. Even though he is only 18, he had his first computer at 18 months old. He’s had plenty since then and his interest in computers led him to pursue a career in electrical engineering. A few years ago, [Conner] started collecting vintage computers.
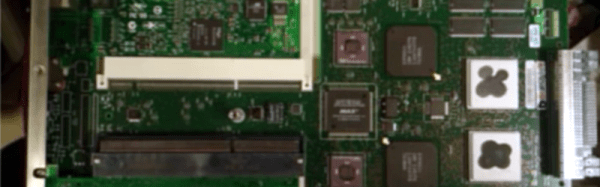
He’d bought up some Apple computers, terminals, and even a Data General minicomputer. Then he found a notice that Rutgers was auctioning off an IBM z890 mainframe computer. People warned [Conner] that this wasn’t a desktop workstation, it was a 2,200 pound case that probably wouldn’t fit through standard doors.
He was undeterred. He won the auction for under $240. The real expense, of course, would be moving it. He planned to make two trips: One to strip the machine to parts and bring some parts back and then a second trip to get the remaining parts.
You can see in the video below that he had a lot of adventure moving the beast. Things didn’t fit and even some excavation had to happen to get the computer in his basement.
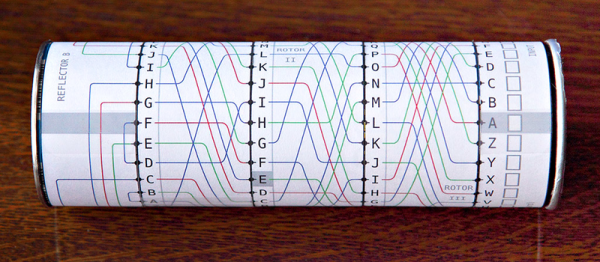
It was high-tech encryption for an important period of time in the mid-1940s, so perhaps you can forgive us our obsession with the Enigma machine. But did you know that you can make your very own Enigma just using some cut out paper strips and a tube to wrap them around? Yeah, you probably did. But this one is historically accurate and looks good too!
If you just want to understand how the machine worked, having a bunch of paper rolls in your hands is a very intuitive approach. Alan Turing explained the way it worked with paper models too, so there’s no shame there. With this model, you can either make the simple version with fixed rotor codes, or cut out some extra slip rings and go all out.
[TK] is a retro computer enthusiast who’s had some difficulty locating a joystick for his trusty Amiga 500. New ‘sticks are expensive, and battered survivors from the 80s go for more than they should.
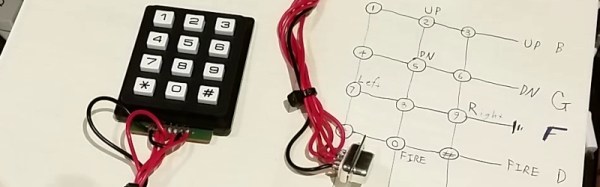
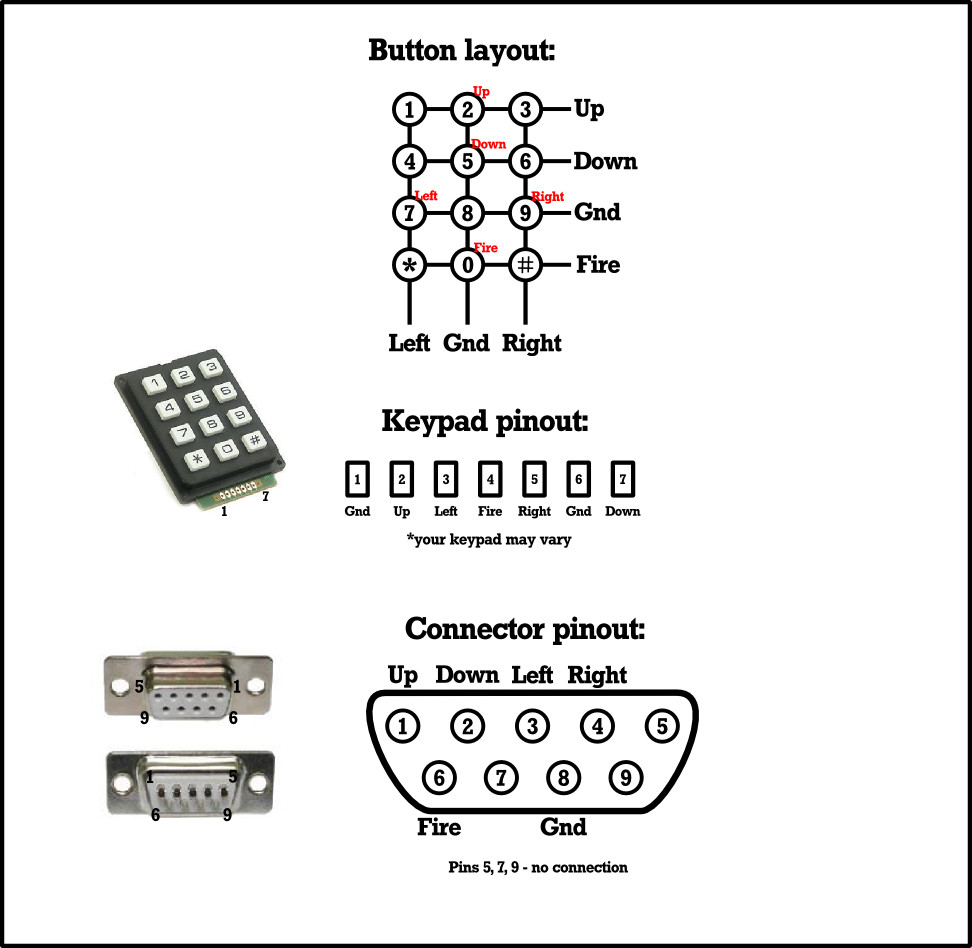
Happily these old controllers were simple devices, having only five control lines for the four directions and a fire button which were active low. [TK] therefore cast around the available components and decided to craft his own controller from a numerical keypad.
Numerical joypad schematic
Numerical keypads may be ubiquitous, but they’re not the perfect choice for a joypad. Instead of individual switches, they are wired as a matrix. [TK]’s controller works within that constraint without butchering the keypad PCB, though his layout has the left and right buttons below the up and down buttons. Looking at the schematic we wonder whether the 4-5-6 and 7-8-9 rows could be transposed , though joypad layout is probably a matter of personal choice.
Making the controller was a simple case of wiring the pad to a 9-pin D socket in the correct order, and plugging it into the Commodore. He reports that it’s comfortable to use and better than some of the lower-quality joysticks that were on the market back in the day. Veterans of Amiga gaming will understand that sentiment, there were some truly shocking offerings to be had at the time.


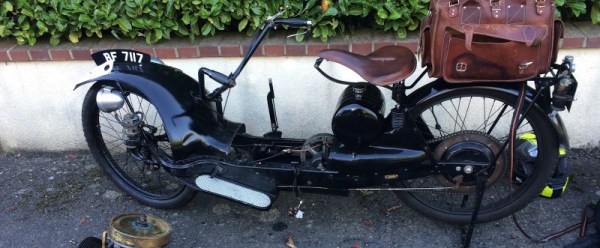
![The Ner-a-Car. By Museumsfotografierer (Own work) [Public domain], via Wikimedia Commons](https://hackaday.com/wp-content/uploads/2016/04/640px-ner-a-car_1924_01.jpg)