Build Your Own CRT TV

There was a time following the Second World War when TV sets for the nascent broadcast medium were still very expensive, but there was an ample supply of war-surplus electronic parts including ex-radar CRTs. Thus it wasn’t uncommon at all for electronics enthusiasts of the day to build their own TV set, and magazines would publish designs to enable them. With a burgeoning consumer electronics industry the price of a new TV quickly dropped to the point of affordability so nobody would consider building one themselves today. Perhaps that should be amended to almost nobody, because [Retro Tech or Die] has assembled a small black-and-white CRT TV from a kit he found on AliExpress.

We have to admit to having seen the same kit and despite a sincere love for analogue telly, to have balked at the price. It’s an exceptionally cheap set of the type that was available from discount stores for a laughably low price around the final few years of mainstream analogue TV broadcasting, and having a couple in the stable we can confirm that the value here lies in building the thing rather than owning it.

The unboxing and building proceeds as you might expect, with the addition of very poor documentation and extremely low-quality parts. Satisfyingly it works on first power-up, though some adjustment and the reversing of a deflection yoke connection is required for a stable picture. The scanned area doesn’t fill the screen and he doesn’t find the solution in the video, we hope that by his next video someone will have suggested moving the deflection yoke forwards.

Perhaps merely assembling a kit might not seem the most exciting subject for a Hackaday story, but this one is a little different here in 2022. CRT TV sets are now a long-gone anachronism, so for a younger generation there is very little chance to see them up close and thus watching one built has some value. If you want to spend the cash and build your own he’s dropped the link in the YouTube description, otherwise watch the progress in the video below the break.

Fancy learning a bit more about analogue TV? Have a dive into the video waveform. Or for a bit more CRT goodness, learn about converging a delta-gun colour set from the days when a TV weighed almost as much as you did.

Continue reading “Build Your Own CRT TV”

A USB interface connected to a Psion Organiser II

Arduino Nano Adds USB Interface To The Psion Organiser II

Introduced in 1984, the Psion Organiser series defined the first generation of electronic organizers or PDAs (personal digital assistants). Even though these devices are now over 30 years old, the Psion Organiser scene is alive and well: with new hardware and software is still being developed by enthusiasts the world over.

A USB interface connected to a Psion Organiser II
The Organiser II, with its brand-new USB interface

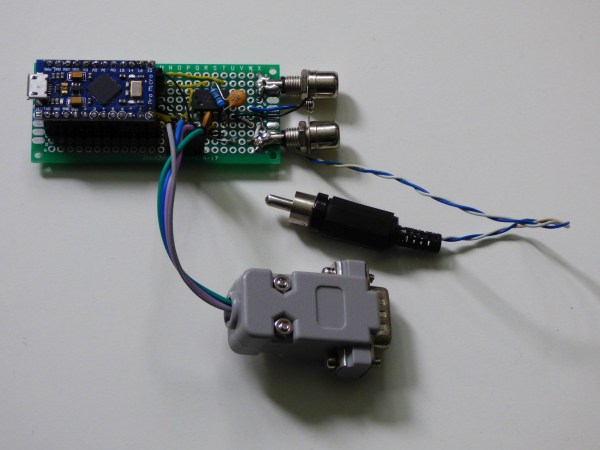
One of those enthusiasts is [James Stanley], who designed and built a USB interface for the Psion Organiser II. Although a “CommsLink” module providing an RS-232 port was available back in the day, it’s become hard to find, inspiring [James] to design a completely new module based on an Arduino Nano. Hooking it up to the Psion’s data bus was a simple matter of wiring up the eight data lines to the Nano’s GPIO ports. A set of series resistors served to prevent bus contention without having to add glue logic.

Getting the software working was a bit more difficult: the Organiser’s native OPL programming language doesn’t allow the user to directly access the expansion port’s memory address, so [James] had to write a routine in HD6303 machine code to perform the read, then call that routine from OPL to display the result on the screen. Currently, the routine only supports reading data from the Arduino, but extending it to a bidirectional interface should be possible too.

Finally, [James] designed and 3D printed a neat enclosure for the Arduino-USB interface, which makes it look almost as sleek as the original CommsLink module. Perhaps with a bit of further development, this could turn into another way to connect old Psions to the internet. We’ve also featured a new type of Datapak to enhance the Organiser’s memory. Continue reading “Arduino Nano Adds USB Interface To The Psion Organiser II”

IBM PalmTop Running Modern (Modified) Linux

The handheld computing market might seem dominated by smartphones today, but before their mass adoption there were other offerings for those who needed some computing power on-the-go. If a 90s laptop was too bulky, there was always the IBM PalmTop which packed punch for its size-to-weight ratio, and for the era it was created in. [Mingcong Bai] still has one of these antiques and decided to see if it was still usable by loading a customized Linux distribution on it.

The PalmTop sported modest hardware even for its time with an Intel 486SL running at 33 MHz with 20 MiB of RAM. This one also makes use of a 1 GB CompactFlash card for storage and while [Mingcong Bai] notes that it is possible to run Windows 95 on it, it’s not a particularly great user experience. A Linux distribution customized for antique hardware, AOSC/Retro, helps solve some of these usability issues. With this it’s possible to boot into a command line and even do some limited text-based web browsing as long as the Ethernet adapter is included.

While the computer is running at its maximum capacity just to boot and perform basic system functions, it’s admirable that an antique computer such as this still works, especially given its small size and limited hardware functionality. If you’re curious about more PalmTop-style computers, take a look at the first one ever produced: the HP-200LX.

Continue reading “IBM PalmTop Running Modern (Modified) Linux”

An MK-85 with a modern CPU replacement

Upgrading A Soviet Calculator With A Modern CPU

Today’s supply chain issues can make it hard to buy microcontrollers, or really any kind of semiconductor. But for those keeping retrocomputers alive, this problem has always existed: ancient components might have been out of production for decades, with a dwindling supply of second-hand parts or “new old stock” as the only option. If a rare CPU breaks, you might have no option but to replace the entire computer.

[Piotr Patek] ran into this issue when he obtained an Elektronika MK-85 programmable calculator with a broken CPU. Unable to find a replacement, he decided instead to build a pin-compatible CPU unit based on an STM32 microcontroller. Of course no modern CPU is pin-compatible with a Soviet design from the 1980s, so [Piotr] had to design a small interposer PCB to match the original pinout. This also gave him enough space to add an efficient DC/DC converter chip that generates the 2.5 V supply for the STM32.

As for the software, [Piotr] managed to port the original BASIC interpreter, which was written in PDP-11 assembly, to a modern equivalent written in C. While he was at it, he fixed a few bugs that had been sitting there for about 35 years. The updated CPU also allows the MK-85 to run circles around its contemporary siblings: [Piotr] timed it to be about thirty times faster than the original chip, while using a comparable amount of power.

If you also happen to have an MK-85 with a dodgy CPU, you’ll be pleased to find that the schematics and source code to [Piotr]’s modification are all available on his blog. This is probably the first calculator CPU update we’ve seen, although we’ve featured other ancient calculators updated with new firmware, and some completely new calculator designs based on classic hardware.

Thanks for the tip, [cmholm]!

Young Maker Mixes Traditional Japanese Construction With Modern Art

We’re Makers. By definition, we make things. Some of us prefer to build from scraps, while others like to make their own IC’s in their garage. [Make With Miles] on the other hand prefers one of the oldest types of making around: woodworking. And in this build, he goes a step further by using a very old Japanese method of woodworking called Kumiko to build a Stratocaster style electric guitar. The results are absolutely stunning as you can see in the video below.

Inspired by a challenge put forth by [The Modern Maker Podcast] to build a woodworking project that ties into another hobby that isn’t related to woodworking, [Miles] knocked it out of the park by including several art forms in this one-off Strat.

The centerpiece of this guitar build is the Kumiko style of construction used within the body. Kumiko is a Japanese method of assembling wood without the use of fasteners. Developed around 600-700AD, Kumiko is as much a construction method as an art form. [Miles] went further by filling the Kumiko framework with blackened epoxy resin which was then sanded and polished. Decals bring the headstock into the motif, but the attention to details goes much, much further. Be sure to watch the video so you can get an appreciation for the high level of workmanship that this young man displays.

That’s right- [Miles] isn’t a maker with decades of experience. In fact in 2017, one of his YouTube videos was “12 yr Old Builds a Row Boat!!!” [Miles], our hats are off to you and we look forward to seeing your art progress, for you truly have commanded the attention of the maker community that you are so rightfully part of.

Just as [Miles]’ guitar hides some great hacks, so does this guitar with Hot Swappable pickups. Thanks to [Keith] for sending this on to the Tip Line!

Continue reading “Young Maker Mixes Traditional Japanese Construction With Modern Art”

555 Teardown Isn’t Just A Good Time, It’s To Die For

It seems only appropriate that hot on the heels of the conclusion of Hackaday’s 555 Timer Contest that [Ken Shirriff] posts a silicon die teardown of an early version of a hacker’s favorite chip, the 555.

A Microscopic View Of the 555 Die

Starting with a mystery chip from January 1973, [Eric Schlaepfer] painstakingly sanded down the package to reveal the die, which he deemed to be a 555 timer. Why didn’t they know it was a 555 timer to start? Because the package was not marked with “555” but rather some other marks that you can see in the blog post.

In addition to a great explanation of how the 555 works in general, [Ken] has taken a microscopic look at the 555 die itself. The schematic of a 555 is easily available, and [Ken] identifies not just sections of the die but individual components. He goes further yet by explaining how the PNP and NPN resistors are constructed in silicon. There’s also a nice and juicy bit of insight into the resistors in the IC, but we won’t spoil it here.

Be sure to show your love for the winners of the 555 contest, or at the very least check out the project that took the stop spot: a giant sized 555 that you don’t need a microscope to see inside of.

DIY “Solid State Drive” Puts Four Bytes In Your Pocket

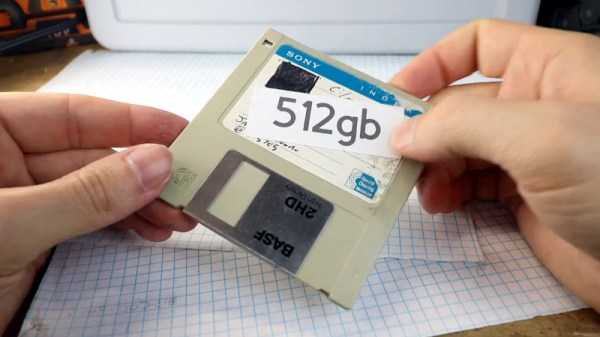
In a relatively short amount of time, the average capacity of USB flash drives has skyrocketed. It wasn’t so long ago that two and four gigabyte drives were considered to be on the high end, but today you can grab a 512 GB drive for less than $50 USD. In fact they’ve gotten so large that it can feel wasteful using them for some tasks, and we occasionally find ourselves wishing we could find some modern USB drives that didn’t rival the storage capacity of our whole computer.

That said, this USB-C tetrabyte drive created by [Glen Akins] might be slightly too small for our tastes. No, that’s not a typo. As in the Greek tetra, this drive can hold a massive four bytes at a time. Even better, you don’t need a computer to write to it: the 32 DIP switches let you key in the content on the fly, bit-by-bit.

Reading out the first byte from the DIP switches.

As explained in a Twitter thread, [Glen] was inspired to create this gadget after another user posted a picture of a 32 position DIP switch with a caption that said it was a “One Tetrabyte SSD” back in December. He apparently couldn’t track down the same switch, but the four red Grayhill 76 Series switches arguably make it a bit clearer when entering in your bytes.

Each of the individual DIP switches are connected to one of the GPIO pins of the 8-bit EFM8UB2 microcontroller, and the code simply reads the state of each pin in order and saves the binary results in a variable to put together the “file” it presents to the OS when plugged in.

We’ve seen our fair share of unusual USB flash drives in the past, but this one is truly in a league of its own. Can’t say we can think of any four bytes of data important enough to hold on a dedicated piece of hardware, but we certainly appreciate the effort to store it in the most robust way possible.

Thanks to [J. Peterson] for the tip.