[Mike] wanted to have remote control of the power on his computer. But Wake-on-LAN wasn’t really all that interesting to him. Instead he set out to build this Bluetooth controller which manipulates the motherboard directly (PDF).
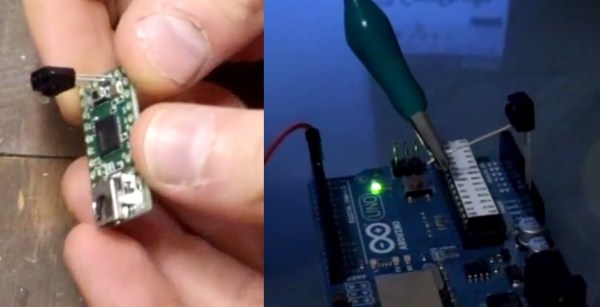
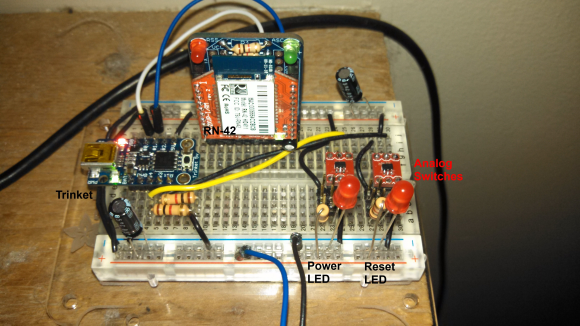
Having been a winner of the Trinket Contest he based the project on that board which is seen on the left. There is also an RN-42 Bluetooth module and a couple of TI TS5A3157 analog switches. Once the prototype is finished the entire thing will run off of standby power and be located inside the case of his computer. The breadboard version just switches a couple of LEDs, but that will end up connecting to the pins for the power buttons once installed.
The video after the break shows off the easter egg. The device is controlled by [Mike’s] custom Android app. Every 42nd time he sends a power command the device calls back with our URL.
This is an entry in the Fubarino Contest for a chance at one of the 20 Fubarino SD boards which Microchip has put up as prizes!
Continue reading “Fubarino Contest: Bluetooth Control For PC PSU”