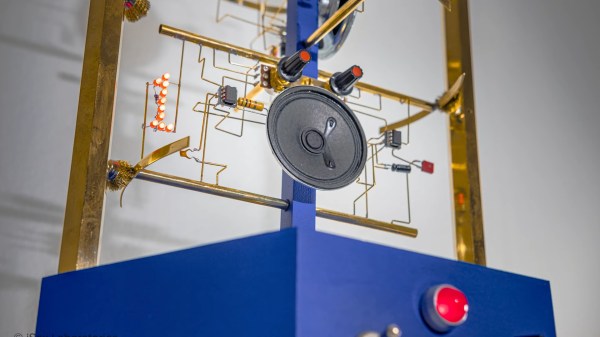
Hack Together Your Own Bat Signal

Bats use echolocation to see objects in front of them. They emit an ultrasonic pulse around 20 kHz (and up to 100 kHz) and then sense the pulses as they reflect off an object and back to the bat. It’s the same type of mechanism used by ultrasonic proximity sensors for object-avoidance. Humans (except perhaps the very young ones) can’t hear the ultrasonic pulses since the frequency is too high, but an inexpensive microphone in a simple bat detector could. As it turns out bat detectors are available off the shelf, but where’s the fun in that? So, like any good hacker, [WilkoL] decided to build his own.

[WilkoL’s] design is composed primarily of an electret microphone, microphone preamplifier, CD4040 binary counter, LM386 audio amplifier, and a speaker. Audio signals are analog and their amplitudes vary based on how close the sound is to the microphone. [WilkoL] wanted to pick up bat sounds as far away as possible, so he cranked up the gain of the microphone preamplifier by quite a bit, essentially railing the amplifiers. Since he mostly cares about the frequency of the sound and not the amplitude, he wasn’t concerned about saturating the transistor output.

The CD4040 then divides the signal by a factor of 16, generating an output signal within the audible frequency range of the human ear. A bat signal of 20 kHz divides down to 1.25 kHz and a bat signal of up to 100 kHz divides down to 6.25 kHz.

He was able to test his bat detector with an ultrasonic range finder and by the noise generated from jingling his keychain (apparently there are some pretty non-audible high-frequency components from jingling keys). He hasn’t yet been able to get a recording of his device picking up bats. It has detected bats on a number of occasions, but he was a bit too late to get it on video.

Anyway, we’re definitely looking forward to seeing the bat detector in action! Who knows, maybe he’ll find Batman.

Continue reading “Hack Together Your Own Bat Signal”

Your Own Electronic Drum Kit

[Jake_Of_All_Trades] wanted to take up a new drumming hobby, but he didn’t want to punish his neighbors in the process. He started considering an electric drum kit which would allow him to practice silently but still get some semblance of the real drumming experience.

Unfortunately, electric drum kits are pretty expensive compared to their acoustic counterparts, so buying an electric kit was a bit out of the question. So, like any good hacker, he decided to make his own.

He found a pretty cheap acoustic drum kit on Craigslist and decided to convert it to electric. He thought this would be a perfect opportunity to learn more about electric drum kits in general and would allow him to do as much tweaking as he wanted to in order to personalize his experience. He also figured this would be a great way to get the best of both worlds. He could get an electric kit to practice whenever he wanted without disturbing neighbors and he could easily convert back to acoustic when needed.

First, he had to do a bit of restorative work with the cheap acoustic kit he found on eBay since it was pretty worn. Then, he decided to convert the drum heads to electric using two-ply mesh drum heads made from heavy-duty fiberglass screen mesh. The fiberglass screen mesh was cheap and easy to replace in the event he needed to make repairs. He added drum and cymbal triggers with his own DIY mechanism using a piezoelectric element, similar to another hack we’ve seen. These little sensors are great for converting mechanical to electrical energy and can feed directly into a GPIO to detect when the drum or cymbal was struck. The electrical signal is then interpreted by an on-board signal processing module.

All he needed were some headphones or a small amplifier and he was good to go! Cool hack [Jake_Of_All_Trades]!

While you’re here, check out some of our best DIY musical projects over the years.

DIY Pocket MP3 Player

When [Neutrino-1] saw DFRobot’s DFPlayer module, he decided he wanted to make his own retro MP3 player. This tiny module comes packed with a ton of interesting capabilities such as EQ adjustment, volume control, and a 3 watt amplifier amongst other things. It can even play ads in between songs, should you want such a thing.

Controlling the DFPlayer module is easy using serial commands from a microcontroller, making it a convenient subsystem in bigger projects, and a potential alternative to the popular VLSI chips or the hard to come by WT2003S IC. [Neutrino-1] does a good job walking readers through the build making it fairly easy to remix, reuse, and reshare.

With the hardware sorted, all you’ve got to do is flash the firmware and load up an SD card with some MP3s. There’s even a small Python GUI to help you get your new player up and running. [Neutrino-1] also introduces users to the U8g2 display library which he says is a bit more feature-rich than the common Adafruit SSD1306 library. Great job [Neutrino-1]!

While you’re here, take a look at some of our other MP3 projects.

Continue reading “DIY Pocket MP3 Player”

Toddler-Friendly MP3 Player Navigates With Light

When designing this custom MP3 player for his grandson, [Luc Brun] ran into a unique problem. He wanted the boy to be able to operate the player on his own, but being only 2½ years old, the user interface would have to be exceedingly straightforward. Too many buttons would just be a distraction, and a display with text would be meaningless at his age.

In the end, [Luc] came up with a very interesting way of navigating through directories full of MP3 files using a few push buttons and a ring of WS2812 LEDs. The color of the LEDs indicate which directory or category is currently being selected: spoken nursery rhymes are red, music is orange, nature sounds are yellow, and so on. The number of LEDs lit indicate which file is selected, so in other words, three orange LEDs will indicate the third music track.

At his grandson’s age, we imagine at least a little bit of him navigating through this system is just luck. But as he gets older, he’ll start to form more solid connections between what he’s hearing and the color and number of the LEDs. So not only is this interface a way to help him operate the device himself, but it may serve as a valuable learning tool in these formative years.

On the other hand, if your goal is just to distract a youngster for as long as possible, an overwhelming number of LEDs, buttons, and switches might be exactly what you want.

ESP32 Becomes Music Player In Under 40 Lines Of Code

The demo code for [XTronical]’s ESP32-based SD card music player is not even 40 lines long, though it will also require a few economical parts before it all works. Nevertheless, making a microcontroller play MP3s (and other formats) from an SD card is considerably simpler today than it was years ago.

Part of what makes this all work is I2S (Inter-IC Sound), a format for communicating PCM audio data between devices. Besides the ESP32, at the heart of it all is an SD card reader breakout board and the MAX98357A, which can be thought of as a combination I2S decoder and Class D amplifier. The ESP32 reads audio files from the SD card and uses an I2S audio library to send the I2S data stream to the MAX98357A (or two of them for stereo.) From there it is decoded automatically and audio gets pumped though attached speakers.

A few economical components, and only a handful of connections between them.

It’s amazing how much easier audio is to work with when one can take advantage of shuffling audio data around digitally, and the decoder handles multiple formats with an amplifier built in. You can see [XTronical]’s ESP32 player in action in the video embedded below.

Continue reading “ESP32 Becomes Music Player In Under 40 Lines Of Code”

A 50W Speaker Made Of Light Bulbs

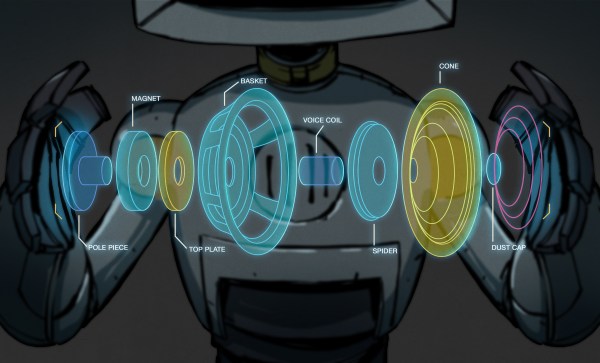
When we think of a speaker, we are likely to imagine a paper cone with a coil of wire somewhere at the bottom of it suspended in a magnetic field. It’s a hundred-plus-year-old technology that has been nearly perfected. The moving coil is not however the only means of turning an electrical current into a sound. A number of components will make a sound when exposed to audio, including to the surprise of [Eric], the humble incandescent light bulb. He discovered when making an addressable driver for them that he could hear the PWM frequency when they lit up, so he set about harnessing the effect for use as a speaker.

Using an ESP32 board and with a few false starts due to cheap components, he started with MIDI files and ended up with PWM frequencies. It’s an interesting journey into creating multiple PWM channels from an ESP32, and he details some of his problems along the way. The result is the set of singing light bulbs that can be seen in the video below the break, which he freely admits is probably the most awful 50 W speaker that he could have made. That however is not the point of such an experiment, and we applaud him for doing it.

For more MIDI-based tomfoolery, take a look at the PCB Tesla coil.

Continue reading “A 50W Speaker Made Of Light Bulbs”

Turning A MicroKORG Into A MicroKORG S With This Speaker Mod

When [Michael Wessel] bought his MicroKORG synthesizer/vocoder, he felt less than amused when two years later the MicroKORG S was released, with the ‘S’ standing for ‘sound’, apparently, for the 2+1 speaker system that was added to it. Undeterred, [Michael] figured out that both synthesizers are similar enough that one could likely add a similar speaker system to the original MicroKORG.

The similarities between the two products become apparent when one compares the original with its successor, with the latter seemingly mostly adding said speakers and more presets, along with a snazzy new exterior. (Although the 1970s styling of the original may have more fans.)  As the embedded video shows, this mod is fairly clean.

At the core of this mod is a PAM8403-based class D amplifier board. The PAM8403 is a 3 W audio amplifier, originally produced by Power Analog Microelectronics (now Diodes). While not an amazing amplifier, it lends itself well for battery-powered applications like the MicroKORG. Rounding out the build is a 7805 linear regulator to get 5 V for the PAM8403, a few filter capacitors, a switch to turn the speakers on/off, and of course the speakers.

Although there’s quite a bit of space in the enclosure, most speakers tend to be large enough that this can be a bit of a squeeze. [Michael] found some low-profile 20 W full-range speakers that seem to work well for this purpose. To finish wiring this up, all it takes is a hole saw and a way to get the audio output from the MicroKORG.

In this mod, [Michael] opted to get the audio from the output jack on the back, but for a cleaner result it probably could be wired straight into the on-board header.

Continue reading “Turning A MicroKORG Into A MicroKORG S With This Speaker Mod”