How To Use Lidar With The Raspberry Pi

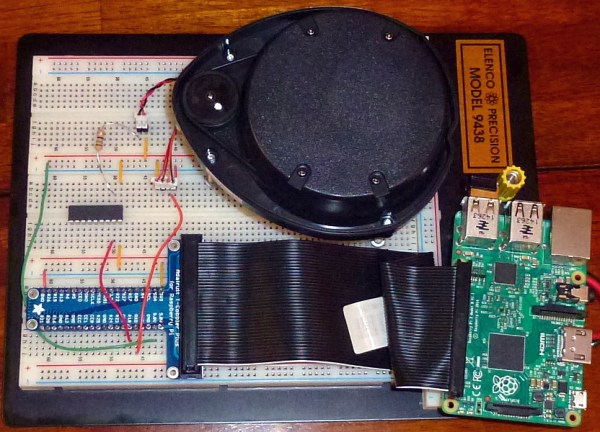
The ability to inexpensively but accurately measure distance between an autonomous vehicle or robot and nearby objects is a challenging problem for hackers. Knowing the distance is key to obstacle avoidance. Running into something with a small robot may be a trivial problem but could be deadly with a big one like an autonomous vehicle.

My interest in distance measurement for obstacle avoidance stems from my entry in the 2013 NASA Sample Return Robot (SRR) Competition. I used a web camera for vision processing and attempted various visual techniques for making measurements, without a lot of success. At the competition, two entrants used scanning lidars which piqued my interest in them.

Continue reading “How To Use Lidar With The Raspberry Pi”

Fail Of The Week : Watt A Loss

This one is a bit dated, but the lessons are still relevant. [Zach Hoeken] posted about the challenges he faced building a CNC stepper driver. He was experimenting with Toshiba motor drivers back in 2012.

The modular motor driver boards he built were based on the THB6064AH – capable of 1/64th step, and 4.5 Amps at up to 50V. [Zach] built a test jig to run the boards through their paces. A couple of messed tracks was the least of his problems – easily fixed by cutting traces and using jumper wires to correct the errors. But the header footprints for the motor drive boards got reversed. The only way out was to solder the headers on the back side.

LESSON : Always check footprint orientation and pin numbering before sending boards to fab.

The surprising part was when someone as experienced as [Zach] messed up on Ohms Law. Based on the current he wanted the motors to run at, his sense resistors needed to be 3.2W, but he’d used SMD footprints (0805 likely) instead. Those tiny resistors couldn’t be used at all, and the 5W resistors plonked on looked like an ugly hack.

Continue reading “Fail Of The Week : Watt A Loss”

Hackaday Europe: Call For Proposals

Hackaday is coming to Europe in April. The world’s most superb conference on hardware creation starts with you. Please submit your proposal to present a talk or workshop at 2016 Hackaday | Belgrade, Hackaday’s first-ever European conference.

Put it on your calendar: Saturday, April 9th in Belgrade, Serbia. We have a lineup spanning from 10am to 2am, and we’re building on the best of the inaugural SuperConference we held last November: a single track of hardware talks which will run concurrently with a set of hands-on workshops. The surprise hit from that conference was badge hacking, which will be expanded and extended into the wee hours of the morning. While that is in progress, a party with two stages will spin up with performances by Infinite Jest, Grupa TI, and DJ sets.

Tickets go on sale the first week of February. Voja Antonic, who does amazing work with PCBs and badge designs, is building the conference badge. The cost of the admission will be just enough to cover the cost of the badge. We’re keeping the admission cost so low to help offset your travel costs. Belgrade is gorgeous in April, and getting there from other parts of Europe is very affordable. This event will sell out so get organized and make sure you and your fellow hardware hackers get tickets early.

Many of the Hackaday crew will be on hand. We’re likely to have a less-formal meetup (hangover brunch?) on Sunday. Check out the Hackaday | Belgrade planning page to discuss this and learn more about the conference as it comes together. See you in Belgrade!

Kids And Hacking: Electromagnetic Eggs

One of my favorite things to do is visit with school kids who are interested in engineering or science. However, realistically, there is a limit to what you can do in a single class that might last 30 to 90 minutes. I recently had the chance to work with a former colleague, a schoolteacher, and The Teaching Channel to create an engineering unit for classroom use that lasts two weeks.

This new unit focuses on an egg drop. That’s not an original idea, but we did add an interesting twist: the project develops a “space capsule” to protect the egg, but also an electromagnetic drop system to test the capsules. The drop system allows for a consistent test with the egg capsule releasing cleanly from a fixed height. So in addition to the classic egg drop capsule, the kids have to build an electromagnet, a safe switching circuit, and a test structure. Better still, teams of kids can do different parts and integrate them into a final product, closely mimicking how real engineering projects work.

There are a few reasons for the complexity. First, given ten class sessions, you can do a lot more than you can in a single day. Second, I always think it is good if you can find exercises that will appeal to lots of different interests. In the past, I’ve used robots and 3D printers for that reason. Some students will be interested in the electronics, others in the mechanics, and still others will be interested in the programming. Some kids will engage in 3D modeling (robot simulation or 3D objects). The point is there is something for everyone.

Continue reading “Kids And Hacking: Electromagnetic Eggs”

Hackaday At SCaLE 14x

Next weekend we’ll be at the fourteenth annual Southern California Linux Expo, a fantastic four-day event that covers everything from Apache to PHP, installing Ubuntu on old laptops, people who have their control key just to the right of their left hand pinky as god intended, and something about how much Linux sucks.

The event will feature 150 exhibitors, 130 sessions, tutorials, amateur radio tests, and features keynotes from Mark Shuttleworth, Cory Doctorow, and Sarah Sharp. It is the largest community-run open source and free software conference in North America.

The Hackaday crew will be there makin’ it rain stickers, but that’s not all: Supplyframe, the Hackaday overlords, is sponsoring Game Night at SCaLE. Saturday night will be filled with vintage video games, Nerf artillery, Settlers of Catan, Fireball Island (if someone can find it), and a hacker show and tell. This year is the inaugural SCaLE museum. The theme is Rise of the Machines: A Living Timeline, and will display historic engineering, computing devices, and clever gadgets.

If you’re in the area on Thursday, We’ll also be having a meet and greet at the soon-to-be-finished Supplyframe Design Lab in Pasadena. We only recently got the paperwork to have people in the space, so if you’d like to have a few drinks, have a few snacks, and look at a Tormach, come on over.

Developed On Hackaday : HaDge Update – It’s A HACK

Work on HaDge – the Hackaday con badge, continues in bits and spurts, and we’ve had some good progress in recent weeks. HaDge will be one conference badge to use at all conferences, capable of communicating between badges.

Picking up from where we left off last time, we had agreed to base it around the Atmel D21, a 32-bit ARM Cortex M0+ processor. To get some prototype boards built to help with software development, we decided to finish designing the HACK before tackling HaDge. HACK is a project that [Michele Perla] started that we have sort of assimilated to act as the prototyping platform for HaDge. We wanted a compact micro-controller board and hence opted for the SAM D21E – a 32 pin package with 26 IO’s.

[Michele Perla] had earlier designed HACK based on the larger 32 pin SAM D21G and used Eagle to hack-brd
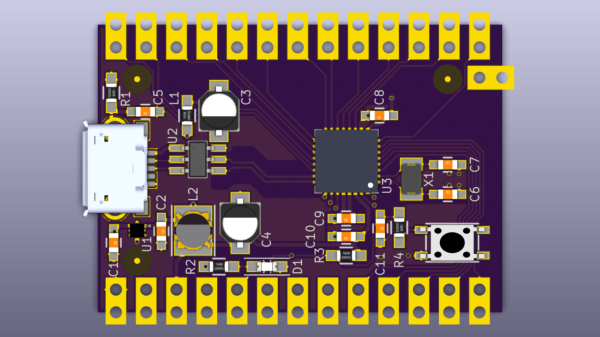
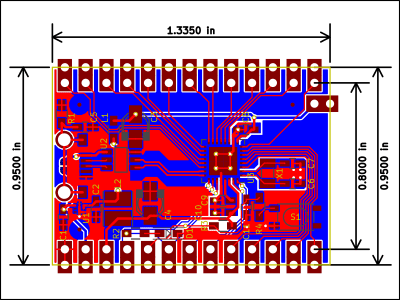
draw the schematic and layout. Using the Eagle to KiCad script, he quickly converted the project and got on to making the board layout. I took up the rear guard, and worked on making his schematic (pdf) “pretty” and building up a schematic library of symbols. While [Michele] finished off the board layout, I worked on collecting STEP models for the various footprints we would be using, most of which I could get via 3dcontentcentral.com. The few I couldn’t were built from scratch using FreeCAD. The STEP models were converted to VRML using FreeCAD. Using [Maurice]’s KiCad Stepup script, we were able to obtain a complete STEP model of the HACK board.

HACK is now ready to go for board fabrication and assembly. We plan to get about 20 boards made and hand them out to developers for working on the software. The GitHub repository has all the current files for those who’d like to take a look – it includes the KiCad source files, PDFs, gerbers, data sheets and images. The board will be breadboard compatible and also have castellated pads to allow it to be soldered directly as a module. Let us know via group messaging on the HACK project page if you’d like to get involved with either the software or hardware development of HaDge.

In a forthcoming post, we’ll put out ideas on how we plan to take forward HaDge now that HACK is complete. Stay tuned.

Running Calculus On An Arduino

It was Stardate 2267. A mysterious life form known as Redjac possessed the computer system of the USS Enterprise. Being well versed in both computer operations and mathematics, [Spock] instructed the computer to compute pi to the last digit. “…the value of pi is a transcendental figure without resolution” he would say. The task of computing pi presents to the computer an infinite process. The computer would have to work on the task forever, eventually forcing the Redjac out.

Calculus relies on infinite processes. And the Arduino is a (single thread) computer. So the idea of zeno_03running a calculus function on an Arduino presents a seemingly impossible scenario. In this article, we’re going to explore the idea of using derivative like techniques with a microcontroller. Let us be reminded that the derivative provides an instantaneous rate of change. Getting an instantaneous rate of change when the function is known is easy. However, when you’re working with a microcontroller and varying analog data without a known function, it’s not so easy. Our goal will be to get an average rate of change of the data. And since a microcontroller is many orders of magnitude faster than the rate of change of the incoming data, we can calculate the average rate of change over very small time intervals. Our work will be based on the fact that the average rate of change and instantaneous rate of change are the same over short time intervals.

Continue reading “Running Calculus On An Arduino”