Reverse Engineering Yokis Home Automation Devices

These days, it’s hard to keep track of all the companies that are trying to break into the home automation market. Whether they’re rebrands of somebody else’s product or completely new creations, it seems like every company has at least a few “smart” gadgets for you to choose from. We hadn’t heard of the Yokis devices that [Nicolas Maupu] has been working on before today, but thanks to his efforts to reverse engineer their protocol, we think they might become more popular with the hacking crowd.

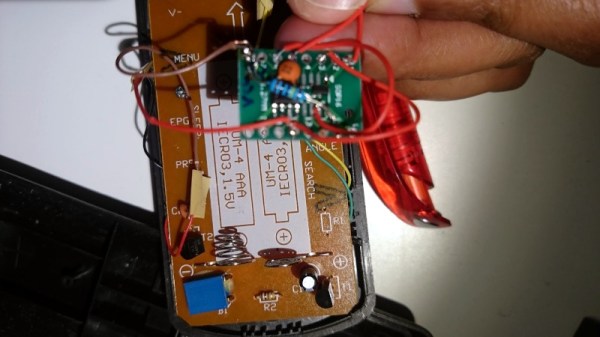
Even if you don’t have a Yokis MTV500ER dimmer or MTR2000ER switch of your own, we think the detailed account of how [Nicolas] figured out how to talk to these devices is worth a read. His first step was to connect his oscilloscope directly to the SPI lines on the remote to see what it was sending out. With an idea of what he was looking for, he then used an nRF24L01+ radio connected to an ESP8266 to pull packets out of the air so he could analyze their structure. This might seem like a very specialized process, but in reality most of the techniques demonstrated could be applicable for any unknown communications protocol of which you’ve got a hex dump.

On the other hand, if you do have some of these devices (or plan to get them), then the software [Nicolas] has put together looks very compelling. Essentially it’s an interactive firmware for the ESP8266 that allows it to serve as a bridge between the proprietary Yokis wireless protocol and a standard MQTT home automation system. When the microcontroller is connected to the computer you get a basic terminal interface that allows you to scan and pair for devices as well as toggle them on and off.

This bridge could be used to allow controlling your Yokis hardware with a custom handheld remote, or you could follow the example of our very own [Mike Szczys], and pull everything together with a bit of Node-RED.

A Simple Auger Pet Feeder

Pet feeders are a popular maker project. One can speculate that this shows the great self-confidence common to the maker set, who are willing to trust their own work to keep their animal companions alive for many days at a a time. [Darren Tarbard] is one such maker, who put together this simple auger build.

The project consists of a hopper for dry pet food, into which a screw auger is inserted. Both parts are 3D printed, making them easy to produce at home for the average maker. The build was designed specifically around the parts [Darren] had to hand, namely a 28BYJ-48 stepper motor, which is charged with turning the auger. Running the show is an Arduino, which can be run with whatever suitable timing code is necessary to feed the particular pet in question. There’s also a remixed version that adds a larger food storage dish on top for longer periods of unattended operation, created by [szuchid].

It’s a basic build, but one that would be readily achievable by most makers with little more than some junkbox components and a roll of filament. Of course, if your pet prefers wet food, you might need a different design. Video after the break.

Continue reading “A Simple Auger Pet Feeder”

Datacenter UPS Heads Home For Off-Grid Power Solution

The news sites seem never to be without stories of Elon Musk and his latest ventures, be they rapid transit tube tubes in partial vacuum, space flight, or even personal not-a-flamethrowers. Famous for electric vehicles, Musks’s Tesla also has a line of solar products and offers the Powerwall home battery power system. These are tantalizing to anyone with solar panels, but the price tag for one isn’t exactly a dream.

[Nathann]’s budget couldn’t stretch to a Powerwall, but he did have access to a hefty ex-datacentre uninterruptible power supply (UPS) and a large quantity of lead-acid cells. From this he built his own off-the-grid power in the cellar of the home. It’s not as elegant as a Powerwall, but it can power the house on moderate usage, so he claims, for up to ten days.

On one level the installation is more of a wiring job than one of high technology, but the logistics of dealing with nearly 100 lead-acid cells are quite taxing. The UPS takes four battery packs, each clocking in at 288 V. The cells are joined with copper straps, and the voltage and current involved is not for the faint-hearted. An accidental short vaporized a screw and a battery terminal; if this were our house we’d put fuses in the middle of the battery packs.

The batteries are stored on wooden pallets atop brick pillars in case the cellar floods. The basement installation now is ready for the addition of solar and wind-based off-grid sources. Maybe your battery power solution will be less hair-raising, but it’s unlikely to be cheaper. Meanwhile this isn’t the first such project we’ve seen, though others usually go for 18650 Li-Ion cells, the use of lead acid remains a viable and economical solution.

The Smart Home Gains An Extra Dimension

With an ever-growing range of smart-home products available, all with their own hubs, protocols, and APIs, we see a lot of DIY projects (and commercial offerings too) which aim to provide a “single universal interface” to different devices and services. Usually, these projects allow you to control your home using a list of devices, or sometimes a 2D floor plan. [Wassim]’s project aims to take the first steps in providing a 3D interface, by creating an interactive smart-home controller in the browser.

Note: this isn’t just a rendered image of a 3D scene which is static; this is an interactive 3D model which can be orbited and inspected, showing information on lights, heaters, and windows. The project is well documented, and the code can be found on GitHub. The tech works by taking 3D models and animations made in Blender, exporting them using the .glTF format, then visualising them in the browser using three.js. This can then talk to Hue bulbs, power meters, or whatever other devices are required. The technical notes on this project may well be useful for others wanting to use the Blender to three.js/browser workflow, and include a number of interesting demos of isolated small key concepts for the project.

We notice that all the meshes created in Blender are very low-poly; is it possible to easily add subdivision surface modifiers or is it the vertex count deliberately kept low for performance reasons?

This isn’t our first unique home automation interface, we’ve previously written about shAIdes, a pair of AI-enabled glasses that allow you to control your devices just by looking at them. And if you want to roll your own home automation setup, we have plenty of resources. The Hack My House series contains valuable information on using Raspberry Pis in this context, we’ve got information on picking the right sensors, and even enlisting old routers for the cause.

Apple HomeKit Accessory Development Kit Gets More Accessible

Every tech monopoly has their own proprietary smart home standard; how better to lock in your customers than to literally build a particular solution into their homes? Among the these players Apple is traditionally regarded as the most secretive, a title it has earned with decades of closed standards and proprietary solutions. This reputation is becoming progressively less deserved when it comes to HomeKit, their smart home gadget connectivity solution. In 2017 they took a big step forward and removed the need for a separate authentication chip in order to interact with HomeKit. Last week they took another and released a big chunk of their HomeKit Accessory Development Kit (ADK) as well. If you’re surprised not to have heard sooner, that might be because it was combined the the even bigger news about Apple, Amazon, the Zigbee Alliance, and more working together on more open, interoperable home IoT standards. Check back in 2030 to see how that is shaping up.

“The HomeKit ADK implements key components of the HomeKit Accessory Protocol (HAP), which embodies the core principles Apple brings to smart home technology: security, privacy, and reliability.”
– A descriptive gem from the README

Apple’s previous loosening-of-restrictions allowed people to begin building devices which could interact natively with their iOS devices without requiring a specific Apple-sold “auth chip” to authenticate them. This meant existing commercial devices could become HomeKit enabled with an OTA, and hobbyists could interact in sanctioned, non-hacky ways. Part of this was a release of the (non-commercial) HomeKit specification itself, which is available here (with Apple developer sign in, and license agreement).

Despite many breathless mentions in the press release it’s hard to tell what the ADK actually is. The README and documentation directory are devoid of answers, but spelunking through the rest of the GitHub repo gives us an idea. It consists of two primary parts, the HomeKit Accessory Protocol itself and the Platform Abstraction Layer. Together the HAP implements HomeKit itself, and the PAL is the wrapper that lets you plug it into a new system. It’s quite a meaty piece of software; the HAP’s main header is a grueling 4500 lines long, and it doesn’t take much searching to find some fear-inspiring 50 line preprocessor macros. This is a great start, but frankly we think it will take significantly more documentation to make the ADK accessible to all.

If it wasn’t obvious, most of the tools above are carefully licensed by Apple and intended for non-commercial use. While we absolutely appreciate the chance to get our hands on interfaces like this, we’re sure many will quibble over if this really counts as “open source” or not (it’s licensed as Apache 2.0). We’ll leave that for you in the comments.

Handheld MQTT Remote For Home Automation

If you’re working on a home automation project, you’re probably knee-deep into MQTT by now. If not, you should be. The lightweight messaging protocol is an ideal choice for getting your “Things” on the Internet, and controlling them all can be done easily through a simple web interface or an application on your mobile device. Or if you’re [serverframework], you make yourself a handsome little all-in-one MQTT remote.

The hardware here is pretty simple; inside there’s just a NodeMCU ESP8266 development board, some buttons, an RGB LED to give feedback, and a 3.7v 1200mAh LiPo battery with associated charging module. Everything is held inside a nice little wooden box that looks like it would fit right in with the living room decor. We’d like to see some kind of a cover over the exposed perfboard the circuit is assembled on, but that’s arguably a personal preference kind of thing.

Most of the magic in this project is actually happening on the software side. Not only does the provided source code handle all the MQTT communications with Home Assistant, but it provides a clever user interface that allows [serverframework] to perform 25 functions with just five buttons. No, you aren’t seeing things. There are actually six buttons on the device, but one of them is a dedicated “power” button that wakes the remote out of deep sleep.

If you’d like to learn more about getting this protocol working for you, our resident MQTT guru [Elliot Williams] has plenty of thoughts on the subject. From his talk at the 2017 Hackaday Supercon to his home automation tutorial series, there’s plenty of information to get you started.

Continue reading “Handheld MQTT Remote For Home Automation”

Amazon Ring: Neighbors Leaking Data On Neighbors

For a while now a series of stories have been circulating about Amazon’s Ring doorbell, an Internet-connected camera and entry system that lets users monitor and even interact with visitors and delivery people at their doors. The adverts feature improbable encounters with would-be crooks foiled by the IoT-equipped homeowner, but the stories reveal a much darker side. From reports of unhindered access by law enforcement to privately-held devices through mass releases of compromised Ring account details to attackers gaining access to children via compromised cameras, it’s fair to say that there’s much to be concerned about.

One cause for concern has been the location data exposed by the associated Amazon Neighbors crowd-sourced local crime paranoia app, and for those of us who don’t live and breathe information security there is an easy-to-understand Twitter breakdown of its vulnerabilities from [Elliot Alderson] that starts with the app itself and proceeds from there into compromising Ring accounts by finding their passwords. We find that supposedly anonymized information in the app sits atop an API response with full details, that there’s no defense against brute-forcing a Ring password, and that a tasty list of API and staging URLs is there for all to see embedded within the app. Given all that information, there’s little wonder that the system has proven to be so vulnerable.

As traditional appliance makers have struggled with bringing Internet connectivity into their products there have been a few stories of woeful security baked into millions of homes. A defense could be made that a company with roots outside the Internet can be forgiven for such a gaffe, but in the case of Amazon whose history has followed that of mass Web adoption and whose infrastructure lies behind so much of the services we trust, this level of lax security is unforgivable. Hackaday readers will be aware of the security issues behind so-called “smart” devices, but to the vast majority of customers they are simply technological wonders that are finally delivering a Jetsons-style future. If some good comes of these Ring stories it might be that those consumers finally begin to wake up to IoT security, and use their new-found knowledge to demand better.

Header image: Ring [CC BY-SA 4.0]