Humans like things that look like other things. A great example are faux LED tea light candles, with a plastic “flame” and flickering orange LED to recreate the effect of their waxy brethren. [gzumwalt] wanted to take the concept a little further, however, and got down to work.
The design harvests the orange LED and flame lens from an existing LED candle, but the rest is all original. [gzumwalt] printed a full-size candle, and fitted it with inductive charging hardware and a lithium-polymer battery. A corresponding charging base is used to supply power to the candle when it’s not in use. This is all handled automatically, with neodymium magnets used to activate reed switches to turn the charger on and the LED off.
It’s a tidy build that can be easily replicated with a 3D printer and some off-the-shelf parts. It’s also less wasteful than using disposable batteries, and safer than using real candles – so if you find yourself routinely shooting candle scenes in your budget film studio, it might be worth printing up a set of these.
LED candles range from the basic to the extreme – we’ve seen builds so realistic, you can light them with a match.
![An American-made Windsor chair from the turn of the 19th century. Los Angeles County Museum of Art [Public domain]](https://hackaday.com/wp-content/uploads/2019/05/Windsor_Arm_Chair_LACMA_54.80.jpg)
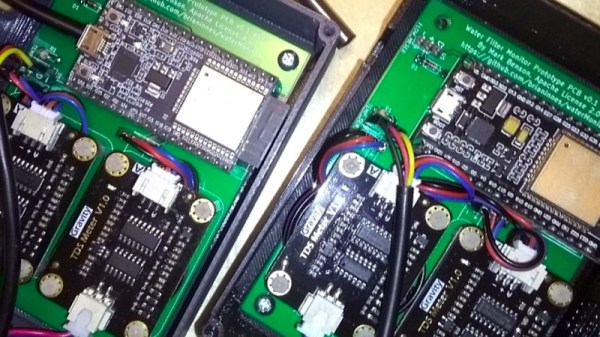
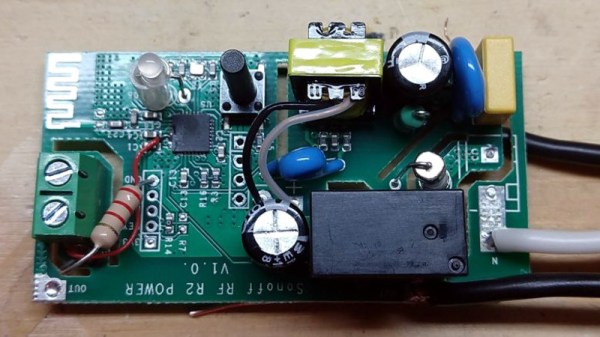
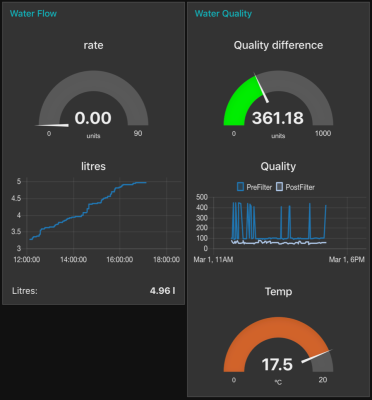 The water passing through the filter is monitored by a couple of DFRobot TDS modules, a flow meter, and a DS18B20 temperature sensor. The data from these is fed into an ESP32 dev board, which makes it available by a web interface for handy accessibility through a smartphone. It can then be used to work out how much of the filter’s capacity has been used, and indicate when a replacement is needed. All the code is available in