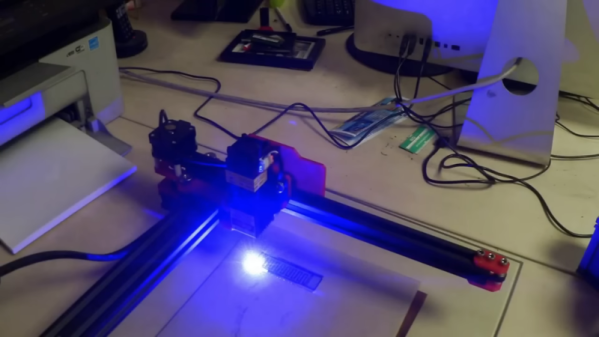
Owen with his laser cutter

A Home Made Laser Cutter For $700

While some decent lasers are out there for under $400 USD, they tend to be a little small. What if you wanted something a little nicer but didn’t want to jump to the $2,000 category? The answer for [Owen Schafer] was to build it with parts he had lying around and a few strategic purchases.

While he was initially planning on using a diode laser, doing anything more than engraving is tricky. He purchased a cheap 40 W CO2 laser tube, but it meant that he needed water cooling, mirrors, and more complex stuff that a diode doesn’t need. The frame is aluminum extrusion held together with 3D printed plates. Given there was a powerful laser bouncing around with mirrors, a plywood box formed the enclosure.

The stepper controller is an Arduino Mega running the Marlaser firmware, though [Owen] admits perhaps a laser cutter-specific driver board would have been better as he spent many hours trying to get the Arduino to do what he wanted. Air ventilation is a tube with a fan that vents out a nearby window. Water cooling is just a bucket of water with a pump in it. A simple nylon hose connected to a compressor with a maximum airflow valve provides an air assist while cutting. Finally, we’re happy to report that [Owen] bought safety glasses specific to his laser to protect his eyes and researched how to ground the high voltages generated.

We particularly loved seeing all of [Owen’s] test cuts. He proudly displayed his boxes, sharks, and lamp shades like anyone with their new laser cutter is wont to do. If you’re looking to upgrade your laser, there’s an add-on for detecting materials optically or a relatively cheap laser bed you can throw in your laser.

Continue reading “A Home Made Laser Cutter For $700”

Extruded Resin FDM Printing (With Lasers!)

At this point, 3D printers are nearly everywhere. Schools, hackerspaces, home workshops, you name it. Most of these machines are of the extruded-filament variety, better known as FDM or Fused Deposition Modelling. Over the last few years, cheap LCD printers have brought resin printing to many shops as well. LCD printers, like their DLP and SLA counterparts, use ultraviolet light to cure liquid resin. These machines are often praised for the super-high detail they can achieve, but are realllly slow. And messy —  liquid resin gets everywhere and sticks to everything.

We’re not exactly sure what [Jón Schone] of Proper Printing was thinking when he set out to convert a classic printer to use resin instead of filament, but it had to be something along the lines of “Can you make FDM printing just as messy as LCD printing?”

It turns out you can. His extremely well-documented research is shown in the video below, and logs his design process, from initial idea to almost-kinda-working prototype. As you may expect, extruding a high-viscosity liquid at a controlled rate and laser-curing it is not an easy task, but [Jón] made a fantastic attempt. From designing and building his own peristaltic pump, to sending a UV laser through fiber-optic cables, he explored a ton of different approaches to making the printer work. While he may not have been 100% successful, the video is a great reminder that not all projects have to go the way we hope they will.

Even so, he’s optimistic, and said that he has a few ideas to refine the design, and welcomes any input from the community. This isn’t even the only new and interesting approach to resin printing we’ve seen in the last few weeks, so we share [Jón]’s optimism that the FDM Resin Printer will work (someday, at least).

Continue reading “Extruded Resin FDM Printing (With Lasers!)”

Inside An EBay Marking Laser

When it comes to trolling eBay for cool stuff, some people have all the luck. Whereas all we ever seem to come across is counterfeit chips and obviously broken gear listed as, “good condition, powers on”, [Les Wright] actually managed to get more than he bargained for with one of his recent eBay purchases.

In his video teardown and tour of an industrial marking laser, [Les] suggests that he was really just in it for the optics — which is not a surprise, given his interest in optics in general and lasers in particular. The 20-W CO2 laser once etched barcodes and the like into products on assembly lines, but with a 2009 date code of its own, it was a safe bet that it was pitched due to a burned-out laser tube. But there were still high-quality IR optics and a precision X-Y galvanometer assembly to be harvested, so [Les] pressed on.

The laser itself ended up being built around a Synrad RF-stimulated CO2 tube. By a happy accident, [Les] found that the laser actually still works, at least most of the time. There appears to be an intermittent problem with the RF driver, but the laser works long enough to release the magic smoke from anything combustible that gets in its way. The galvos work too — [Les] was able to drive them with a Teensy and a couple of open-source libraries.

Galvos, lenses worth more than $800, and a working laser tube — not a bad haul. We’ll be following along to see what [Les] makes of this booty. Continue reading “Inside An EBay Marking Laser”

Bug Eliminator Zaps With A Laser

Mosquitoes tend to be seen as an almost universal negative, at least in the lives of humans. While they serve as a food source for plenty of other animals and may even pollinate some plants, they also carry diseases like malaria and Zika, not to mention the itchy bites. Various mosquito deterrents have been invented over the years to solve some of these problems, but one of the more interesting ones is this project by [Ildaron] which attempts to build a mosquito-tracking laser.

The device uses a neural learning algorithm to identify mosquitoes flying nearby. Once a mosquito is detected, a laser is aimed at it and activated in order to “thermally neutralize” the pest. The control system as well as the neural network and machine learning are hosted on a Raspberry Pi and Jetson Nano which give it plenty of computing power. The only major downside with this specific project is that the high-powered laser can be harmful to humans as well.

Ideally, a market for devices like these would bring the price down, perhaps even through the use of something like an ASIC specifically developed for these mosquito-targeting machines. In the meantime, [Ildaron] has made this project available for replication on his GitHub page. We have also seen similar builds before which are effective against non-flying insects, so it seems like only a matter of time before there is more widespread adoption — either that or Judgement day!

Continue reading “Bug Eliminator Zaps With A Laser”

A frosted glass disk with geometrical markers

Using A Laser Cutter To Replicate An Optical Comparator Screen

Precision instruments often contain specialized components that are essential to their function, but nearly impossible to replace if they fail. [Andre] had just such a problem with an optical comparator, which is an instrument typically used in machine shops to help check the tolerances of a finished part. It does this by projecting a magnified picture of an object onto a glass screen with markings showing angles and distances.

In the old comparator [Andre] bought on eBay, the markings on the glass had faded to such a degree that the instrument was almost unusable. So he contacted [James] over at Clough42, who was able to create a near-perfect replacement screen by using a laser cutter, as shown in the video embedded below.

The first step was to replicate the screen’s markings in a CAD program. [James] explains the process in Fusion 360, demonstrating how you can generate all the different scales nearly automatically through the proper use of constraints, variables and patterns. He then transferred the drawing to Lightburn, which drives the laser cutter and etches the markings into a sheet of glass covered with CerMark, a marking solution that turns a deep black when heated by a laser.

After etching, the final step was to apply frosting to the glass to turn it into a projection screen. While there are several ways to achieve this, [James] went for a simple spray-based method that gave surprisingly good results. It took a few experiments to find out that etching the markings on the back of the glass and applying the frosting on that side as well gave the best combination of sharpness and durability.

[James]’s project shows that even delicate instruments with custom glass components can be repaired, if you just have the right tools. A similar strategy might also work for creating custom scales for analog meters, or even old radio dials. If you’re not familiar with laser cutters, have a look at our experiments with an Ortur model. Thanks for the tip, [poiuyt]!

Continue reading “Using A Laser Cutter To Replicate An Optical Comparator Screen”

Laser-Engraving Hairlines: When A Line Isn’t A Line

When is a line not a line? When it’s a series of tiny dots, of course!

The line is actually tiny, laser-etched craters, 0.25 mm center-to-center.

That’s the technique [Ed Nisley] used to create a super-fine, colored hairline in a piece of clear plastic — all part of his project to re-create a classic Tektronix analog calculator from the 1960s, but more on that in a moment.

[Ed] tried a variety of methods and techniques, including laser engraving a solid line, and milling a line with an extremely tiny v-tool. Results were serviceable, but what really did the trick was a series of tiny laser-etched craters filled in with a red marker. That resulted in what appears — to the naked eye — as an extremely fine hairline. But when magnified, as shown here, one can see it is really a series of small craters. The color comes from coloring in the line with a red marker, then wiping the excess off with some alcohol. The remaining pigment sitting in the craters gives just the right amount of color.

This is all part of [Ed]’s efforts to re-create the Tektronix Circuit Computer, a circular slide rule capable of calculating all kinds of useful electrical engineering-related things. And if you find yourself looking to design and build your own circular slide rule from scratch? We have you covered.

Adjustable Workholding For Honeycomb Tables, With A Bit Of DIY

Honeycomb tables are often found on laser cutters, where they provide a way for work material to be laid flat while not interfering with things like airflow. This leads to a cleaner laser cut and a nicer finish, but if one’s work depends on precise positioning and placement, they leave something to be desired because there’s no good way to attach rails, jigs, or anything of the sort in an easy and stable fashion.

The solution [Ed] found for this was to make himself some adjustable offset stops designed to fit into his laser cutter’s honeycomb table. Each consists of a laser-cut disc of wood, which is screwed off-center into an acetal “plug” sized to fit into the vertical gaps in the honeycomb table. This allows each disc to be rotated to fine-tune positioning. With the help of some T-shaped pegs that are also sized to fit into the honeycomb table, [Ed] has all he needs to fix something like a workpiece or jig into a particular and repeatable position.

The whole thing depends on a friction fit, so the sizing of the plug needs to match a particular honeycomb table’s construction. We think this makes it a good match for 3D printing, as one can measure and print plugs (perhaps employing the Goldilocks approach) that fit with just the right amount of snug.

Honeycomb tables are fantastic for laser cutting, but if you find yourself in a pinch for a replacement, an old radiator can make a pretty decent stand-in.