laser engraved color

Laser Engraving In Color?

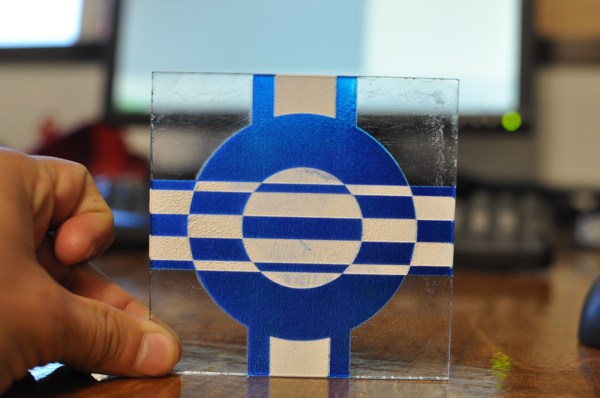
Here’s a fantastic way to add a new dynamic to your laser cut and engraved parts. Did you know it is possible to color your engravings on acrylic? It’s kind of one of those moments where you go “Why didn’t I think of that?”

[Frankie Flood] works at the Digital Craft Research Lab (DCRL for short), which is kind of like a hackerspace for the University of Wisconsin — complete with CNC routers, lasers, 3D printers, and all your basic manufacturing tools.  [Lionel Rocheleau], one of his lab technicians at DCRL was interested in doing some experiments with the laser cutter, so they came up with this experiment…

Continue reading “Laser Engraving In Color?”

home made spot welder

The Nicest Home Made Spot Welder We’ve Ever Seen

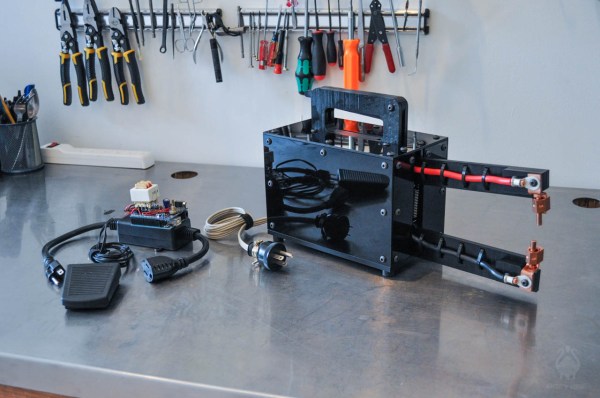
By golly, look at the build quality of this homemade spot welder.

Just about everyone on here knows it’s quite possible to build one of these things using a re-wrapped microwave transformer, but they’re usually made of wood like the one we swap on Friday, and we often wonder how much real use they get other than “hey look I built a spot welder!”. I myself made one, but then ended up buying a professional one because it works better. Not [Matthew Borgatti] though, his looks better and has more features than even the one I bought!

Screen-Shot-2015-07-01-at-3.09.59-PM

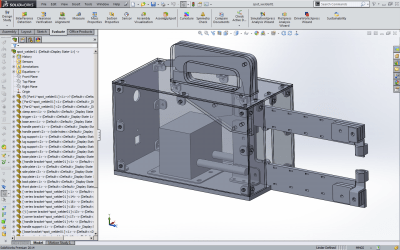
Why? Because he put some serious thought into his design. He even 3D modeled the whole thing in SolidWorks.

Beyond the excellent laser cut enclosure (complete with ratcheting work piece clamping), [Matt’s] also added an Arduino to create a timing circuit. Most times you just squeeze the clamp, press the button, and watch the metal heat up — “I think that’s good…”

But with an actual timing circuit you can calculate how much time you need versus current and electrode size to produce a good quality weld.

Continue reading “The Nicest Home Made Spot Welder We’ve Ever Seen”

Optics Laboratory Made From LEGO

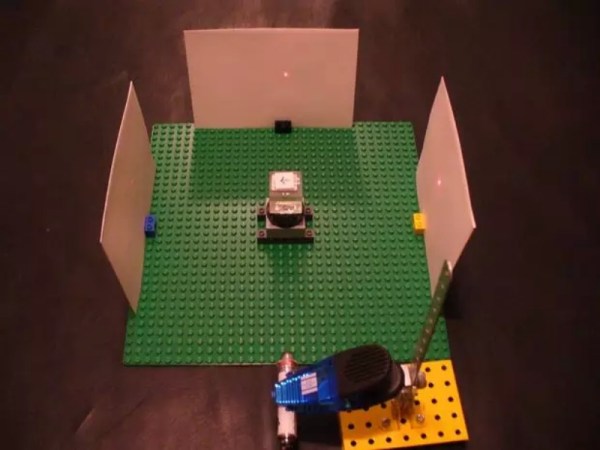
16A lot of engineers, scientists, builders, makers, and hackers got their start as children with LEGO. Putting those bricks together, whether following the instructions or not, really brings out the imagination. It’s not surprising that some people grow up and still use LEGO in their projects, like [Steve] who has used LEGO to build an optics lab with a laser beam splitter.

[Steve] started this project by salvaging parts from a broken computer projector. Some of the parts were scorched beyond repair, but he did find some lenses and mirrors and a mystery glass cube. It turns out that this cube is a dichroic prism which is used for combining images from the different LCD screens in the projector, but with the right LEGO bricks it can also be used for splitting a laser beam.

The cube was set on a LEGO rotating piece to demonstrate how it can split the laser at certain angles. LEGO purists might be upset at the Erector set that was snuck into this project, but this was necessary to hold up the laser pointer. This is a great use of these building blocks though, and [Steve] finally has his optics lab that he’s wanted to build for a while. If that doesn’t scratch your LEGO itch, we’ve also featured this LEGO lab which was built to measure the Planck constant.

Solar-Cell Laser Communication System

Forget the soup cans connected by a piece of string. There’s now a way to communicate wirelessly that doesn’t rely on a physical connection… or radio. It’s a communications platform that uses lasers to send data, and it’s done in a way that virtually anyone could build.

This method for sending information isn’t exactly new, but this project is one of the best we’ve seen that makes it doable for the average tinkerer. A standard microphone and audio amplifier are used to send the signals to the transmitter, which is just a typical garden-variety laser that anyone could find for a few dollars. A few LEDs prevent the laser from receiving too much power, and a solar cell at the receiving end decodes the message and outputs it through another amplifier and a speaker.

Of course you will need line-of-sight to get this communications system up and running, but as long as you have that taken care of the sky’s the limit. You can find incredibly powerful lasers lying around if you want to try to increase the communication distance, and there are surprisingly few restrictions on purchasing others that are 1W or higher. You could easily increase the range, but be careful not to set your receiving station (or any animals, plants, buildings, etc) on fire!

Continue reading “Solar-Cell Laser Communication System”

What You See Is What You (Laser) Cut

WYSIWYG editors revolutionized content management systems, will WYSIWYC interfaces do the same for laser cutters? Unlikely, but we still appreciate the concepts shown here. Chalkaat uses computer vision to trace lines drawn in ink with the cutting power of a laser.

At its core, you simply draw on your work piece with a colored marker and the camera system will ensure the laser traces this line exactly. There is even a proof of concept here for different behavior based on different line color, and the technique is not limited to white paper but can also identify and cut printed materials.

This is a spin on [Anirudh’s] first version which used computer vision with a projector to create a virtual interface for a laser cutter. This time around we can think of a few different uses for this. The obvious is the ability for anyone to use a laser cutter by drawing their designs by hand. Imagine introducing grade-school children to this type of technology by having them draw paper puppets and scenery in advance and have it cut in shop class for use in art projects.

A red arrow indicates cut line, but a pink arrow is used for indicating positioning on a work piece. The example shows a design from a cellphone etched next to a positioning marker. But we could see this used to position expensive things (like a Macbook) for etching. We also think the red marker could be used to make slight adjustments to cut pieces by scribing a work piece with the marker and having the laser cut it away.

This concept is a product of [Nitesh Kadyan] and [Anirudh Sharma] at the Fluid Interfaces group at the MIT Media Lab and is something we could see being built into future laser cutter models. What do you think?

Continue reading “What You See Is What You (Laser) Cut”

3D Miniature Chess Pieces Made With A Laser Cutter

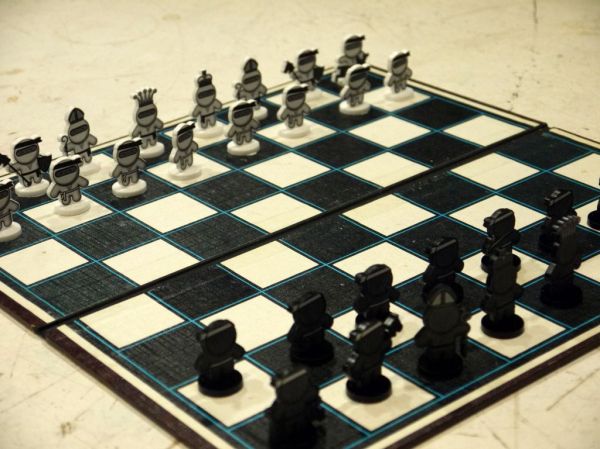
When you think of laser cutters, you generally don’t think of 3d parts. Well, at least not without using something like glue, nuts and bolts, or tabs and slots to hold multiple parts together. [Steve Kranz] shows you how to make these very tiny 3D chess pieces by making 2 passes at right angles to thick acrylic. The first pass cuts one side’s profile, then the part is rotated 90 degrees and a second pass is cut, giving the part more of a “real” 3D look, rather than something cut out of a flat sheet. If you’re having a hard time imagining how it works, his pictures do a great job of explaining the process. He even added some engraving to give the chess pieces for a selective frosted look. We think it’s a cool idea, and well executed too!

But that got us to thinking (always dangerous) that we’ve seen rotary attachments for laser cutters, but they are mainly for etching cylindrical objects like champagne flutes and beer bottle. What if you added a rotating “3rd” axis to a laser cutter that could hold a block of material and rotate it while being cut? (Much like a traditional 4th Axis on a CNC machine). Would the material also need to be raised and lowered to keep the laser focused? Surely software that is aimed at 3D CNC would be needed, something like Mach3 perhaps. A quick Google search show that there are some industrial machines that more-or-less do 3D laser cutting, but if you, or someone you know of, has attached a 3rd axis to a desktop laser, let us know in the comments, we would love to see it.

(via Adafruit)

Lasersaur That Cuts 1/2″ Plywood And 10mm Acrylic (Pew-Pew)

Remember when building your own 3D printer was a big deal? We’re starting to think that building your own laser cutter might be the next hot topic.

Boasting a 16,000 square-foot facility, the Dallas Makerspace is an impressive collaboration of local artists, engineers, makers, and thinkers. Recently they embarked on building a serious laser cutting machine. They chose to go with the an open-hardware design rather than buying an off-the-shelf unit. What they built is based on the Lasersaur plans. (Another popular open-source build is the buildlog.net unit.)

They ended up with a huge 24″ by 48″ cutting bed and with a laser tube rated for 100 watts continuous output. It can cut 1/2″ plywood and 10mm acrylic with ease. The entire machine is built from 20mm Misumi aluminum t-slot extrusions, making more like a giant erector set then a commercial built machine. We hadn’t seen too many of the Lasersaur builds out in the wild, so we thought you might like to see one too.

Now, before you start ordering parts to build your own, you should know that a top of the line build like this will run you about $7-10k. But by comparison if you were to go with something with the same cutting area and power, you’d be looking at something like the “Epilog Fusion 40” at a whopping $40k. With that said, we expect to see more budget laser cutter builds. Cost can be cut dramatically when you go for a smaller machine, with less cutting area, and less power. With that, you can use less expensive steppers, drivers, and frame. We suspect a little as $700 for a smart shopper could yield a very respectable laser cutter.

If you’re interested in learning more about the Dallas Makerspace, we took a video tour back in early 2014.