DIY ZigBee Therapy Lights Are Hue Compatible

Working on a project into the wee hours is hardly uncommon for us hackers, but if you’re consistently sleeping until the afternoon, it’s possible you’re suffering from a condition known as Delayed Phase Sleep Disorder (DPSD). Put simply, your body’s internal clock is out of alignment with the world around you. One of the ways to treat this condition is to expose yourself to bright light in the morning, which can help you wake up and feel more refreshed. Unfortunately, these so-called “Bright Light Therapy” boxes tend to be pretty expensive.

Looking for a way to treat his own DPSD, [Edward Shin] decided to build his own light box based on the research he’d done on the various commercial offerings out there. After all, a box full of bright lights that operates on a timer doesn’t seem particularly complex. Of course, in reality there’s a bit more to it than that, but so far the results are certainly promising.

The first decision [Edward] had to make was what kind of light he wanted. Classic light therapy devices, often used to treat Seasonal Affective Disorder (SAD), tend to be full spectrum lights that try and simulate sunlight. But in his research, he found a paper from Nature that explained the melanopsin in the human eye responds primarily to blue and green light. But as intense blue light can apparently lead to macular degeneration, he decided to go with green.

Since [Edward] already uses the Philips Hue system for his home’s lighting, he wanted to bring his therapy light into that ecosystem. The idea was that he could easily schedule his new green light box to go on when he wanted to wake up in the morning. So he used the Mesh Bee from Seeed Studio which not only supports ZigBee, but for which software is available to emulate a Hue bulb. Then he just needed to pair that with a sufficiently beefy LED driver and some 510 nm emitters. Everything is enclosed in a box made of laser cut wood that’s designed to hang from the headboard and shine down onto his face.

Over the years we’ve seen a number of similar projects trying to address SAD, so the idea of a hacker tweaking the concept to tackle DPSD seems a natural enough evolution of the idea. Just remember to speak with a medical professional before coming up with a homebrew treatment plan.

Great Artificial Daylight Via Broken TVs

[DIY Perks] has long been a fan of lights that accurately mimic real daylight. Often choosing high-quality LEDs for his projects, lately he’s taken a different tack – using broken televisions to produce attractive home lighting solutions.

The hack involves removing the backlight from the damaged television or monitor. These have a powerful white light inside, but the real key is that they also features a Fresnel lens. This helps the backlight appear very similar to a real skylight, due to the way it scatters light around the room.

Due to the difficulty of driving most LED and CCFL backlights, the project strips the original lighting out and replaces it with a set of high-CRI LED strips readily available off eBay. These are easily driven from 12 volts and give a white light more similar to actual daylight compared to most backlights. With the LEDs in place, the monitor’s original diffusers and Fresnel lens are put back in place, and the light is finished off with an aluminium frame.

Fitted to an angled ceiling, the light really does look as if actual sunlight is streaming through a window on a rainy day. It’s a pleasant effect that does a great job of lighting a room, and we suspect it would be excellent for general video work, too. [DIY Perks] is no stranger to a good studio light build, after all. Video after the break.

Continue reading “Great Artificial Daylight Via Broken TVs”

A Custom Milled Jig For Smart Bulb Programming

Who would have thought that some day we’d need programming jigs for our light bulbs? But progress marches on, and as there’s currently a number of affordable Internet-controlled bulbs powered by the ESP8266 on the market, we’re at the point where a tool to help update the firmware on the light over your kitchen sink might be something nice to have. Which is why [cperiod] created this programming jig for AiLight smart bulbs.

Flashing the AiLight bulbs is easy enough, there’s a series of test points right on the face of the PCB that you can hook up to. But if you’re updating more than one of them, you don’t want to have to solder your programmer up to each bulb individually. That’s where the jig comes in. [cperiod] says there are already some 3D printed designs out there, but they proved to be a bit finicky.

The design that [cperiod] came up with and eventually milled out on a 1610 CNC router is quite simple. It’s effectively just a holder to keep the five pogo pins where they need to be, and a jumper that lets you toggle the chip’s programming mode (useful for debugging).

The neat trick here are the “alignment pins”, which are actually two pieces of 14 gauge copper wire that have had their ends rounded off. It turns out these will slip perfectly into holes on the AliLight PCB, ensuring that the pogo pins end up on target. It works well enough that you can hold the bulb and jig in one hand while programming, it just needs a little downwards pressure to make good contact.

We’ve previously seen how easily you can replace the firmware on some of these ESP8266 bulbs. While there’s certainly a downside to these bulbs being so simple to modify, it’s hard to deny their hackability makes them very appealing for anyone looking to roll their own network-controlled lighting system.

Individual Neopixels Make Up This Lightsaber’s Blade

The lightsaber is an iconic weapon from the Star Wars franchise, designed in all sorts of shapes and colors. Several fan-made versions have been built as well, quite a few of which use the almost ubiquitous neopixel. [Tirenoth] decided to build his first lightsaber using a series of neopixels, but decided on a unique build method.

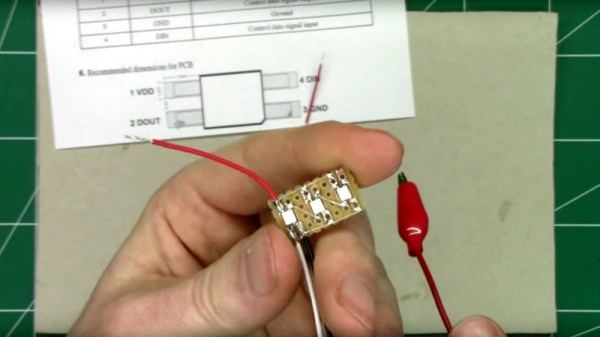
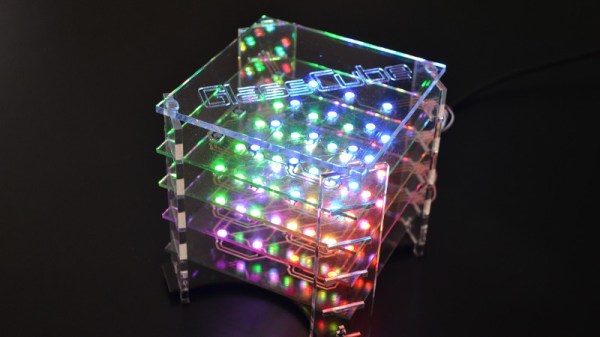
Instead of the usual strip of neopixels, [Tirenoth] chose to use a bunch of neopixels in the 5mm LED form-factor. [Tirenoth] soldered each LED’s 5v pins and GND pins to the same pins on the next, rotating each LED 180 degrees, building a tower of pixels. The data in and out pins are soldered to the next (and previous) LED as well. This allows the series of LEDs to be a bit more stable physically, and allows them to be stacked close together, one on top of the other.

To control the neopixels, a Proffieboard is used, an open-source lightsaber controller. The Proffieboard uses an STM32 microcontroller and allows you to hook up LEDs or neopixels as well as a speaker. Its open-source software allows the animation of the pixels and the playing of sounds. It’s designed specifically for lightsaber builds and is programmed via the Arduino IDE.

[Tirenoth] has some nice pictures of the build in process and, of course some nice pics of the final result. He suggests that the blade would be the first to break in battle, though. There’s been a few lightsaber builds over the years, like this lightsaber with rave mode, or this lightsaber made with real lasers.

via Reddit.

This WiFi Spoofing Syringe Is For External Use Only

A browse through his collected works will tell you that [El Kentaro] loves to build electronics into interesting enclosures, so when he realized there’s enough room inside a 150 ml plastic syringe to mount an ESP8266, a battery, and a copious amount of RGB LEDs, the “Packet Injector” was the inescapable result.

Granted, the current incarnation of this device doesn’t literally inject packets. But [El Kentaro] wasn’t actually looking to do anything malicious, either. The Injector is intended to be a fun gag for him to bring along to the various hacker cons he finds himself at, like his DEAUTH “bling” necklace we saw at DEF CON 26, so having any practical function is really more icing on the cake than a strict requirement.

In the end, the code he came up with for the Adafruit Feather HUZZAH that uses the FakeBeaconESP8266 library to push out fictitious networks on demand. This is a trick we’ve seen used in the past, and makes for a relatively harmless prank as long as you’re not pumping out any particularly unpleasant SSIDs. In this case, [El Kentaro] punctuates his technicolor resplendency with beacons pronouncing “The WiFi Doctor is Here.”

But the real hack here is how [El Kentaro] controls the device. Everything is contained within the syringe chamber, and he uses a MPL3115A2 I2C barometric pressure sensor to detect when it’s being compressed. If the sensor reads a pressure high enough over the established baseline, the NeoPixel Ring fires up and the fake beacon frames start going out. Ease up on the plunger, and the code detects the drop in pressure and turns everything back off.

If this build has piqued your interest, [El Kentaro] gave a fascinating talk about his hardware design philosophy during the WOPR Summit that included how he designed and built some of his “greatest hits”; including a Raspberry Pi Zero enclosure that was, regrettably, not limited to external use.

Supercap Drink Coasters Are The Life Of The Party

You’ve probably seen multicolored flashing LEDs embedded into clear plastic cups or coasters before, they’re quite commonly used in fancy restaurants that also feature animatronic characters and a gift shop on the way out. But have you ever wondered about the logistics of maintaining such devices? When the anthropomorphic rodent shuts down for the night, you’re going to want to clean all those blinking doodads; but any opening to connect a charger or insert a battery is just a leak waiting to happen.

[Scott Clandinin] has come up with a solution to this problem that’s equal parts brilliant simplicity and unabashed overengineering. Using wireless charging and supercapacitors, he’s developing an LED coaster that can be hermetically sealed in clear resin.

With no plugs to connect or batteries to change, these coasters can be permanently encapsulated with no ill effects. Granted the supercapacitors will degrade with time and eventually won’t hold a charge for as long, but even the most conservative estimates would have these coasters still partying in a decade.

For his prototype version [Scott] has put together a simple charging base, but we imagine in a full deployment such devices could be charged with induction coils built into a bar or table. While the energy consumption could potentially be a showstopper, we’d love to see a future version that integrates a radio receiver. Then the coasters could double as pagers to let diners know their table is ready.

While this device is obviously much thicker than a traditional coaster, it looks fairly reasonable even at this early stage. We like the concentric design that puts the coil inside the PCB, and wonder if similar cutouts couldn’t be used to get the twin 15F supercapacitors and charging module hunkered down just a few millimeters more. The 2019 Hackaday Prize is all about evolving an idea into a design suitable for production, and those are the sort of incremental improvements that the judges will certainly be keeping an eye out for.

Make Your Own Flexible Panel Lights

In this day and age, production values are everything. Even bottom-rung content creators are packing 4K smartphones and DSLRs these days, so if you want to compete, you’re gonna need the hardware. Lighting is the key to creating good video, so you might find a set of flexible panel lights handy. Thankfully, [DIY Perks] is here to show you how to build your own. (Video embedded below.)

The key to building a good video light rig is getting the right CRI, or Color Rendering Index. With low CRI lights, colors will come out looking unnatural or with odd casts in your videos. [DIY Perks] has gone to the effort of hunting down a supplier of high-quality LED strips in a range of different color temperatures that have a high CRI value, making them great for serious video work.

To build the flexible panel, the LED strips are glued onto a fake leather backing pad, which is then given a steel wire skeleton to enable it to be bent into various shapes. Leather loops are built into each corner of the panel as well, allowing the light to be fitted to a stand using a flexible aluminium bracket. The LEDs are slightly under-volted to help them last longer and enable them to run from a laptop power supply.

The build is one that focuses on light quality and usability, rather than just throwing a bunch of bright LEDs at the problem and calling it good. The results are great, with the panel showing a significant improvement on [DIY Perks]’s earlier builds.
Continue reading “Make Your Own Flexible Panel Lights”